

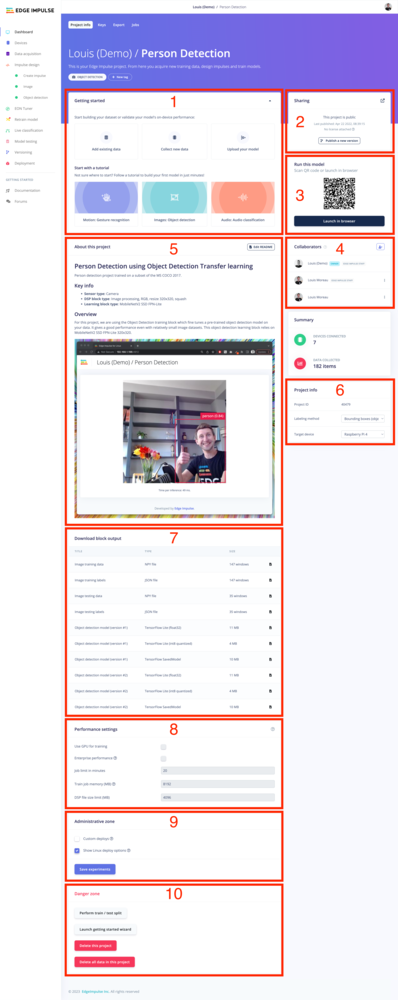
The dashboard, with each widget numbered to match the sections below.
- Getting started
- Project visibility (Sharing)
- Run this model
- Collaboration (Collaborators)
- Project README (About this project)
- Project info
- Block outputs (Download block output)
- Performance settings
- Administrative zone
- Danger zone
Getting started
The Getting Started section is here to help. You can choose from 3 different options to get started:- Add existing data: When selecting this option, you can then choose to Upload data from your computer or to Add storage bucket
- Collect new data: When selecting this option, the getting started guide will ask you to either Scan QR code to connect to your phone, Connect to your computer, or to Connect your device or developer board. Make sure that your device or development board is flashed with the Edge Impulse official firmware.
- Upload your model: This option will change the default workflow. See BYOM to learn more about how to import your existing model to Edge Impulse studio.
Project visibility
You have two options for your project’s visibility:Private
Private projects are only visible to you in your developer profile or, if you are on the Enterprise plan, within your organization. There are limits to the number of private projects a developer or enterprise may have. Please refer to our plans and pricing page on our website for details.Public
When a project is public, all of your data, block configurations, intermediate results, and final models will be shared with the world. Your project will be publicly accessible and can be cloned with a single click with the provided URL. There are no limits to the amount of public projects a developer or enterprise may have.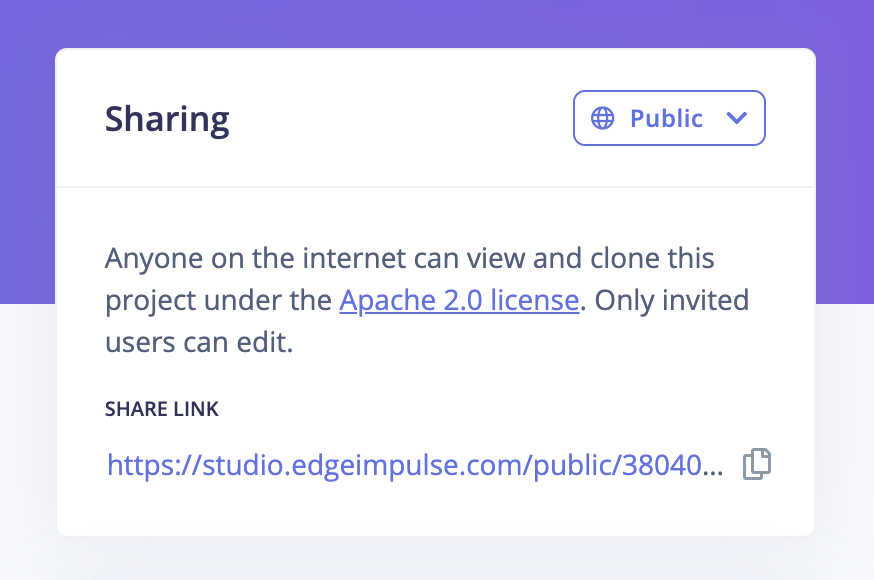
A public project in the Edge Impulse Studio.
List your project in the public project repositoryIf you want to reference your project in the Edge Impulse public project repository, you can go to the versioning page, create a version and check the Publish this version under the Apache 2.0 license.This is a great way to share your work with the community.
Run this model
When you have a trained model available in your project, this card will appear to let you test your model with your phone or your computer. This is particularly useful to validate the behaviour of your model before integrating it into your targeted embedded firmware.Collaboration
To add a collaborator, go to your project’s dashboard and find the “Collaborators” widget. Click the ’+’ icon and type the username or e-mail address of the other user. The user will be invited to create an Edge Impulse account if it doesn’t exist. The user will be automatically added to the project and will get an email notification inviting them to start contributing to your project. To remove a user, simply click on the three dots beside the user then tap ‘Delete’ and they will be automatically removed. There are different limits for how many collaborators can be added to project depending on its visibility (public or private) and the pricing plan it is associated with (Developer plan or Enterprise plan). Please refer to our plans and pricing page on our website for details.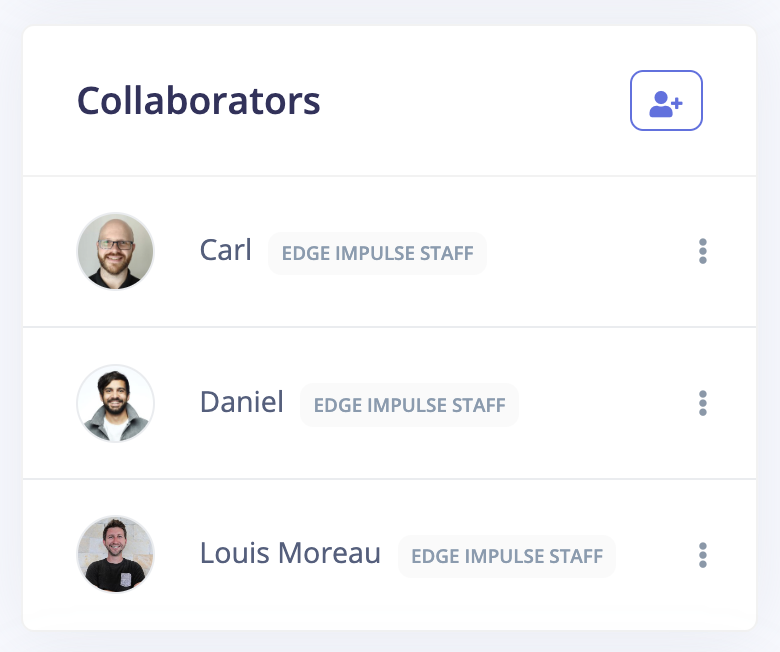
Collaborators
Showcasing your public projects with Markdown READMEs
The project README enables you to explain the details of your project in a short way. Using this feature, you can add visualizations such as images, GIFs, code snippets, and text to your project in order to bring your colleagues and project viewers up to speed with the important details of your project. In your README you might want to add things like:- What the project does
- Why the project is useful
- Motivations of the project
- How to get started with the project
- What sensors and target deployment devices you used
- How you plan to improve your project
- Where users can get help with your project

The Edge Impulse Studio project README.
Project info
The project info widget shows the project’s specifications such as the project ID, labeling method, and latency calculations for your target device.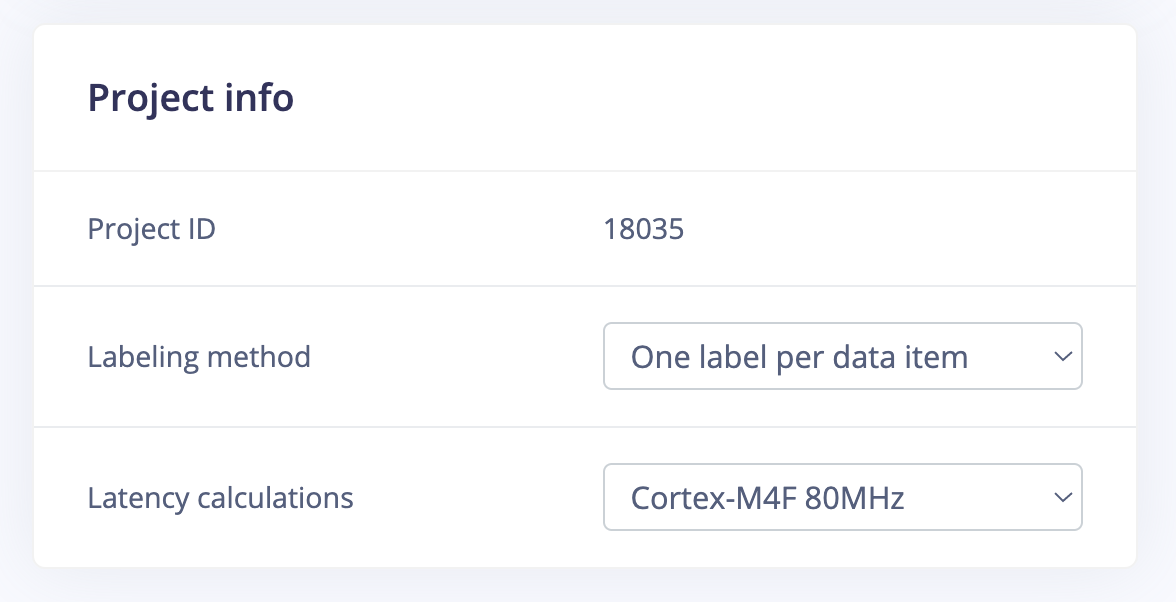
Edge Impulse Studio project information.
- The project ID is a unique numerical value that identifies your project. Whenever you have any issue with your project on the studio, you can always share your project ID on the forum for assistance from edge Impulse staff.
- On the labeling method dropdown, you need to specify the type of labeling your dataset and model expect. This can be either one label per data item or bounding boxes. Bounding boxes only work for object detection tasks in the studio. Note that if you interchange the labeling methods, learning blocks will appear to be hidden when building your impulse.
- The latency calculation component estimates the approximate time in milliseconds that the trained model and DSP operations are going to take during inference based on the selected target device. This hardware in the loop approach ensures that the target deployment device compute resources are not underutilized or over-utilized. It also saves developers’ time associated with numerous inference iterations back and forth the studio in search of optimum models.
Block outputs
In the Block output section, you can download the results of the DSP and ML operations of your impulse.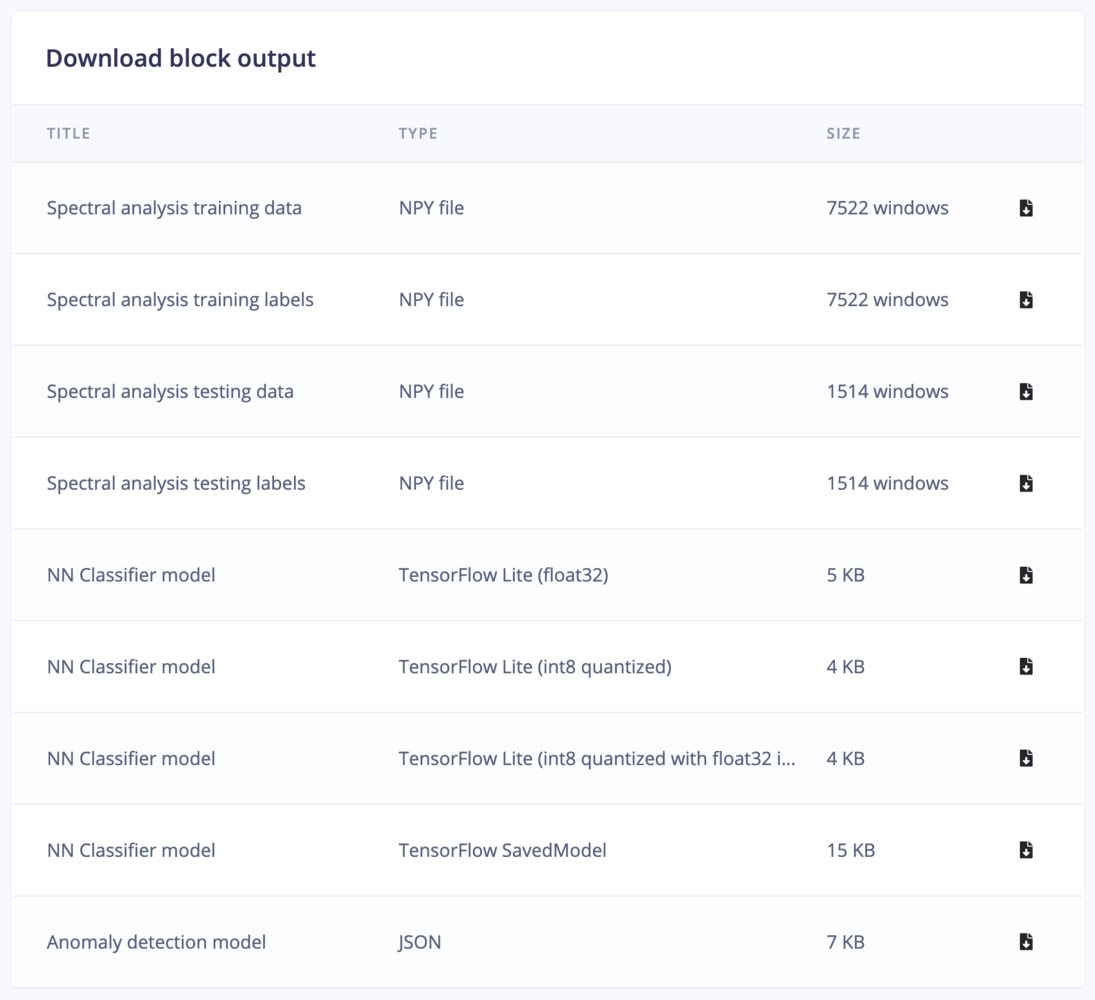
Download Edge Impulse Studio project block output.
Performance settings
Only available on the Enterprise planThis feature is only available on the Enterprise plan. Review our plans and pricing or sign up for our free expert-led trial today.
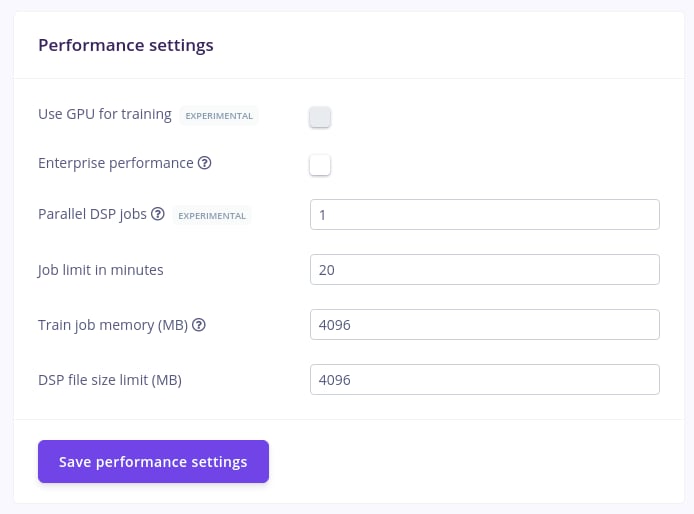
The Edge Impulse Studio project performance settings.
GPU training and parallel DSP jobs are experimental and are not enabled for every organization.
Administrative zone
To bring even more flexibility to projects, the administrative zone gives developers the power to enable other additional features that are not found in edge impulse projects by default. Most of these features are usually advanced features intended for organizations or sometimes experimental features. Check the boxes for the features you want and save. These features are experimental and can behave differently from the documented defaults.Danger zone
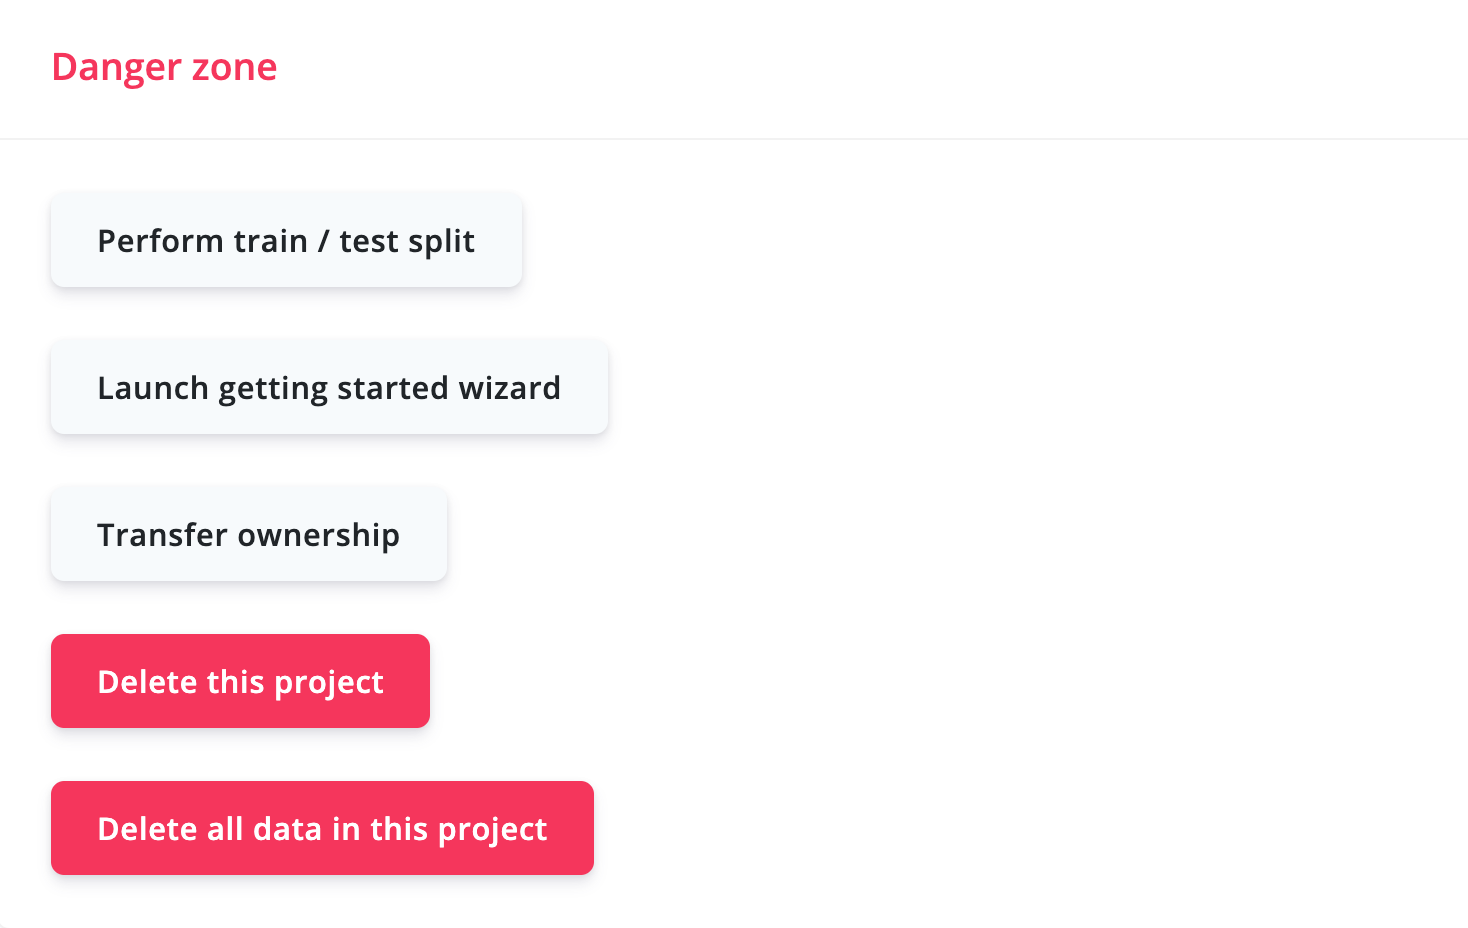
Edge Impulse Studio project danger zone settings.
- Perform train/test split. This action re-balances your dataset by splitting all your data automatically between the training and testing set and resets the categories for all data.
- Launch the getting started wizard. This will remove all data, and clear out your impulse.
- Transfer ownership. This action is available for users who have one or more organizations linked with their accounts. With it, you can start working on a project with your user profile and then transfer the ownership to your organization.
- Delete your project. This action removes all devices, data, and impulses from your project.
- Delete all data in this project.
API keys
The Keys tab in the dashboard lets you manage API keys and HMAC keys for your project. See API keys for full details.API reference
Additional resources
- API keys for authenticating against the project
- Bring your own model for importing an existing model
- Versioning for publishing a project to the public repository