> ## Documentation Index
> Fetch the complete documentation index at: https://docs.edgeimpulse.com/llms.txt
> Use this file to discover all available pages before exploring further.
# Auto-labeler
> Use embeddings to group unlabeled object detection images and assign bounding boxes more quickly.
**Deprecated feature**
This feature has been deprecated. Please see below for additional details.
On November 18, 2024, we have replaced the auto-labeler with a new AI-enabled labeling flow, which allows prompt-based labeling (and much more).
See the [AI labeling documentation page](/studio/projects/data-acquisition/ai-labeling).
Our auto-labeling feature relies on the [Segment Anything](https://github.com/facebookresearch/segment-anything) foundation model, creates embeddings or segmentation maps for your image datasets and then clusters (or groups) these embeddings based on your settings. In the Studio, you can then associate a label with a cluster and it will automatically create the labeled bounding boxes around each of the objects present in that cluster.
We developed this feature to ease your labeling tasks in your object detection projects.
Also, see our [Label image data using GPT-4o](/tutorials/topics/data/label-image-data-gpt-4o) tutorial to see how to leverage the power of LLMs to automatically label your data samples based on simple prompts.
## Prerequisites
1. Make sure your project belongs to an organization. See [transfer ownership](/studio/projects/dashboard#danger-zone) for more info.
2. Make sure your project is configured as an object detection project. You can change the labeling method in your project's dashboard. See [Dashboard](/studio/projects/dashboard#project-info) for more info.
3. Add some images to your project, either by collecting data or by uploading existing datasets. See [Data acquisition](/studio/projects/data-acquisition) for more info.
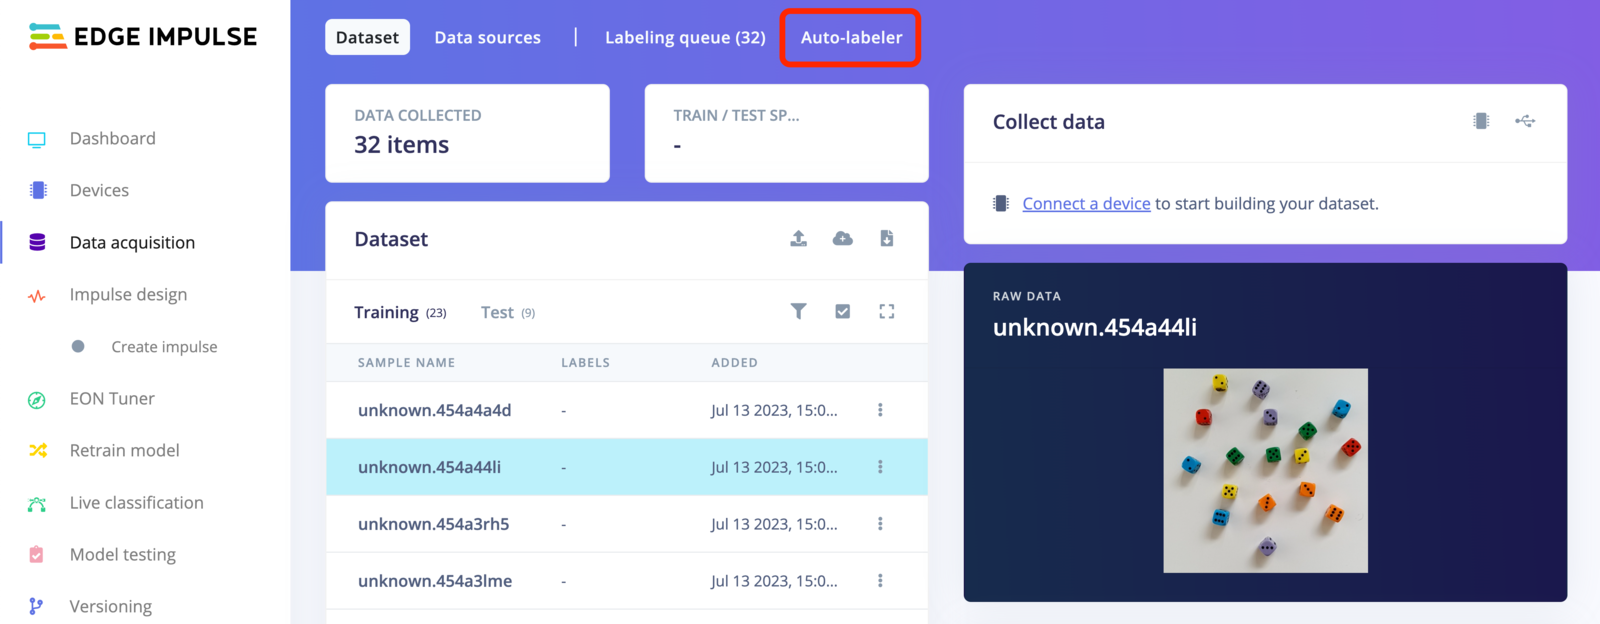
4. You now should be able to see the **Auto-labeler** tab in your **Data acquisition** view:
 ## Object detection auto-labeler settings
**Which items to include**:
* All data items present in your dataset
* Data items in the labeling queue
* Data items without a given class
**Minimum object size (pixels)**:
Objects smaller than this value are thrown out, an object of 20x10 pixels is 200 pixels.
**Maximum object size (pixels)**:
Objects bigger than this value are thrown out, an object of 150x100 pixels is 15,000 pixels.
**Sim threshold**:
The Sim threshold corresponds to the "similarity" where 1.0 implies items are exactly the same and 0.0 are totally different. Ideal values are usually between 0.9 and 0.999, lower this value if you have too many clusters, or increase it if you notice that different objects are in the same cluster.
## Object detection auto-labeler settings
**Which items to include**:
* All data items present in your dataset
* Data items in the labeling queue
* Data items without a given class
**Minimum object size (pixels)**:
Objects smaller than this value are thrown out, an object of 20x10 pixels is 200 pixels.
**Maximum object size (pixels)**:
Objects bigger than this value are thrown out, an object of 150x100 pixels is 15,000 pixels.
**Sim threshold**:
The Sim threshold corresponds to the "similarity" where 1.0 implies items are exactly the same and 0.0 are totally different. Ideal values are usually between 0.9 and 0.999, lower this value if you have too many clusters, or increase it if you notice that different objects are in the same cluster.
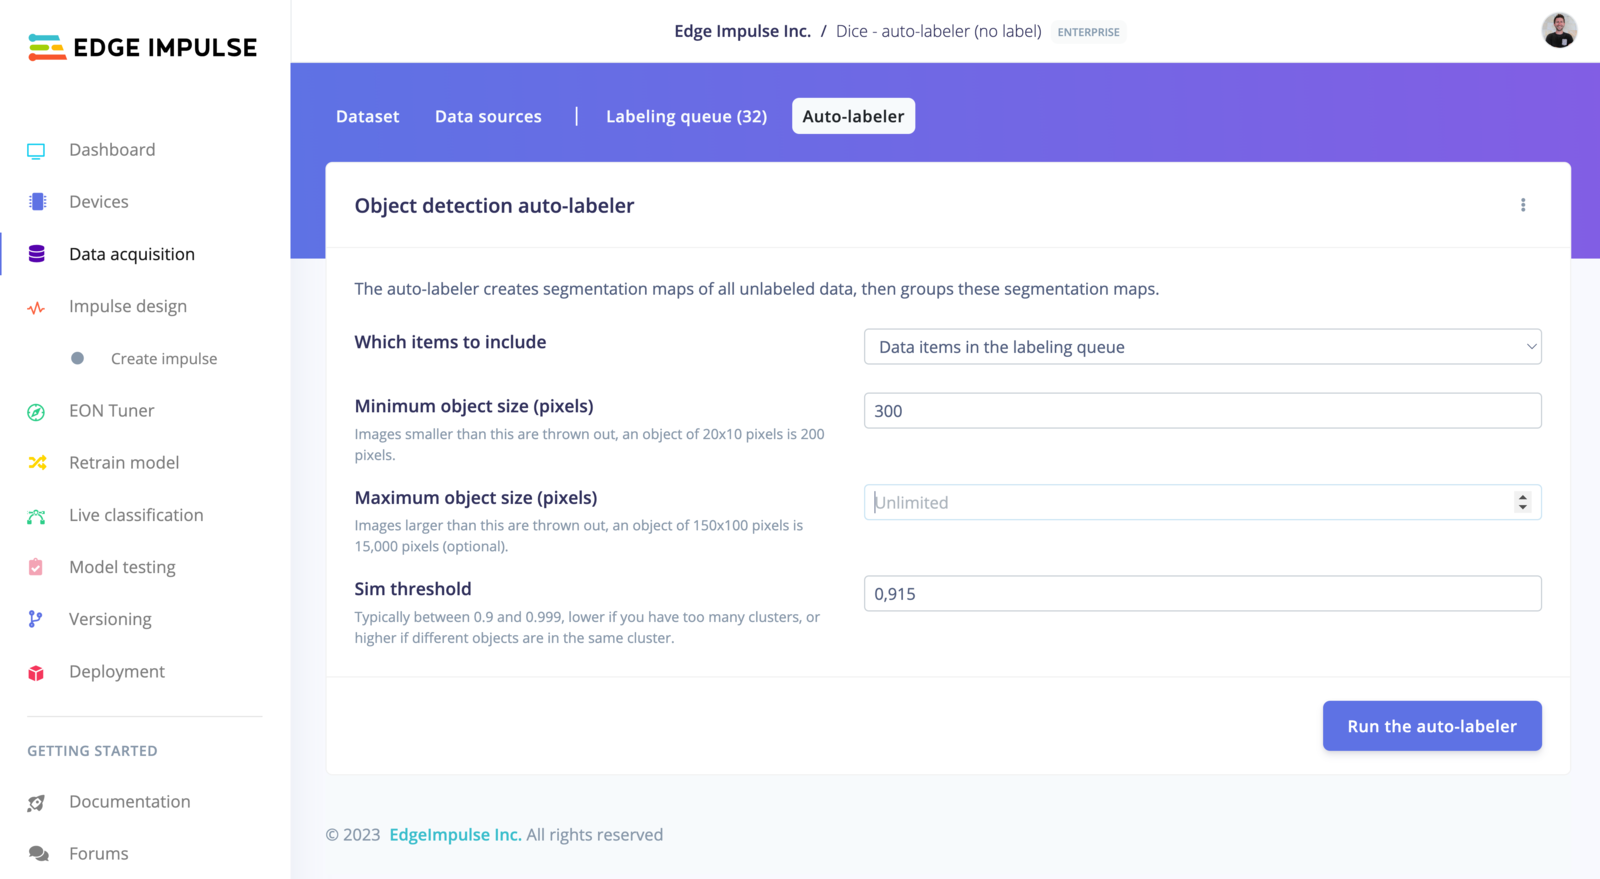 Click on **Run the auto-labeler** to generate the segmentation maps and the clusters.
Note that this process is slow (a few seconds per image, even on GPUs). However, we apply a strong cache on the results, so once you have ran the auto-labeler once, your iterations will be must faster. This will allow you to change the settings with less friction.
## Label clusters
Once the process is finished, you will be redirected to a new page to associate a label with a cluster:
Click on **Run the auto-labeler** to generate the segmentation maps and the clusters.
Note that this process is slow (a few seconds per image, even on GPUs). However, we apply a strong cache on the results, so once you have ran the auto-labeler once, your iterations will be must faster. This will allow you to change the settings with less friction.
## Label clusters
Once the process is finished, you will be redirected to a new page to associate a label with a cluster:
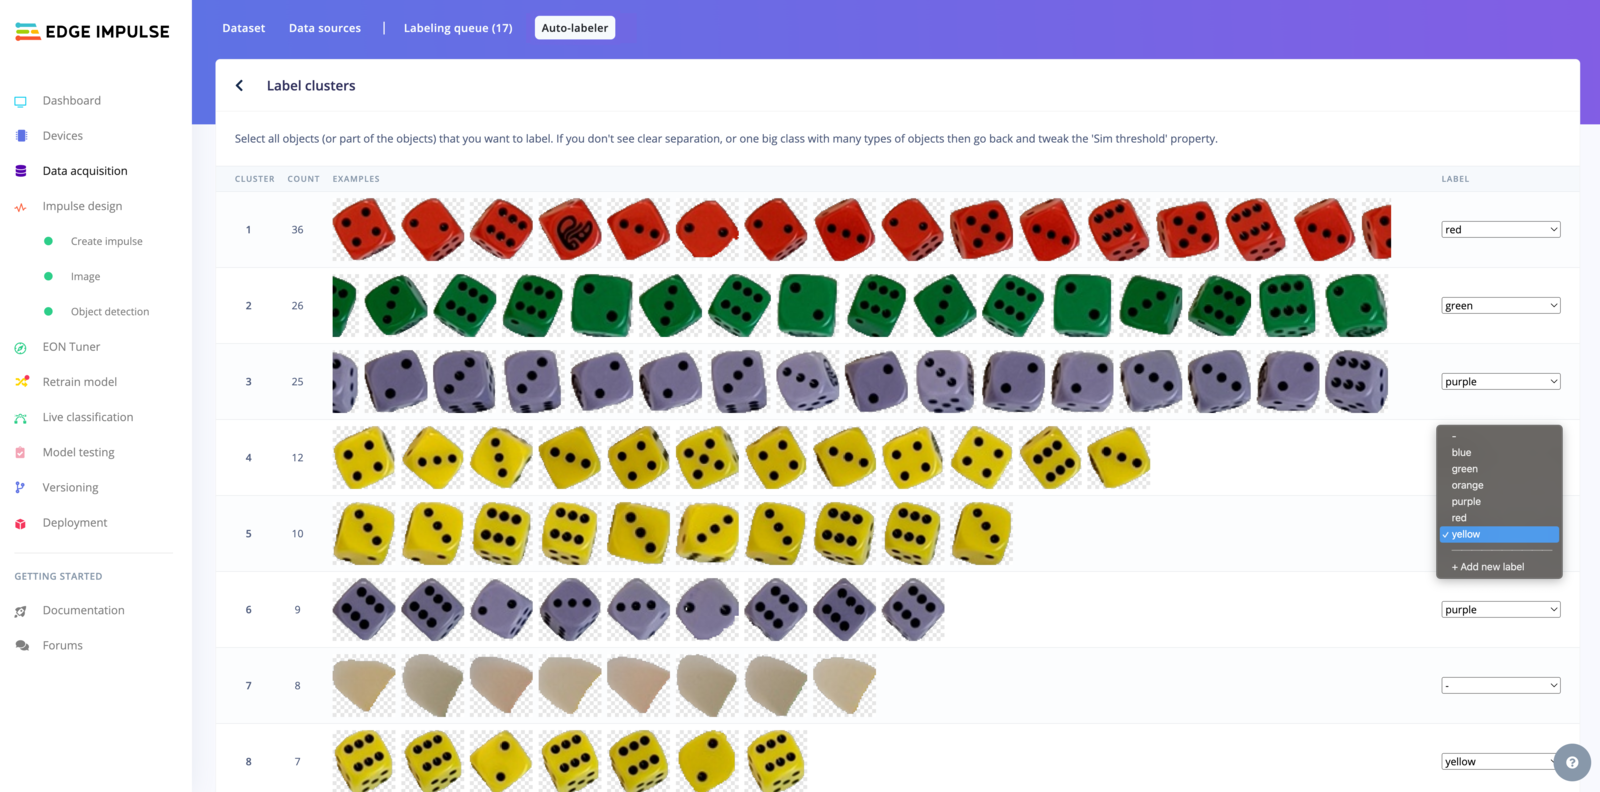 Select your class or create a new one for each of the clusters you want to label and click on **Save the labels** once you are happy with it.
Do not hesitate to go back and adjust the parameters if the clusters you don't see a clear separation, if too different objects are in the same cluster or if you have too many clusters.
## Example
Each project is different, to write this documentation page, we have collected images containing several dice. This dataset can be used in several ways -
you can either label the dice only, the dice color or the dice figures.
You can find the dataset, with the dice labeled per color in [this public project](https://studio.edgeimpulse.com/public/253742/latest).
To adjust the granularity, you can use the **Sim threshold** parameter.
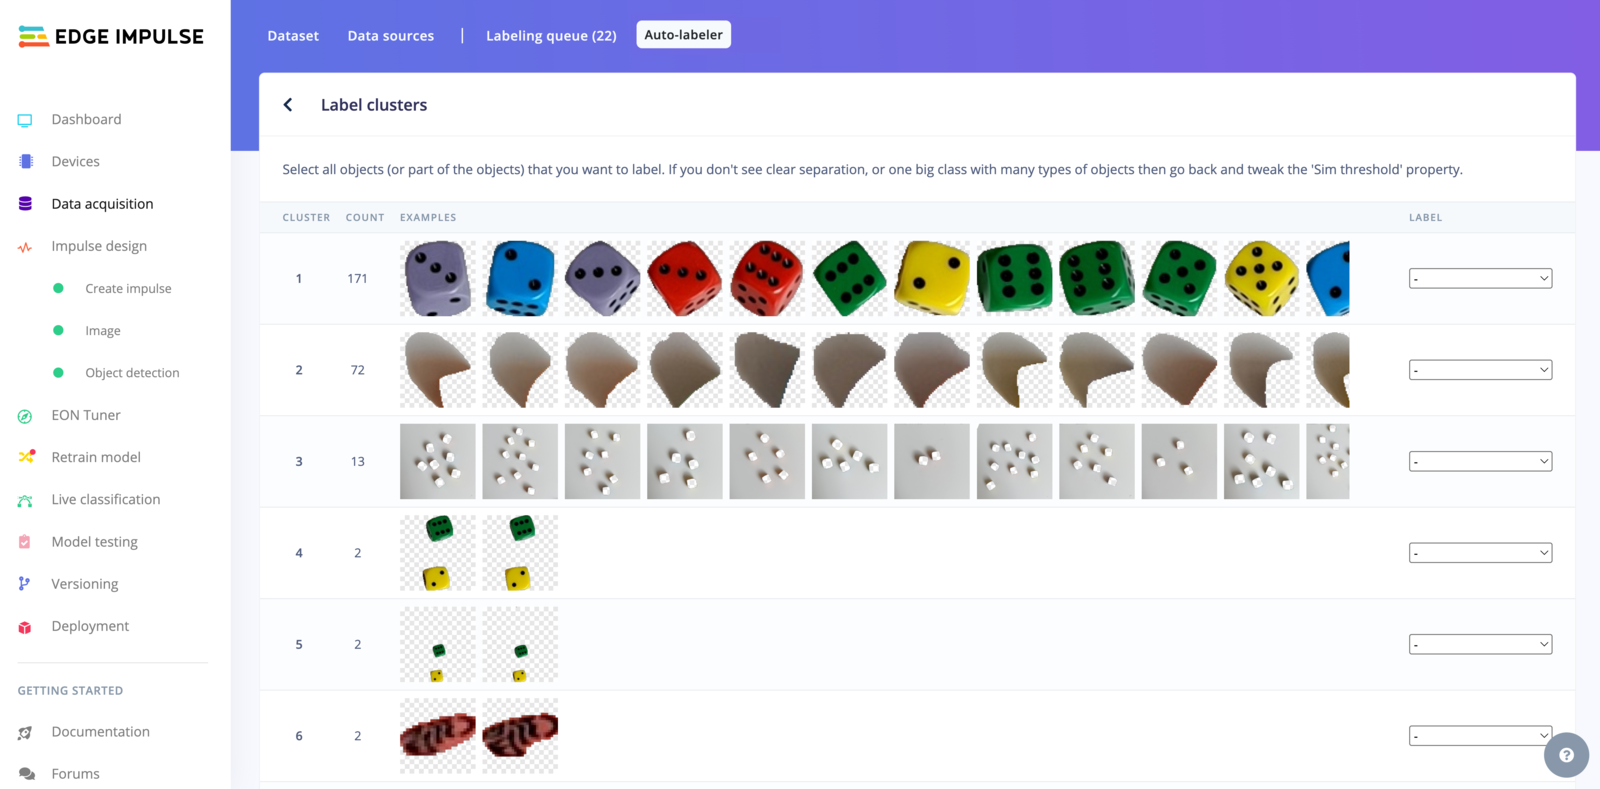
### 1. Group all the dice together:
Here we have been setting the **Sim threshold** to `0.915`
Select your class or create a new one for each of the clusters you want to label and click on **Save the labels** once you are happy with it.
Do not hesitate to go back and adjust the parameters if the clusters you don't see a clear separation, if too different objects are in the same cluster or if you have too many clusters.
## Example
Each project is different, to write this documentation page, we have collected images containing several dice. This dataset can be used in several ways -
you can either label the dice only, the dice color or the dice figures.
You can find the dataset, with the dice labeled per color in [this public project](https://studio.edgeimpulse.com/public/253742/latest).
To adjust the granularity, you can use the **Sim threshold** parameter.
### 1. Group all the dice together:
Here we have been setting the **Sim threshold** to `0.915`
 ### 2. Group the dice by color:
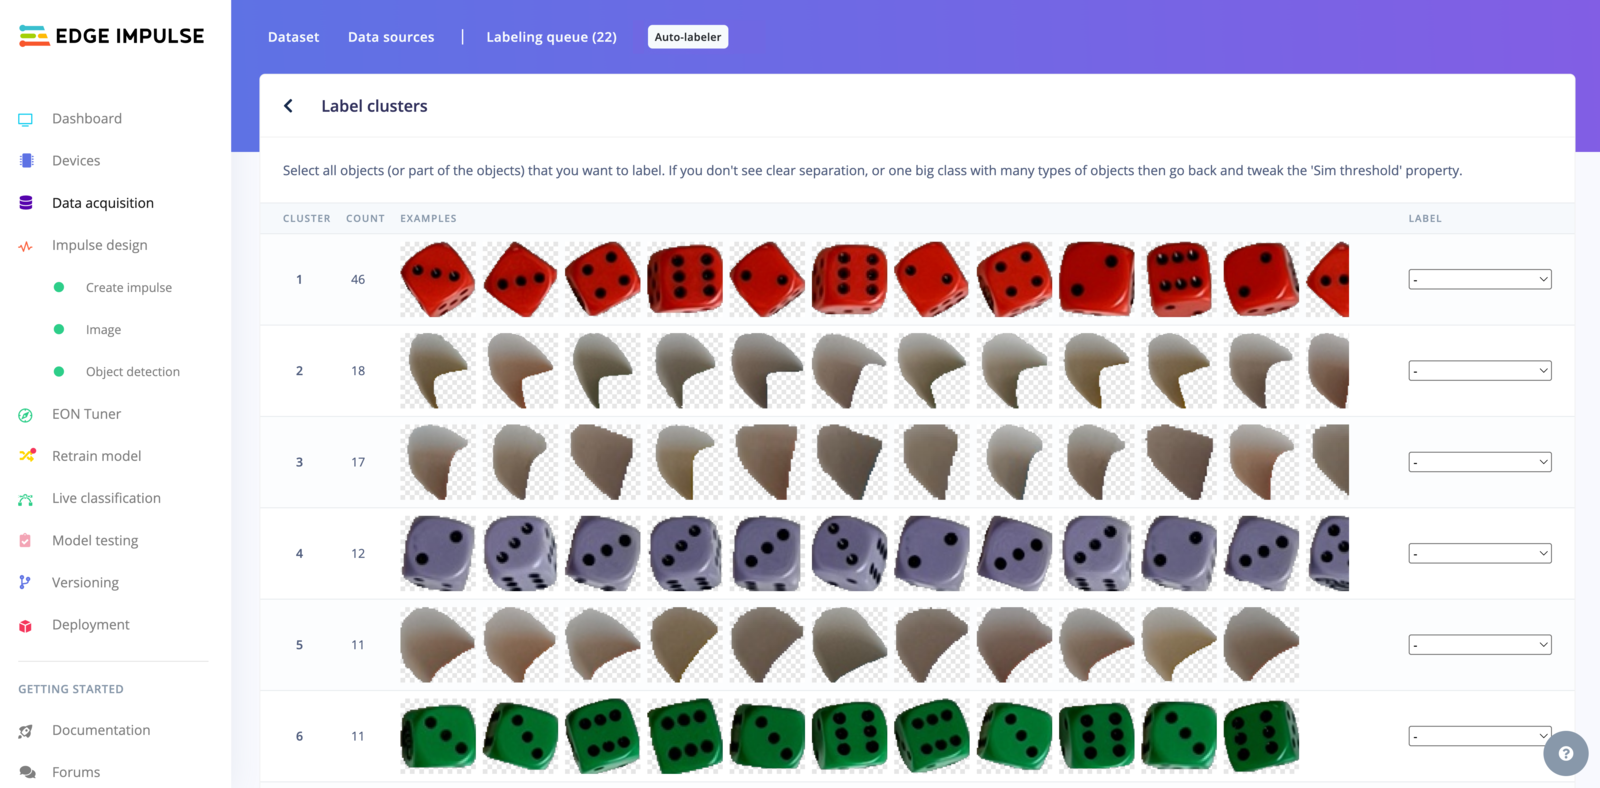
Here we have been setting the **Sim threshold** to `0.945`
### 2. Group the dice by color:
Here we have been setting the **Sim threshold** to `0.945`
 ### 3. Group the dice by color and by figure:
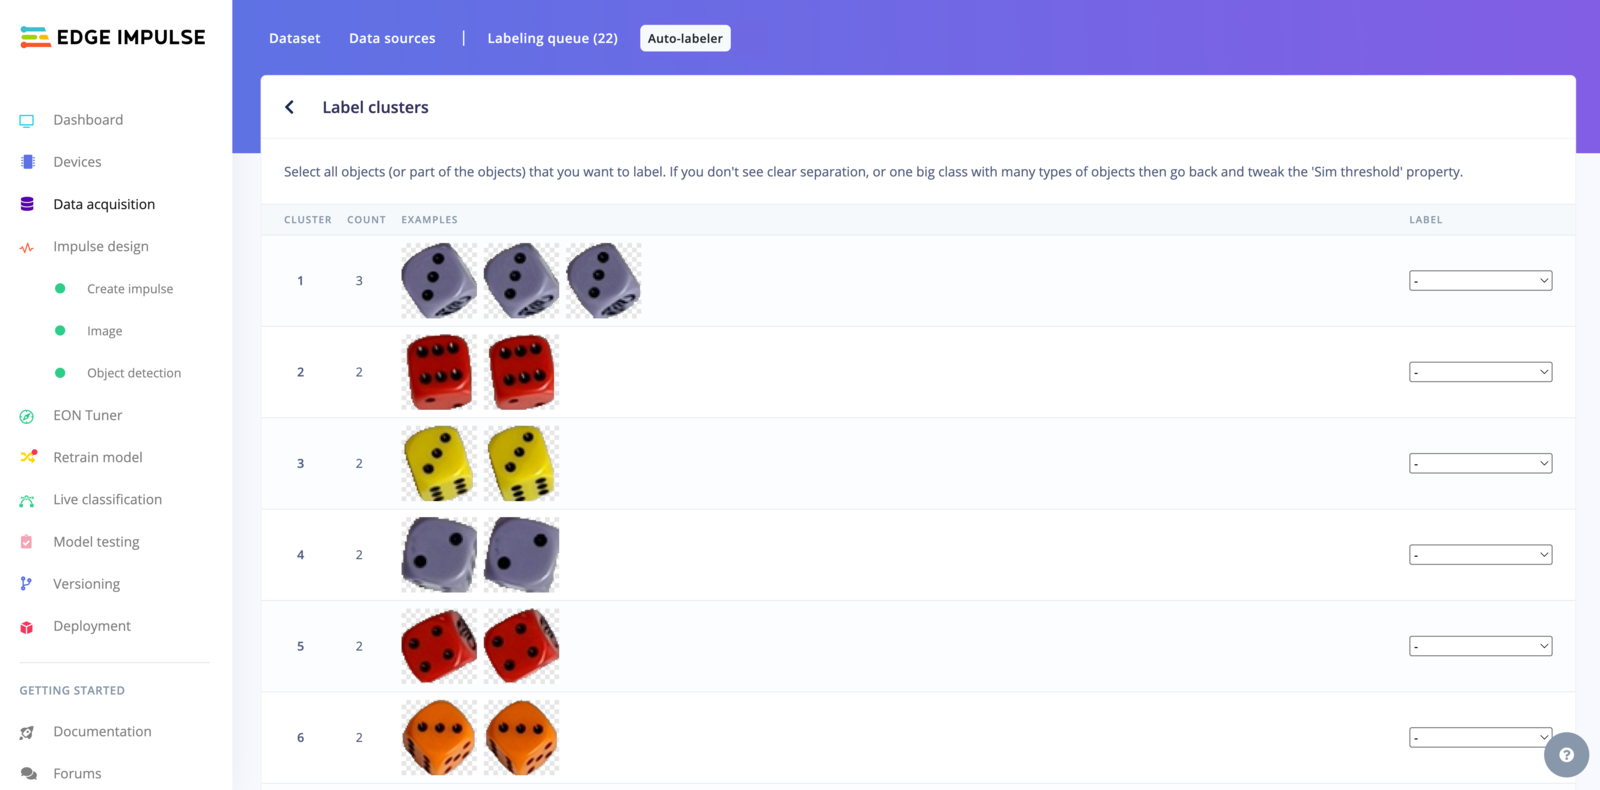
Here we have been setting the **Sim threshold** to `0.98`
### 3. Group the dice by color and by figure:
Here we have been setting the **Sim threshold** to `0.98`
 Voilà! Now that you have labeled your dataset, you can [create an Impulse](/studio/projects/impulse-design) and train your [object detection](/studio/projects/learning-blocks/blocks/object-detection) project.
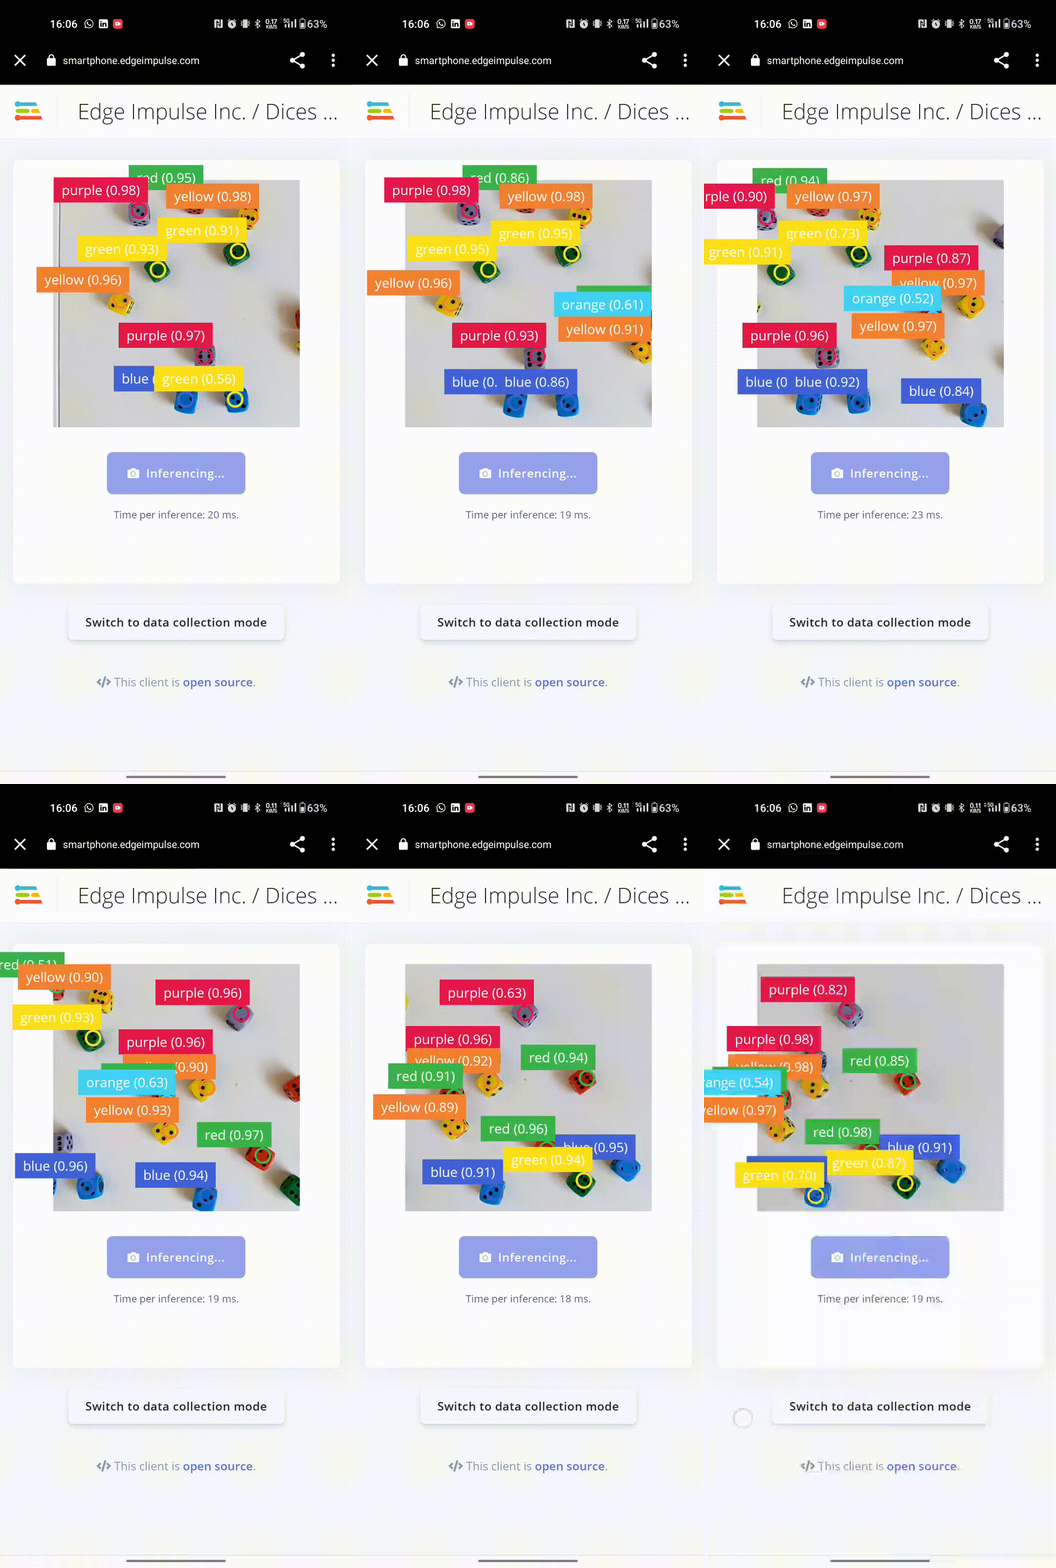
In the public project shared above, here are the results of the trained model using the mobile phone deployment option:
Voilà! Now that you have labeled your dataset, you can [create an Impulse](/studio/projects/impulse-design) and train your [object detection](/studio/projects/learning-blocks/blocks/object-detection) project.
In the public project shared above, here are the results of the trained model using the mobile phone deployment option: