> ## Documentation Index
> Fetch the complete documentation index at: https://docs.edgeimpulse.com/llms.txt
> Use this file to discover all available pages before exploring further.
# Food Irradiation Dose Detection - DFRobot Beetle ESP32C3
> Predict food irradiation dose classes with Beetle ESP32-C3 sensors, a PHP logger, and Edge Impulse.
Created By: Kutluhan Aktar
Public Project Link: [https://studio.edgeimpulse.com/public/109647/latest](https://studio.edgeimpulse.com/public/109647/latest)
 ## Description
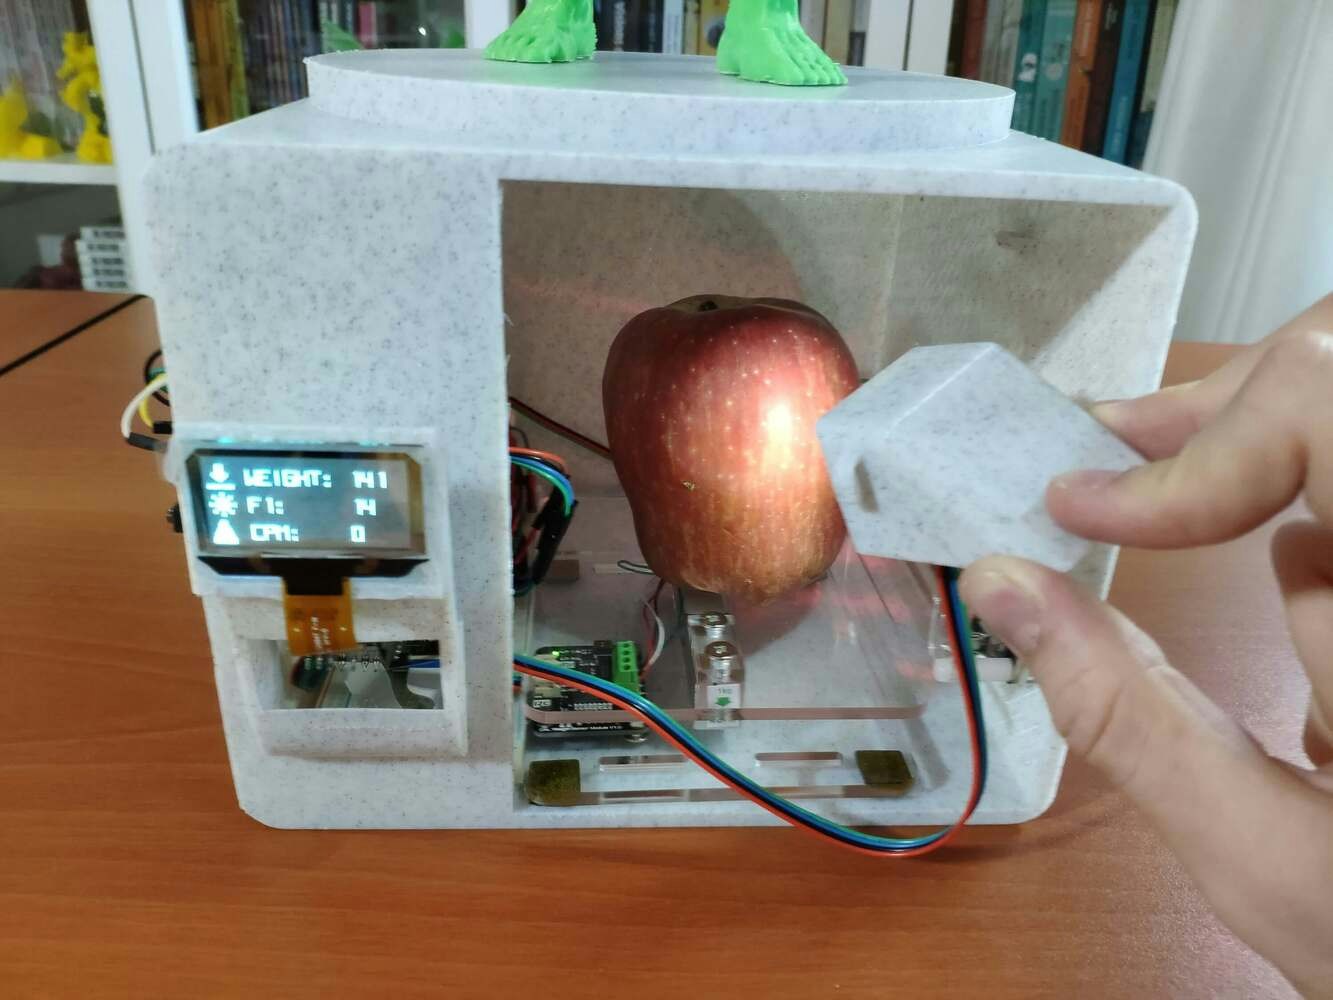
Even though food irradiation improves food hygiene, spoilage reduction, and extension of shelf-life, it should be regulated strictly to avoid any health risks and nutritional value drops. However, small businesses in the food industry lack a budget-friendly and simple way to detect food irradiation doses after treating food with ionizing energy, especially for animal (livestock) feed. Therefore, I decided to build an AI-driven IoT device predicting food irradiation doses based on weight, color (visible light), and emitted ionizing radiation.
Ionizing radiation is a nonthermal process utilized to achieve the preservation of food. At a maximum commercial irradiation dose of 10 kGy, irradiation does not impart heat to the food, and the nutritional quality of the food is generally unaffected. The irradiation process can reduce the microbial contamination of food, resulting in improved microbial safety as well as the extended shelf-life of the food\[^1]. Irradiation also benefits the consumer by reducing the risk of severe health issues caused by foodborne illnesses. Food irradiation has three categories: low-dose (radurization), medium-dose (radicidation), and high-dose (radappertization). Low dose irradiation (under 1 kGy) inhibits the sprouting of produce (onion, potato, and garlic); retards the ripening and fungi deterioration of fruits and vegetables (strawberry, tomato, etc.), and promotes insect disinfestations in cereals and vegetables. Medium dose irradiation (between 1 and 10 kGy) controls the presence of pathogenic organisms, especially in fruit juices; retards the deterioration of fish and fresh meat; and reduces Salmonella in poultry products, similar to pasteurization. High dose irradiation (over 10 kGy) is rather significant to the sterilization of health and personal hygiene products\[^2].
Since foods treated with ionizing radiation should be adequately labeled under the general labeling requirements, consumers can make their own free choice between irradiated and non-irradiated food. However, unfortunately, some countries do not apply strict regulations for irradiated foods, especially for animal feed. Therefore, detecting proper irradiation doses can be arduous for small businesses in the food industry due to governments not incentivizing strictly regulated food irradiation processes. Since irradiation can engender certain alterations that can modify the chemical composition and nutritive values of food, depending on the factors such as irradiation dose, food composition, packaging, and processing conditions such as temperature and atmospheric oxygen saturation\[^2], unsupervised food irradiation portends health issues.
After scrutinizing recent research papers on food irradiation, I decided to utilize ionizing radiation, weight, and visible light (color) measurements denoting the applied irradiation dose so as to create a budget-friendly and accessible device to predict food irradiation dose levels in the hope of assisting small businesses in checking compliance with existing regulations on food irradiation.
Although ionizing radiation, weight, and visible light (color) measurements provide insight into detecting food irradiation doses, it is not possible to conclude and interpret food irradiation doses precisely by merely employing limited data without applying complex algorithms since food irradiation dose levels fluctuate depending on processing techniques, food characteristics, and equipment. Therefore, I decided to build and train an artificial neural network model by utilizing the theoretically assigned food irradiation dose classes to predict food irradiation dose levels based on ionizing radiation, weight, and visible light (color) measurements. Since I could not apply ionizing radiation directly to foods by emitting Gamma rays, X-rays, or electron beams, I exposed foods to sun rays as a natural source of radiation for estimated periods.
Since Beetle ESP32-C3 is an ultra-small size development board intended for IoT applications, that can easily collect data and run my neural network model after being trained to predict food irradiation doses, I decided to employ Beetle ESP32-C3 in this project. To obtain the required measurements to train my model, I utilized a Geiger counter module (Gravity), an I2C weight sensor (Gravity), and an AS7341 11-channel visible light sensor (Gravity). Since Beetle ESP32-C3 is equipped with an expansion board providing the GDI display interface, I connected an SSD1309 OLED transparent screen (Fermion) to display the collected data.
After collecting data successfully, I developed a PHP web application that obtains the transmitted data from Beetle ESP32-C3 via HTTP GET requests, logs the received measurements in a given MySQL database table, and lets the user create appropriately formatted samples for Edge Impulse.
After completing my data set and creating samples, I built my artificial neural network model (ANN) with Edge Impulse to make predictions on food irradiation dose levels (classes) based on ionizing radiation, weight, and visible light (color) measurements. Since Edge Impulse is nearly compatible with all microcontrollers and development boards, I had not encountered any issues while uploading and running my model on Beetle ESP32-C3. As labels, I employed the theoretically assigned food irradiation dose classes for each data record while collecting and logging data:
* Regulated
* Unsafe
* Hazardous
After training and testing my neural network model, I deployed and uploaded the model on Beetle ESP32-C3. Therefore, the device is capable of detecting precise food irradiation dose levels (classes) by running the model independently without any additional procedures.
Lastly, to make the device as robust and compact as possible while experimenting with a motley collection of foods, I designed a Hulk-inspired structure with a movable visible light sensor handle (3D printable).
So, this is my project in a nutshell 😃
In the following steps, you can find more detailed information on coding, logging data via a web application, building a neural network model with Edge Impulse, and running it on Beetle ESP32-C3.
:gift::art: Huge thanks to [DFRobot](https://www.dfrobot.com/?tracking=60f546f8002be) for sponsoring these products:
:star: Beetle ESP32-C3 | [Inspect](https://www.dfrobot.com/product-2566.html?tracking=60f546f8002be)
:star: Gravity: Geiger Counter Module | [Inspect](https://www.dfrobot.com/product-2547.html?tracking=60f546f8002be)
:star: Gravity: I2C 1Kg Weight Sensor Kit | [Inspect](https://www.dfrobot.com/product-2289.html?tracking=60f546f8002be)
:star: Gravity: AS7341 11-Channel Visible Light Sensor | [Inspect](https://www.dfrobot.com/product-2131.html?tracking=60f546f8002be)
:star: Fermion: 1.51” OLED Transparent Display | [Inspect](https://www.dfrobot.com/product-2521.html?tracking=60f546f8002be)
:gift::art: If you want to purchase products from DFRobot, you can use [my \$5 discount coupon](https://www.dfrobot.com/coupon-117.html).
:gift::art: Also, huge thanks to [Creality](https://store.creality.com/) for sending me a [Creality CR-200B 3D Printer](https://www.creality.com/products/cr-200b-3d-printer).
## Description
Even though food irradiation improves food hygiene, spoilage reduction, and extension of shelf-life, it should be regulated strictly to avoid any health risks and nutritional value drops. However, small businesses in the food industry lack a budget-friendly and simple way to detect food irradiation doses after treating food with ionizing energy, especially for animal (livestock) feed. Therefore, I decided to build an AI-driven IoT device predicting food irradiation doses based on weight, color (visible light), and emitted ionizing radiation.
Ionizing radiation is a nonthermal process utilized to achieve the preservation of food. At a maximum commercial irradiation dose of 10 kGy, irradiation does not impart heat to the food, and the nutritional quality of the food is generally unaffected. The irradiation process can reduce the microbial contamination of food, resulting in improved microbial safety as well as the extended shelf-life of the food\[^1]. Irradiation also benefits the consumer by reducing the risk of severe health issues caused by foodborne illnesses. Food irradiation has three categories: low-dose (radurization), medium-dose (radicidation), and high-dose (radappertization). Low dose irradiation (under 1 kGy) inhibits the sprouting of produce (onion, potato, and garlic); retards the ripening and fungi deterioration of fruits and vegetables (strawberry, tomato, etc.), and promotes insect disinfestations in cereals and vegetables. Medium dose irradiation (between 1 and 10 kGy) controls the presence of pathogenic organisms, especially in fruit juices; retards the deterioration of fish and fresh meat; and reduces Salmonella in poultry products, similar to pasteurization. High dose irradiation (over 10 kGy) is rather significant to the sterilization of health and personal hygiene products\[^2].
Since foods treated with ionizing radiation should be adequately labeled under the general labeling requirements, consumers can make their own free choice between irradiated and non-irradiated food. However, unfortunately, some countries do not apply strict regulations for irradiated foods, especially for animal feed. Therefore, detecting proper irradiation doses can be arduous for small businesses in the food industry due to governments not incentivizing strictly regulated food irradiation processes. Since irradiation can engender certain alterations that can modify the chemical composition and nutritive values of food, depending on the factors such as irradiation dose, food composition, packaging, and processing conditions such as temperature and atmospheric oxygen saturation\[^2], unsupervised food irradiation portends health issues.
After scrutinizing recent research papers on food irradiation, I decided to utilize ionizing radiation, weight, and visible light (color) measurements denoting the applied irradiation dose so as to create a budget-friendly and accessible device to predict food irradiation dose levels in the hope of assisting small businesses in checking compliance with existing regulations on food irradiation.
Although ionizing radiation, weight, and visible light (color) measurements provide insight into detecting food irradiation doses, it is not possible to conclude and interpret food irradiation doses precisely by merely employing limited data without applying complex algorithms since food irradiation dose levels fluctuate depending on processing techniques, food characteristics, and equipment. Therefore, I decided to build and train an artificial neural network model by utilizing the theoretically assigned food irradiation dose classes to predict food irradiation dose levels based on ionizing radiation, weight, and visible light (color) measurements. Since I could not apply ionizing radiation directly to foods by emitting Gamma rays, X-rays, or electron beams, I exposed foods to sun rays as a natural source of radiation for estimated periods.
Since Beetle ESP32-C3 is an ultra-small size development board intended for IoT applications, that can easily collect data and run my neural network model after being trained to predict food irradiation doses, I decided to employ Beetle ESP32-C3 in this project. To obtain the required measurements to train my model, I utilized a Geiger counter module (Gravity), an I2C weight sensor (Gravity), and an AS7341 11-channel visible light sensor (Gravity). Since Beetle ESP32-C3 is equipped with an expansion board providing the GDI display interface, I connected an SSD1309 OLED transparent screen (Fermion) to display the collected data.
After collecting data successfully, I developed a PHP web application that obtains the transmitted data from Beetle ESP32-C3 via HTTP GET requests, logs the received measurements in a given MySQL database table, and lets the user create appropriately formatted samples for Edge Impulse.
After completing my data set and creating samples, I built my artificial neural network model (ANN) with Edge Impulse to make predictions on food irradiation dose levels (classes) based on ionizing radiation, weight, and visible light (color) measurements. Since Edge Impulse is nearly compatible with all microcontrollers and development boards, I had not encountered any issues while uploading and running my model on Beetle ESP32-C3. As labels, I employed the theoretically assigned food irradiation dose classes for each data record while collecting and logging data:
* Regulated
* Unsafe
* Hazardous
After training and testing my neural network model, I deployed and uploaded the model on Beetle ESP32-C3. Therefore, the device is capable of detecting precise food irradiation dose levels (classes) by running the model independently without any additional procedures.
Lastly, to make the device as robust and compact as possible while experimenting with a motley collection of foods, I designed a Hulk-inspired structure with a movable visible light sensor handle (3D printable).
So, this is my project in a nutshell 😃
In the following steps, you can find more detailed information on coding, logging data via a web application, building a neural network model with Edge Impulse, and running it on Beetle ESP32-C3.
:gift::art: Huge thanks to [DFRobot](https://www.dfrobot.com/?tracking=60f546f8002be) for sponsoring these products:
:star: Beetle ESP32-C3 | [Inspect](https://www.dfrobot.com/product-2566.html?tracking=60f546f8002be)
:star: Gravity: Geiger Counter Module | [Inspect](https://www.dfrobot.com/product-2547.html?tracking=60f546f8002be)
:star: Gravity: I2C 1Kg Weight Sensor Kit | [Inspect](https://www.dfrobot.com/product-2289.html?tracking=60f546f8002be)
:star: Gravity: AS7341 11-Channel Visible Light Sensor | [Inspect](https://www.dfrobot.com/product-2131.html?tracking=60f546f8002be)
:star: Fermion: 1.51” OLED Transparent Display | [Inspect](https://www.dfrobot.com/product-2521.html?tracking=60f546f8002be)
:gift::art: If you want to purchase products from DFRobot, you can use [my \$5 discount coupon](https://www.dfrobot.com/coupon-117.html).
:gift::art: Also, huge thanks to [Creality](https://store.creality.com/) for sending me a [Creality CR-200B 3D Printer](https://www.creality.com/products/cr-200b-3d-printer).


 ## Step 1: Designing and printing a Hulk-inspired structure
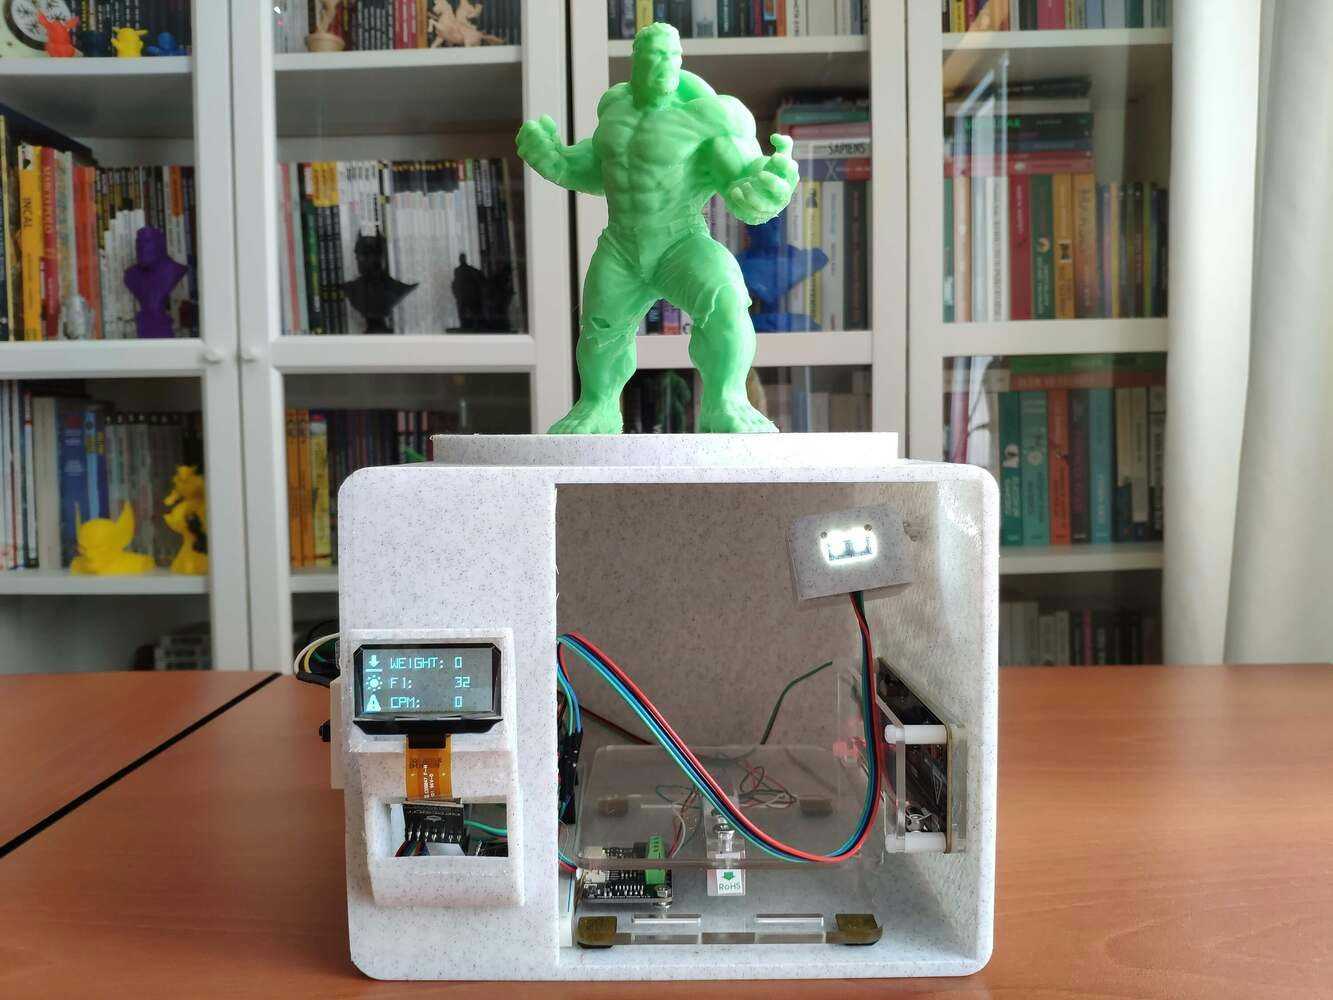
Since this project is for detecting irradiation doses of foods treated with ionizing radiation, I got inspired by the most prominent fictional Gamma radiation expert, Bruce Banner (aka, The Incredible Hulk), to design a unique structure so as to create a robust and compact device flawlessly operating while collecting data from foods. To collect data with the visible light sensor at different angles, I added a movable handle to the structure, including a slot and a hook for hanging the sensor.
I designed the structure and its movable handle in Autodesk Fusion 360. You can download their STL files below.
## Step 1: Designing and printing a Hulk-inspired structure
Since this project is for detecting irradiation doses of foods treated with ionizing radiation, I got inspired by the most prominent fictional Gamma radiation expert, Bruce Banner (aka, The Incredible Hulk), to design a unique structure so as to create a robust and compact device flawlessly operating while collecting data from foods. To collect data with the visible light sensor at different angles, I added a movable handle to the structure, including a slot and a hook for hanging the sensor.
I designed the structure and its movable handle in Autodesk Fusion 360. You can download their STL files below.


 For the Hulk replica affixed to the top of the structure, I utilized this model from Thingiverse:
* [Hulk](https://www.thingiverse.com/thing:993933)
Then, I sliced all 3D models (STL files) in Ultimaker Cura.
For the Hulk replica affixed to the top of the structure, I utilized this model from Thingiverse:
* [Hulk](https://www.thingiverse.com/thing:993933)
Then, I sliced all 3D models (STL files) in Ultimaker Cura.


 Since I wanted to create a solid structure for this device with a movable handle and complement the Hulk theme gloriously, I utilized these PLA filaments:
* eMarble Natural
* Peak Green
Finally, I printed all parts (models) with my Creality CR-200B 3D Printer. It is my first fully-enclosed FDM 3D printer, and I must say that I got excellent prints effortlessly with the CR-200B :)
If you are a maker planning to print your 3D models to create more complex projects, I highly recommend the CR-200B. Since the CR-200B is fully-enclosed, you can print high-resolution 3D models with PLA and ABS filaments. Also, it has a smart filament runout sensor and the resume printing option for power failures.
According to my experience, there are only two downsides of the CR-200B: relatively small build size (200 x 200 x 200 mm) and manual leveling. Conversely, thanks to the large leveling nuts and assisted leveling, I was able to level the bed and start printing my first model in less than 30 minutes.
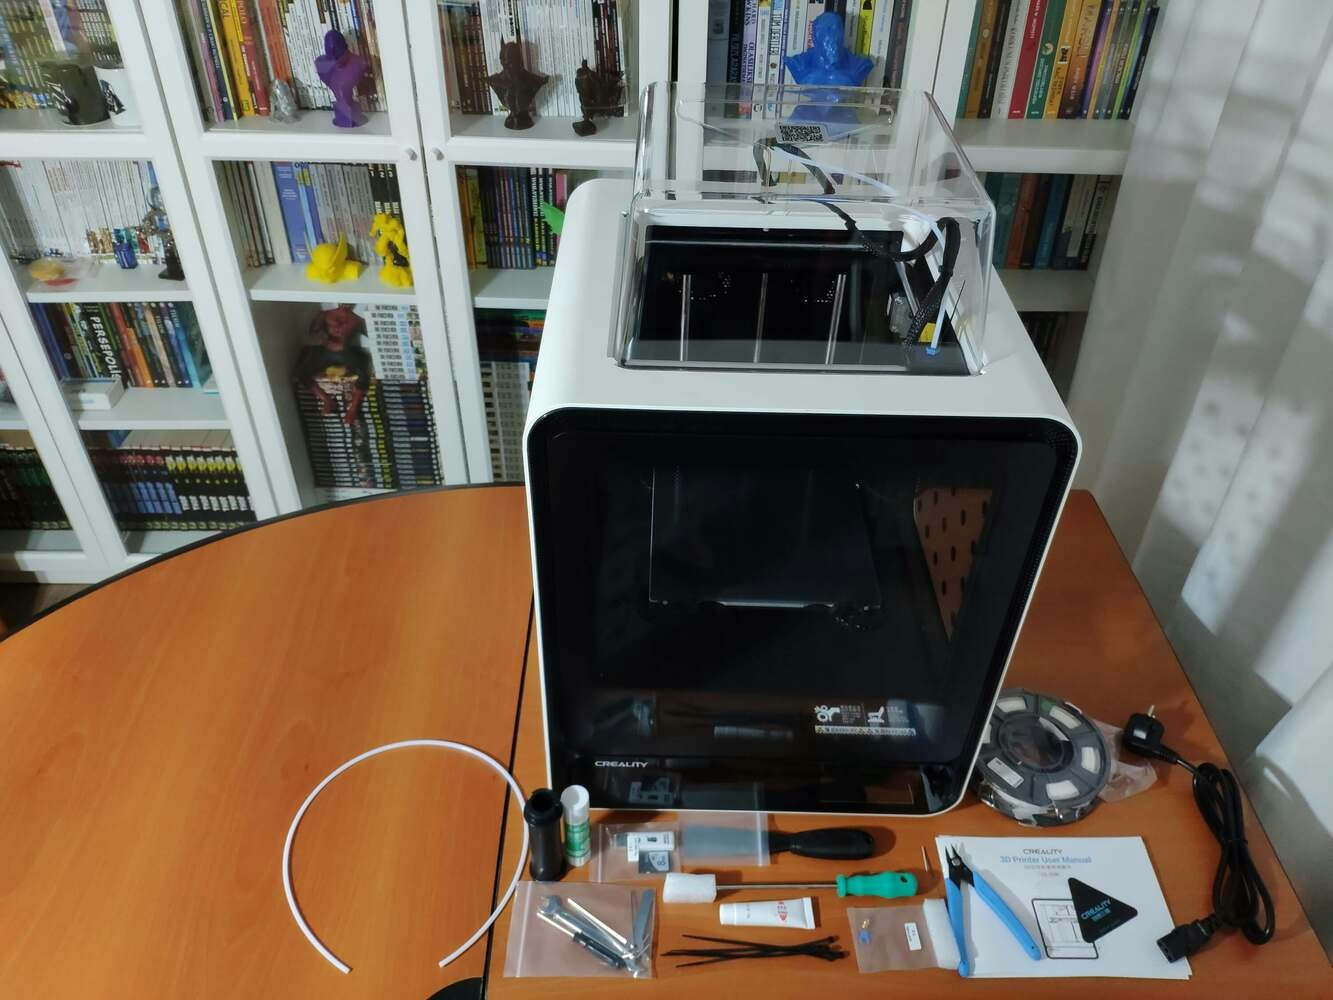
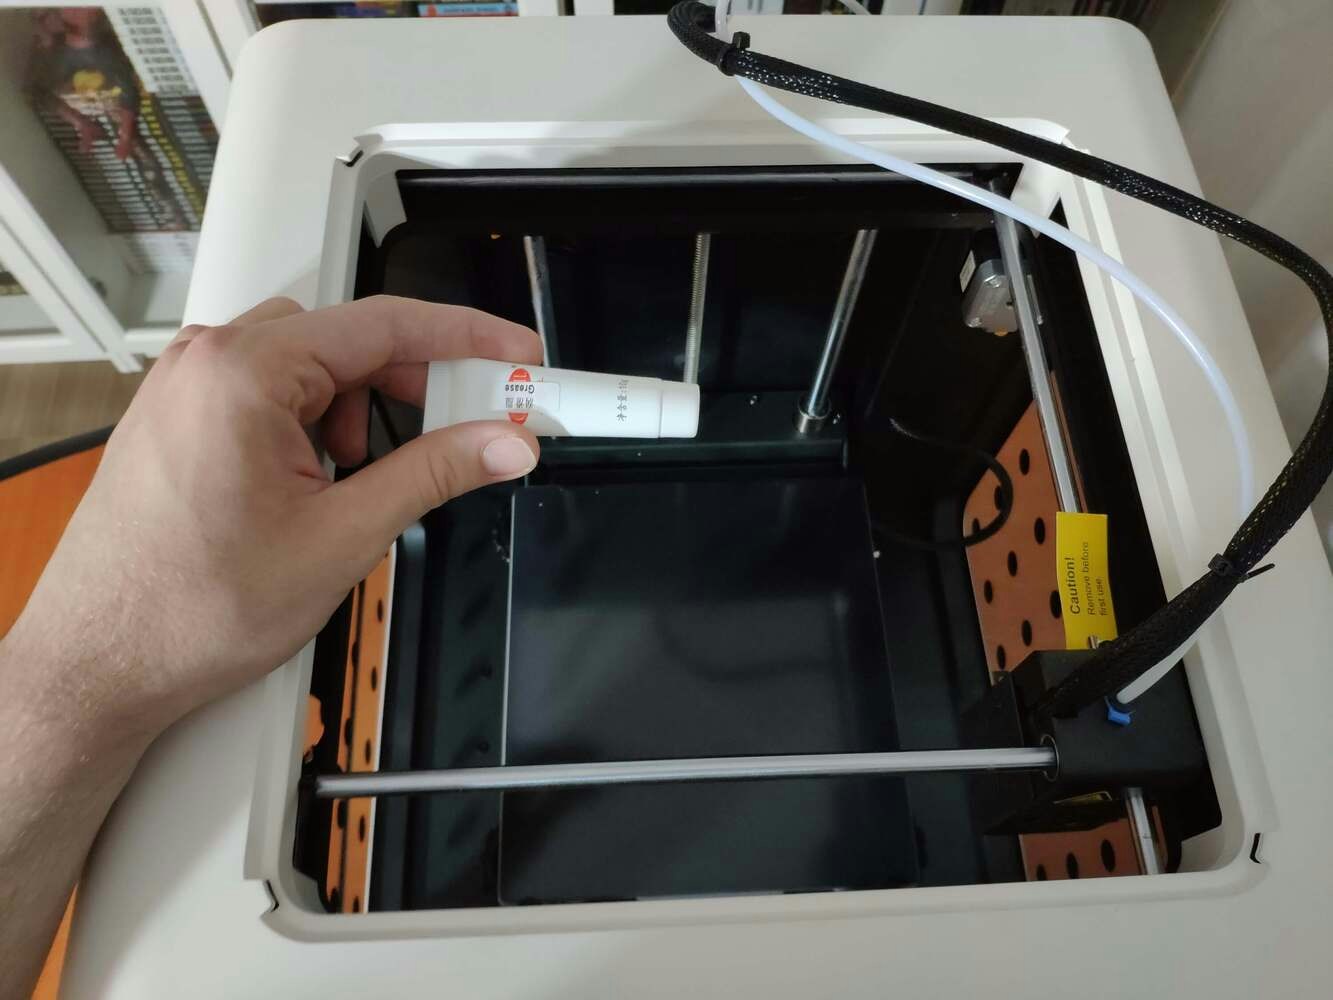
:hash: Before the first use, remove unnecessary cable ties and apply grease to the rails.
Since I wanted to create a solid structure for this device with a movable handle and complement the Hulk theme gloriously, I utilized these PLA filaments:
* eMarble Natural
* Peak Green
Finally, I printed all parts (models) with my Creality CR-200B 3D Printer. It is my first fully-enclosed FDM 3D printer, and I must say that I got excellent prints effortlessly with the CR-200B :)
If you are a maker planning to print your 3D models to create more complex projects, I highly recommend the CR-200B. Since the CR-200B is fully-enclosed, you can print high-resolution 3D models with PLA and ABS filaments. Also, it has a smart filament runout sensor and the resume printing option for power failures.
According to my experience, there are only two downsides of the CR-200B: relatively small build size (200 x 200 x 200 mm) and manual leveling. Conversely, thanks to the large leveling nuts and assisted leveling, I was able to level the bed and start printing my first model in less than 30 minutes.
:hash: Before the first use, remove unnecessary cable ties and apply grease to the rails.
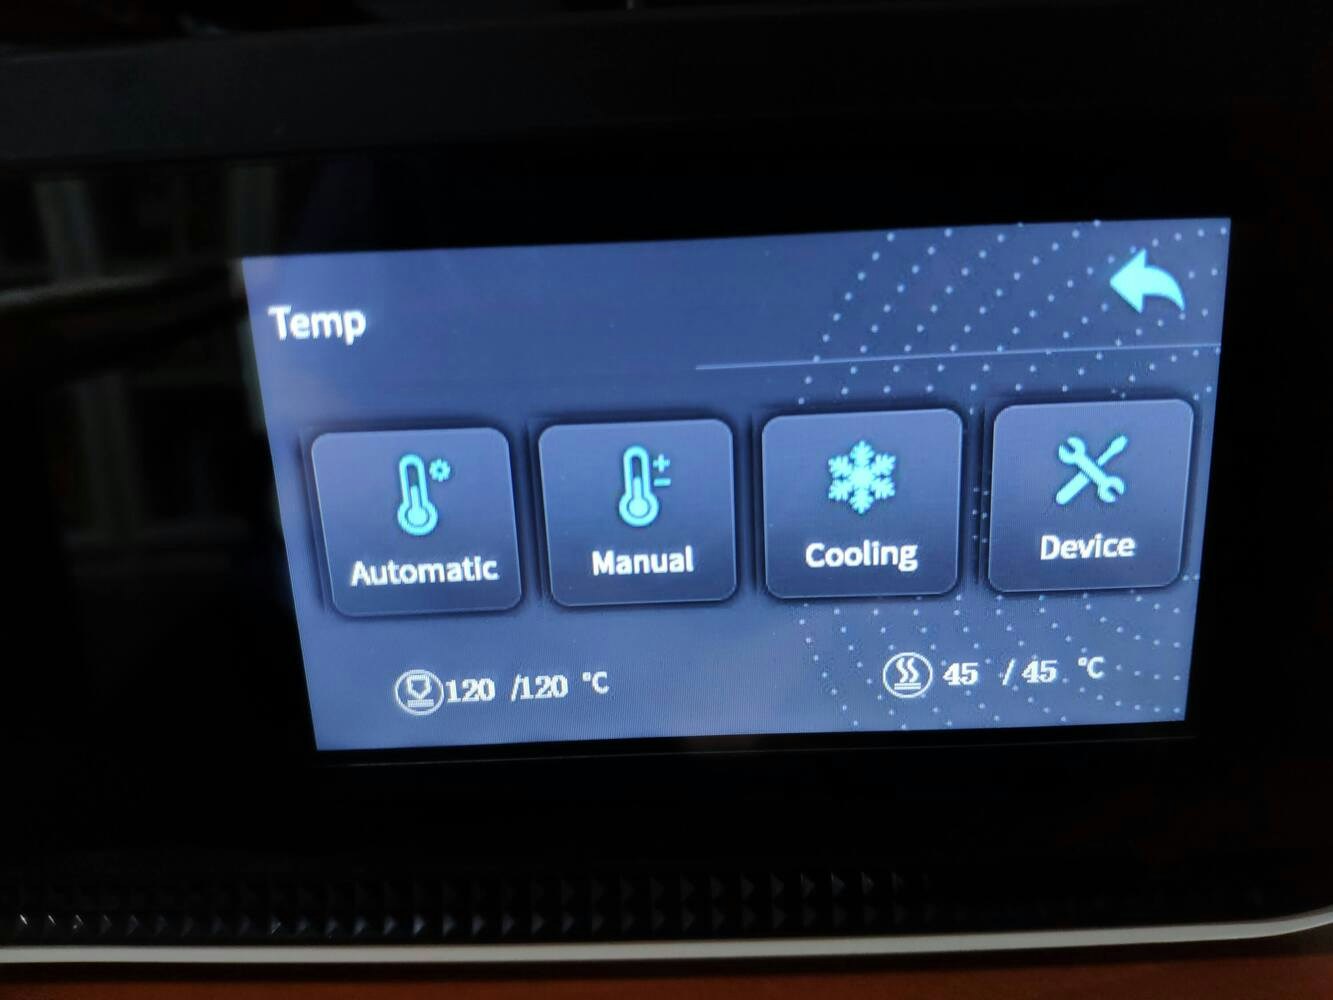
 :hash: Test the nozzle and hot bed temperatures.
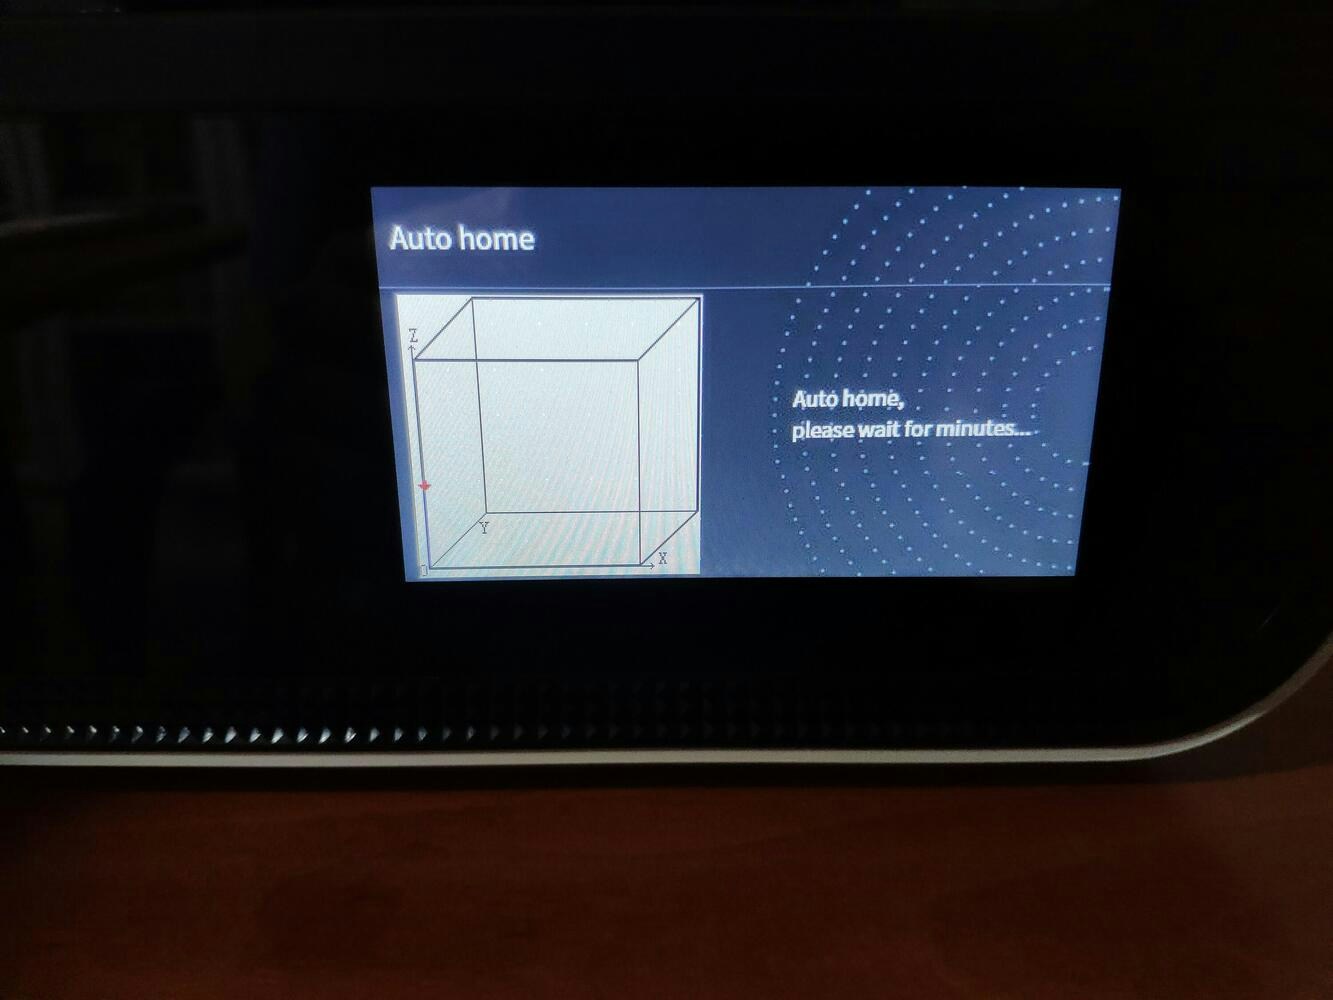
 :hash: Go to *Settings ➡ Leveling* and adjust four predefined points by utilizing the leveling nuts.
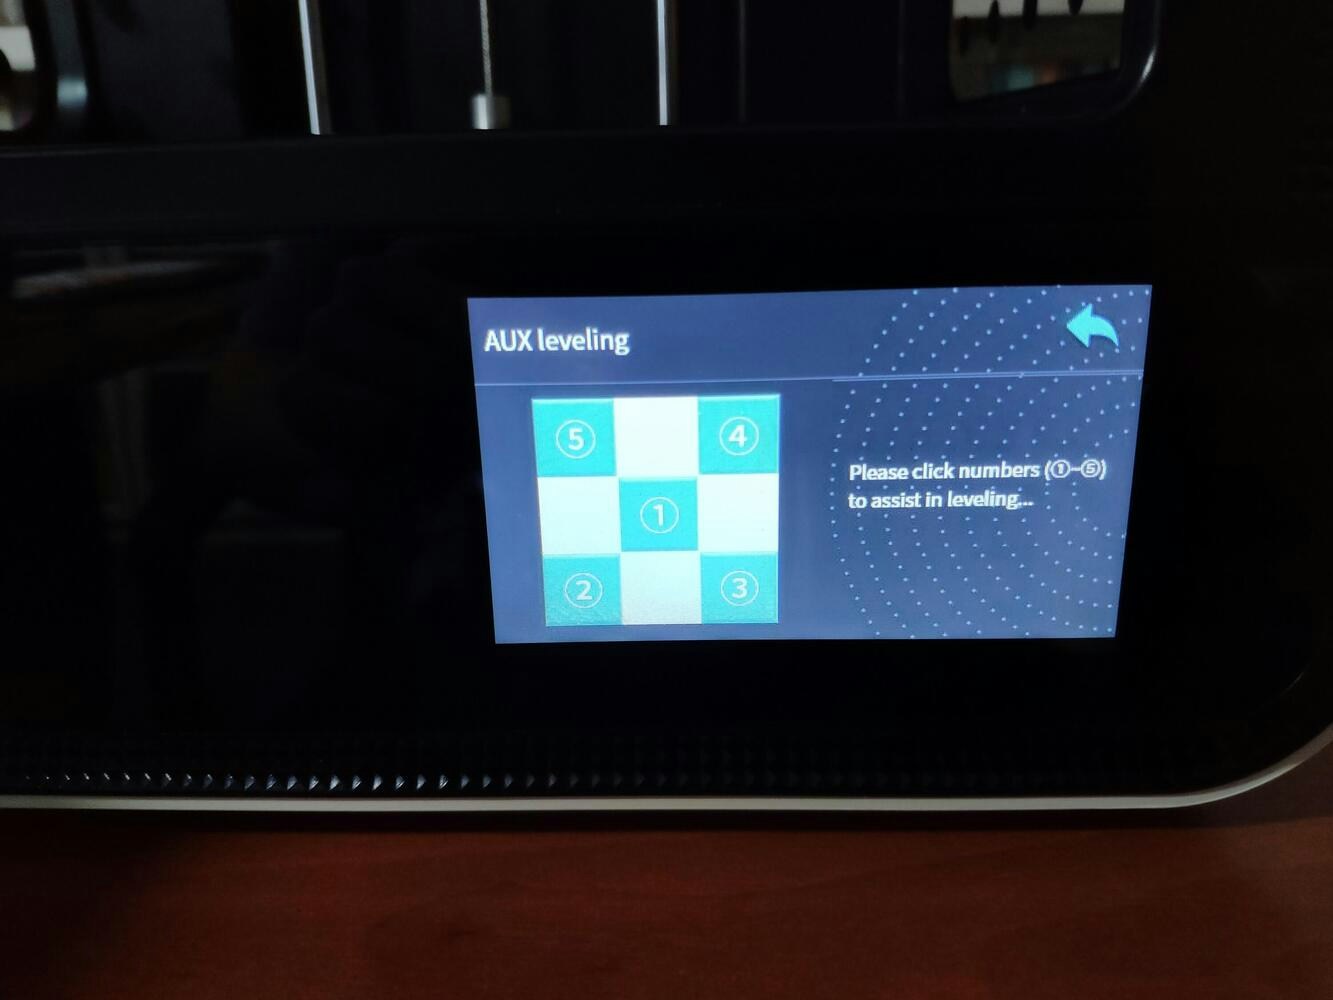
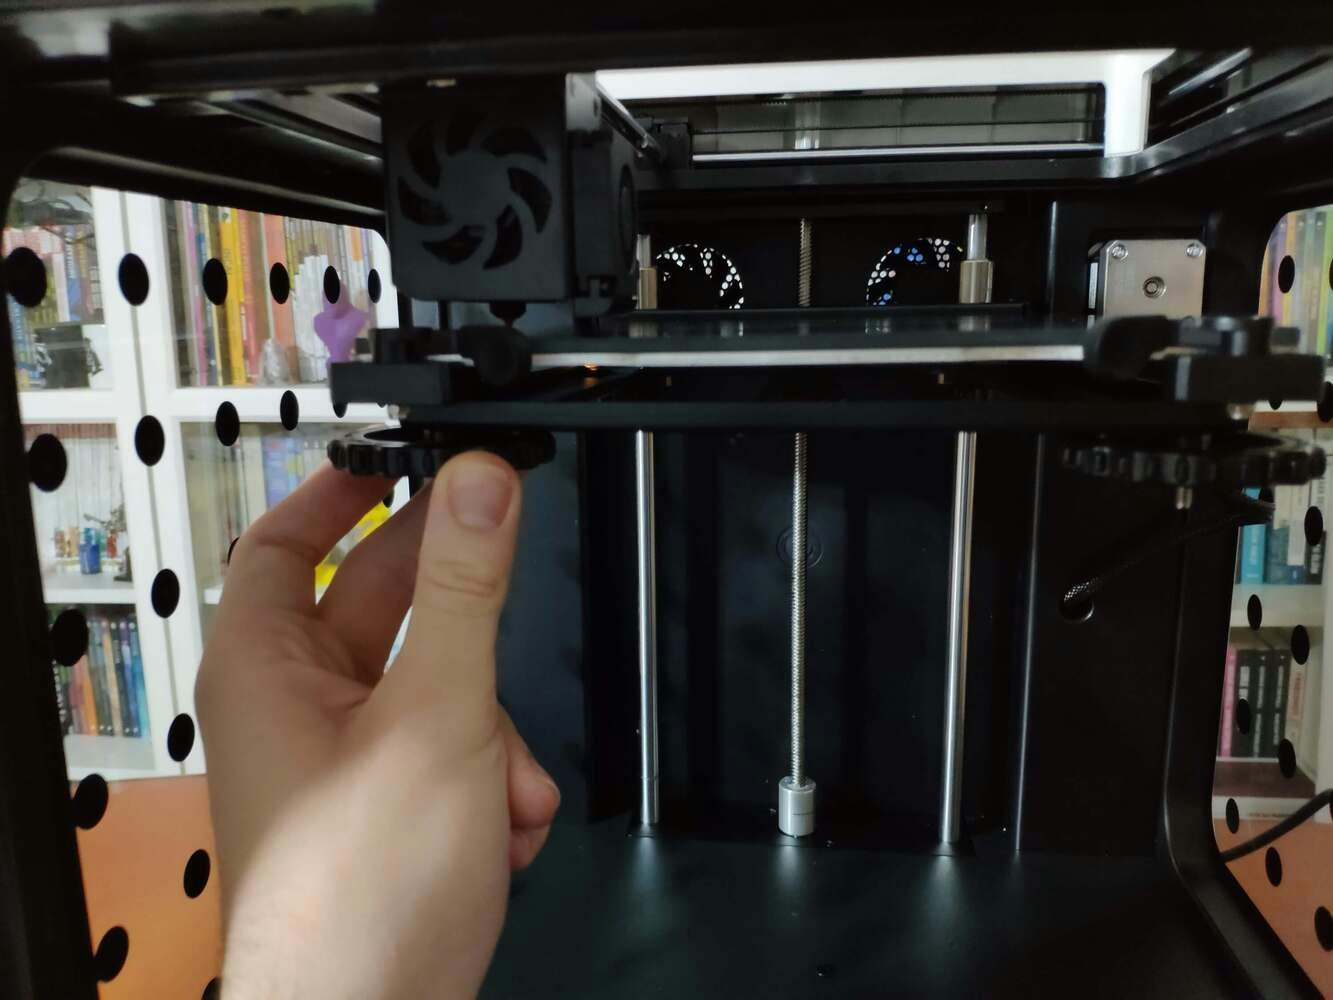
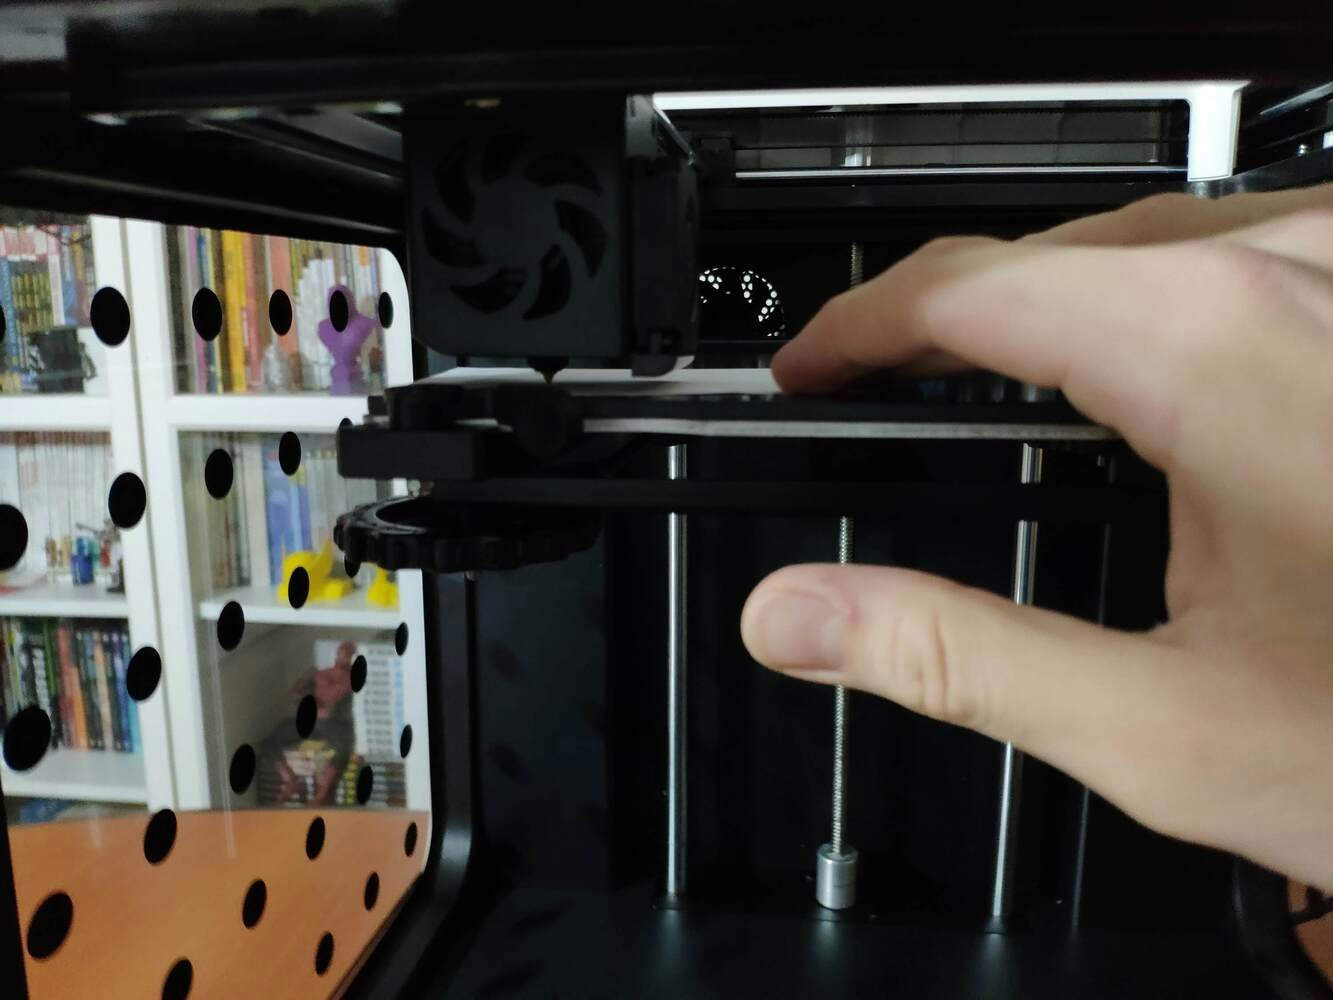 :hash: Finally, attach the spool holder and feed the extruder with the filament.
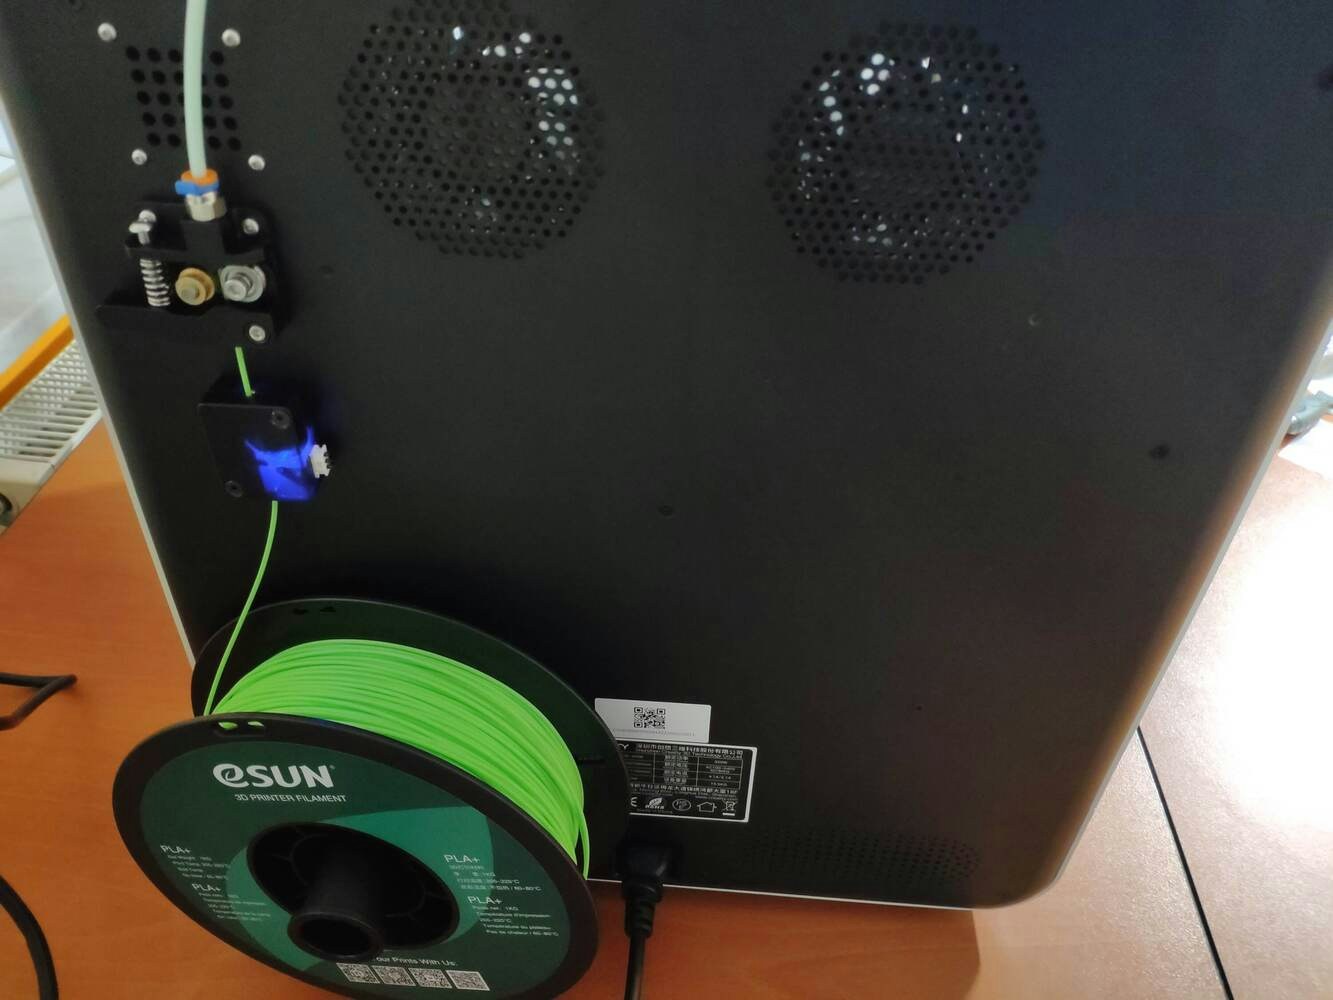 :hash: Since the CR-200B is not officially supported by Cura, select the Ender-3 profile and change the build size to 200 x 200 x 200 mm. Also, to compensate for the nozzle placement, set the *Nozzle offset X* and *Y* values to -10 mm on the *Extruder 1* tab.

 ## Step 1.1: Assembling the structure and making connections & adjustments
```
// Connections
// Beetle ESP32-C3 :
// Gravity: Geiger Counter Module
// D5 --------------------------- D
// VCC --------------------------- +
// GND --------------------------- -
// Gravity: I2C 1Kg Weight Sensor Kit - HX711
// VCC --------------------------- VCC
// GND --------------------------- GND
// D9 --------------------------- SCL
// D8 --------------------------- SDA
// Fermion: 1.51” SSD1309 OLED Transparent Display
// D4 --------------------------- SCLK
// D6 --------------------------- MOSI
// D7 --------------------------- CS
// D2 --------------------------- RES
// D1 --------------------------- DC
// AS7341 11-Channel Spectral Color Sensor
// VCC --------------------------- +
// GND --------------------------- -
// D9 --------------------------- C
// D8 --------------------------- D
// Control Button (A)
// D0 --------------------------- +
// Control Button (B)
// D20 --------------------------- +
// Control Button (C)
// D21 --------------------------- +
```
First of all, I soldered male pin headers to [Beetle ESP32-C3](https://wiki.dfrobot.com/SKU_DFR0868_Beetle_ESP32_C3) and its expansion board.
## Step 1.1: Assembling the structure and making connections & adjustments
```
// Connections
// Beetle ESP32-C3 :
// Gravity: Geiger Counter Module
// D5 --------------------------- D
// VCC --------------------------- +
// GND --------------------------- -
// Gravity: I2C 1Kg Weight Sensor Kit - HX711
// VCC --------------------------- VCC
// GND --------------------------- GND
// D9 --------------------------- SCL
// D8 --------------------------- SDA
// Fermion: 1.51” SSD1309 OLED Transparent Display
// D4 --------------------------- SCLK
// D6 --------------------------- MOSI
// D7 --------------------------- CS
// D2 --------------------------- RES
// D1 --------------------------- DC
// AS7341 11-Channel Spectral Color Sensor
// VCC --------------------------- +
// GND --------------------------- -
// D9 --------------------------- C
// D8 --------------------------- D
// Control Button (A)
// D0 --------------------------- +
// Control Button (B)
// D20 --------------------------- +
// Control Button (C)
// D21 --------------------------- +
```
First of all, I soldered male pin headers to [Beetle ESP32-C3](https://wiki.dfrobot.com/SKU_DFR0868_Beetle_ESP32_C3) and its expansion board.
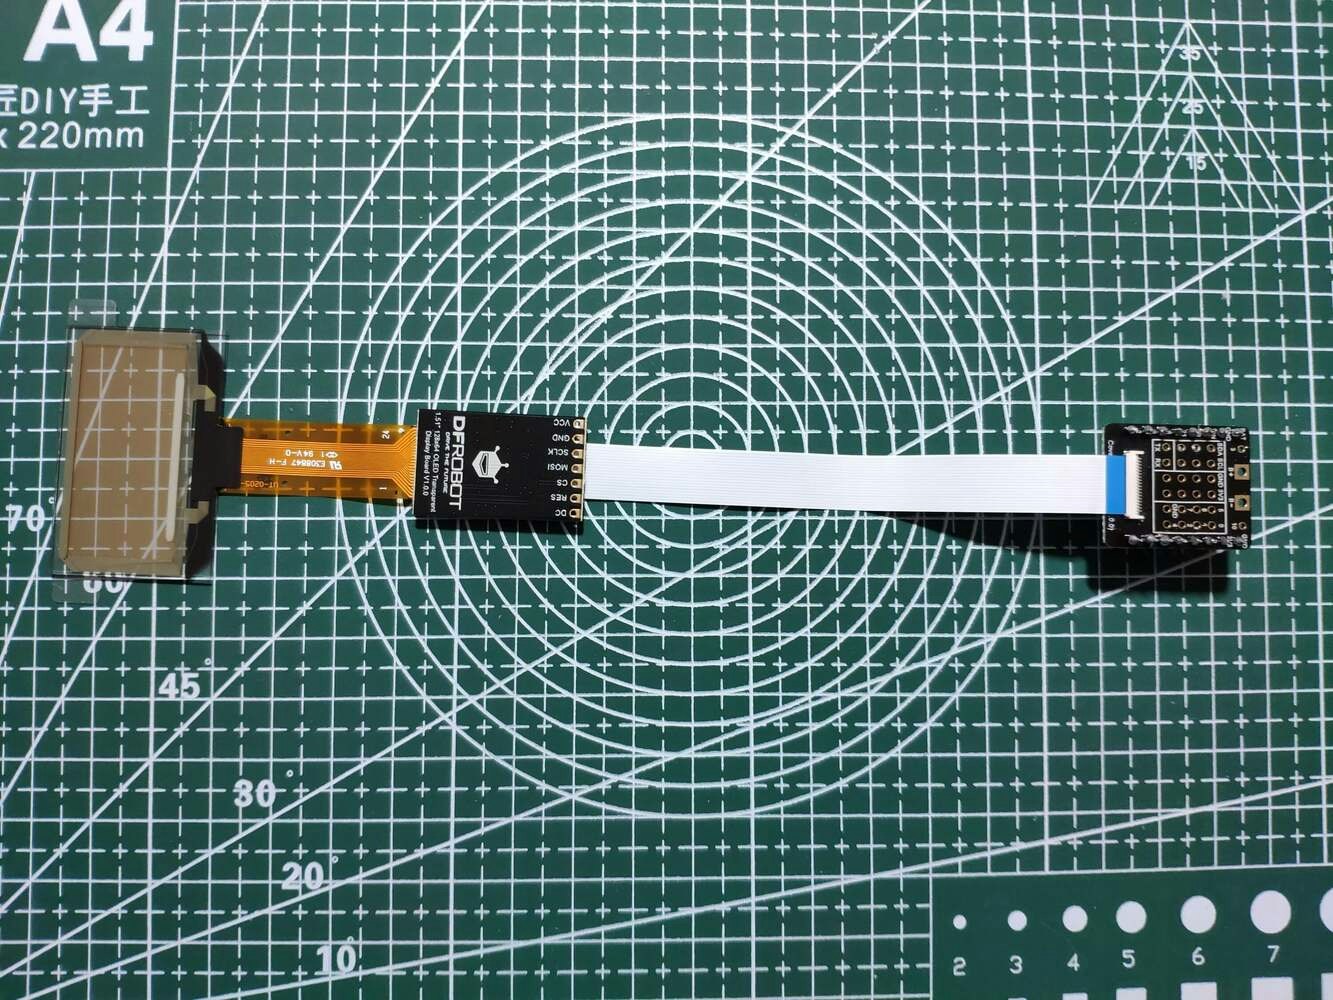
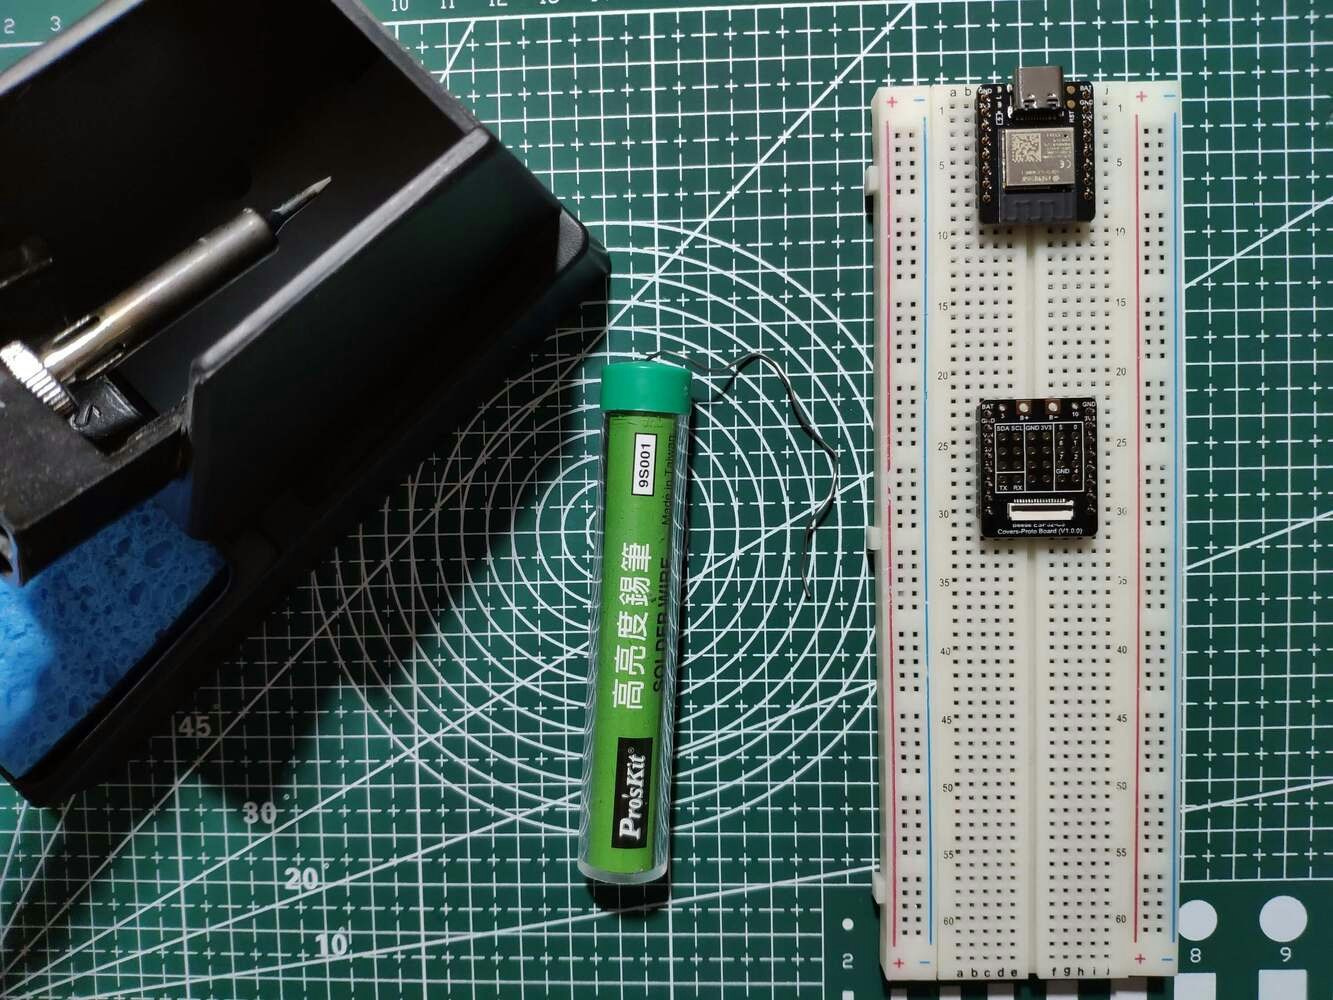 Then, to collect ionizing radiation, weight, and color (visible light) measurements, I connected a Geiger counter module (Gravity), an I2C HX711 weight sensor (Gravity), and an AS7341 11-channel visible light sensor (Gravity) to Beetle ESP32-C3. Since the expansion board provides the GDI display interface for DFRobot screens, I was able to connect [the SSD1309 OLED transparent screen (Fermion)](https://wiki.dfrobot.com/SKU_DFR0934_Fermion_1.51Inch_128%C3%9764_OLED_Transparent_Display_with_Converter_Breakout) to Beetle ESP32-C3 via the expansion board.
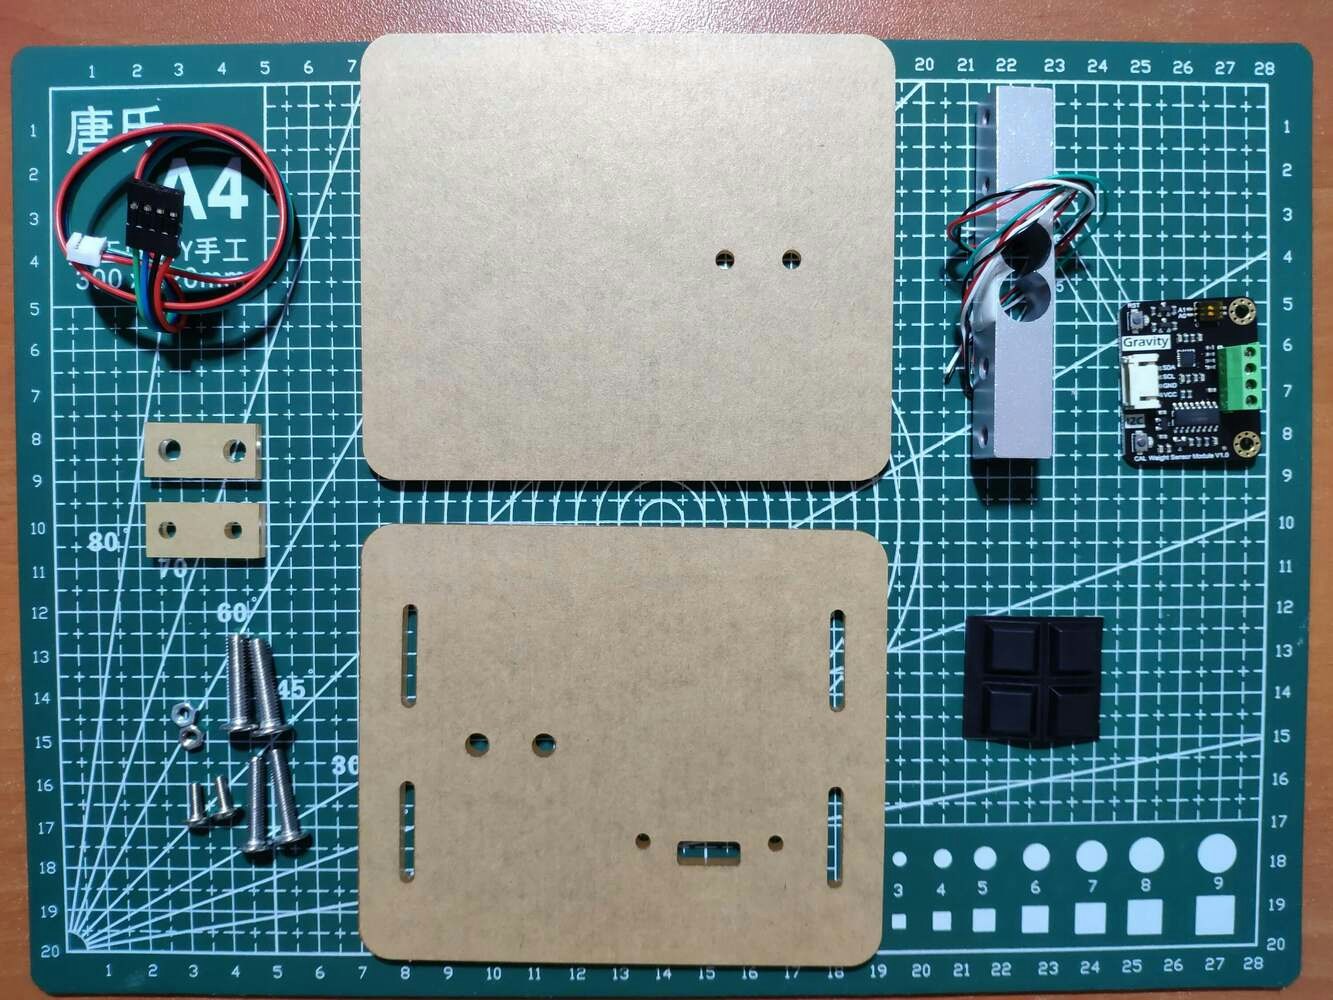
 After assembling [the weight sensor kit](https://wiki.dfrobot.com/HX711_Weight_Sensor_Kit_SKU_KIT0176), to calibrate the weight sensor in order to get accurate measurements, press the *cal* button on the adapter board. Then, wait for the indicator LED to turn on and place a 100 g (default value) object on the scale within 5 seconds. When the adapter board completes calibration, the indicator LED blinks three times.
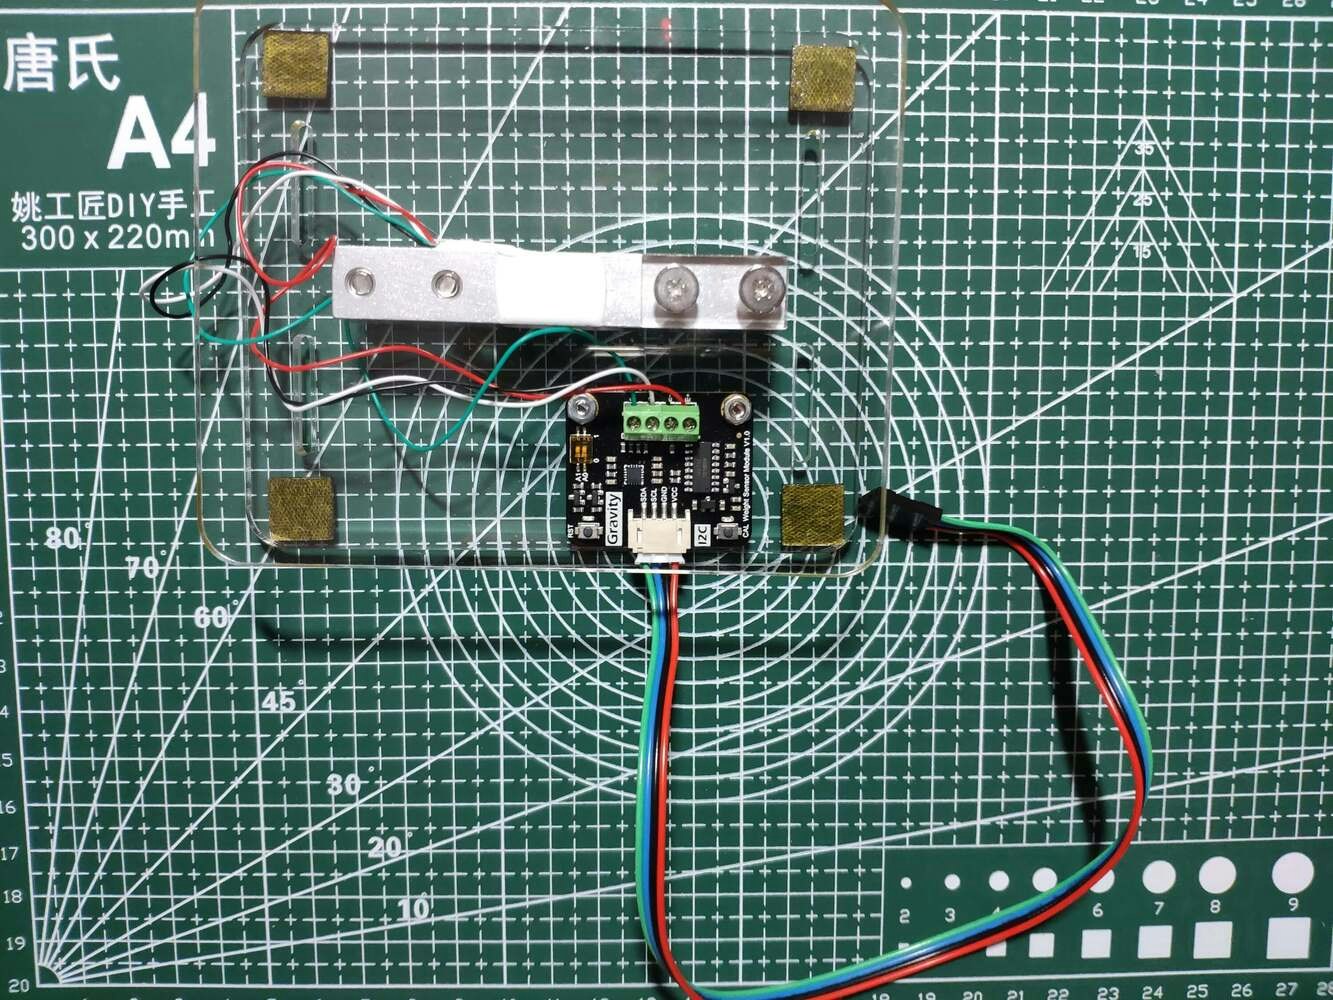 Since Beetle ESP32-C3 cannot power [the Geiger counter module](https://wiki.dfrobot.com/SKU_SEN0463_Gravity_Geiger_Counter_Module) and the weight sensor simultaneously due to its working current, I connected a USB buck-boost converter board to my Xiaomi power bank to elicit stable 3.3V to supply the sensors.
Since the Geiger counter library needs to use an external interrupt pin for counting, the Geiger counter module can only be connected to external interrupt pins. Plausibly, Beetle ESP32-C3 allows the user to define any pin as an external interrupt.
To assign labels while transmitting the collected data and run my neural network model effortlessly, I added three control buttons (6x6), as shown in the schematic below.
After completing sensor connections and adjustments on breadboards successfully, I made the breadboard connection points rigid by utilizing a hot glue gun.
Since Beetle ESP32-C3 cannot power [the Geiger counter module](https://wiki.dfrobot.com/SKU_SEN0463_Gravity_Geiger_Counter_Module) and the weight sensor simultaneously due to its working current, I connected a USB buck-boost converter board to my Xiaomi power bank to elicit stable 3.3V to supply the sensors.
Since the Geiger counter library needs to use an external interrupt pin for counting, the Geiger counter module can only be connected to external interrupt pins. Plausibly, Beetle ESP32-C3 allows the user to define any pin as an external interrupt.
To assign labels while transmitting the collected data and run my neural network model effortlessly, I added three control buttons (6x6), as shown in the schematic below.
After completing sensor connections and adjustments on breadboards successfully, I made the breadboard connection points rigid by utilizing a hot glue gun.
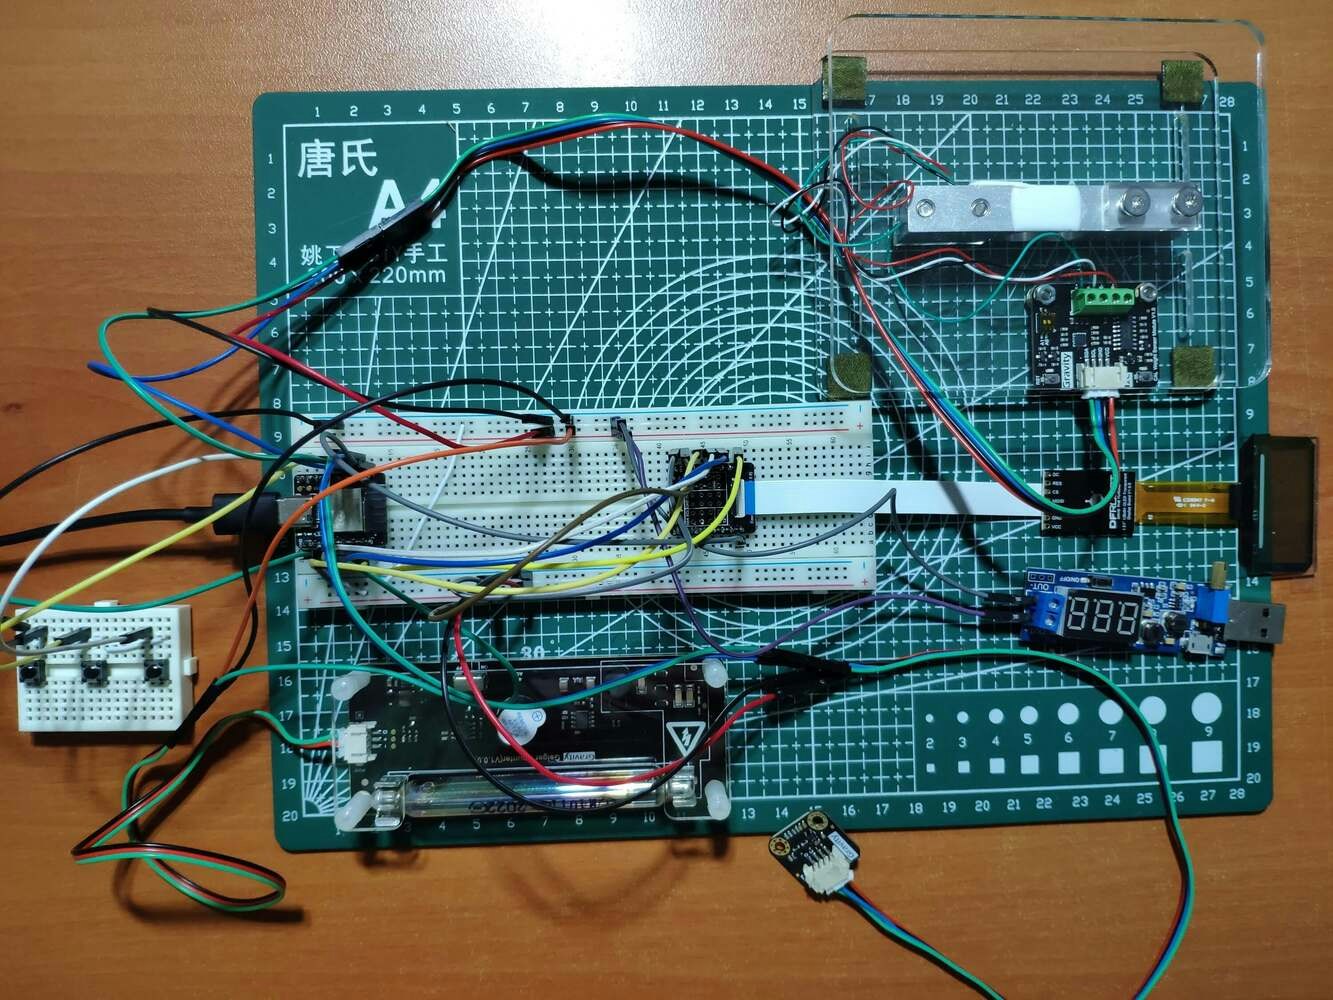
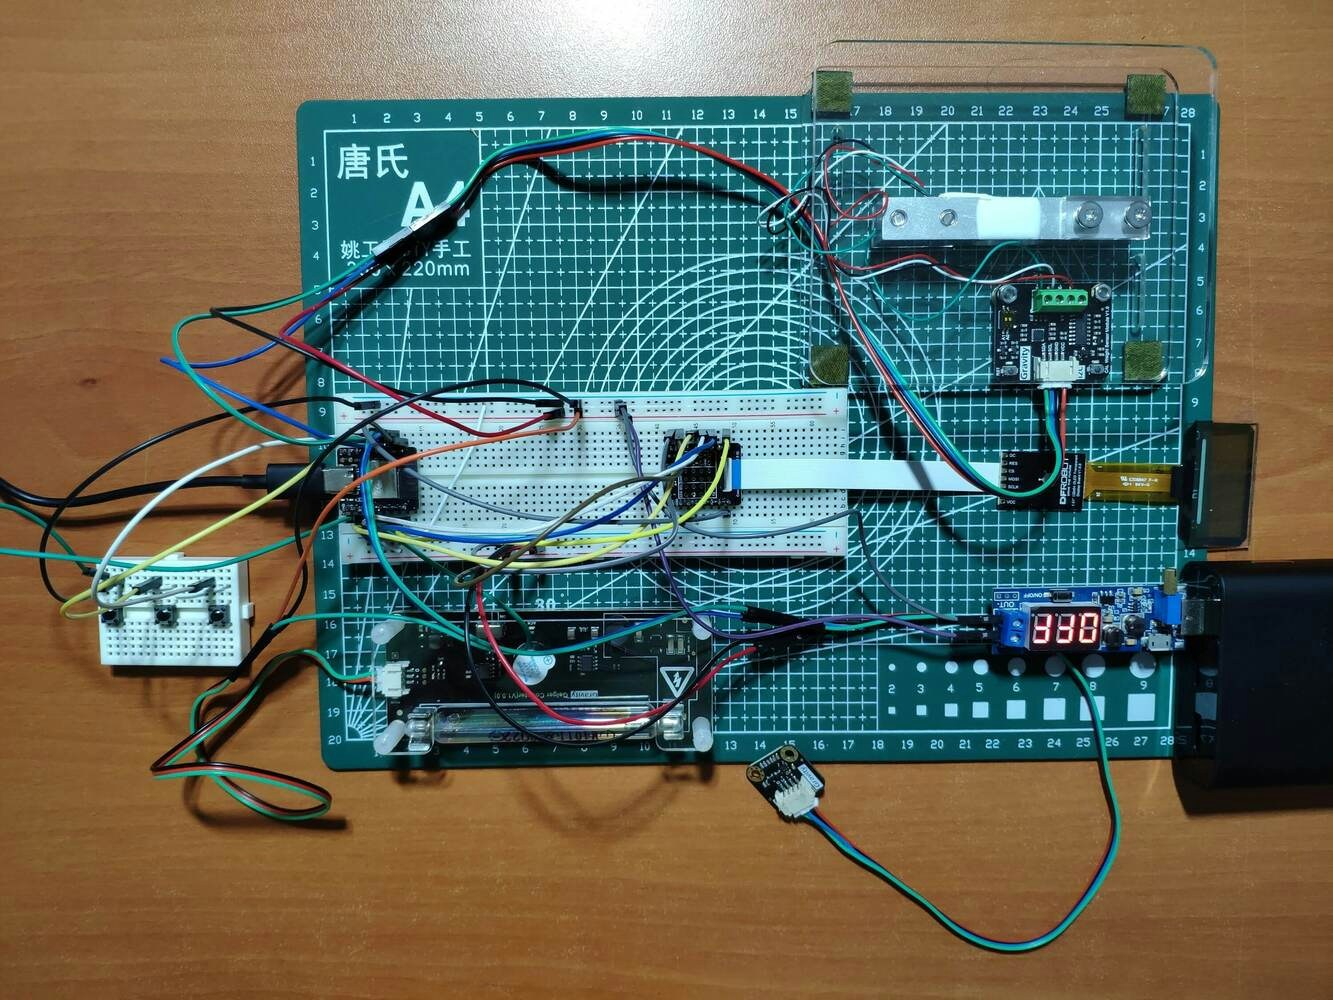 After printing all parts (models), I fastened all components except the visible light sensor to their corresponding slots on the structure via the hot glue gun.
Then, I attached the visible light sensor to the movable handle and hung it via its slot in the structure.
After printing all parts (models), I fastened all components except the visible light sensor to their corresponding slots on the structure via the hot glue gun.
Then, I attached the visible light sensor to the movable handle and hung it via its slot in the structure.
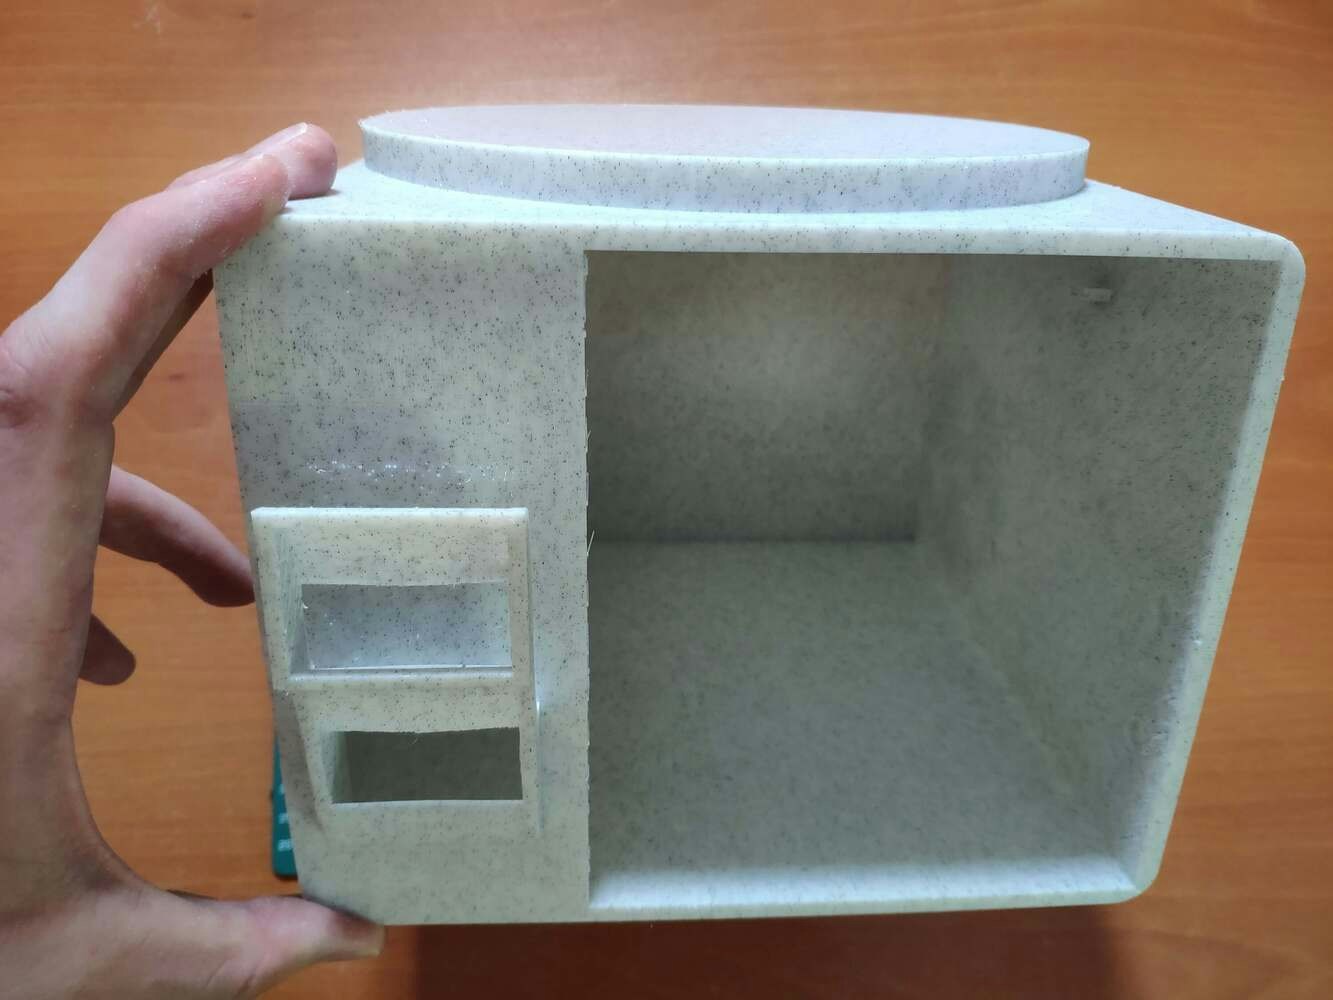
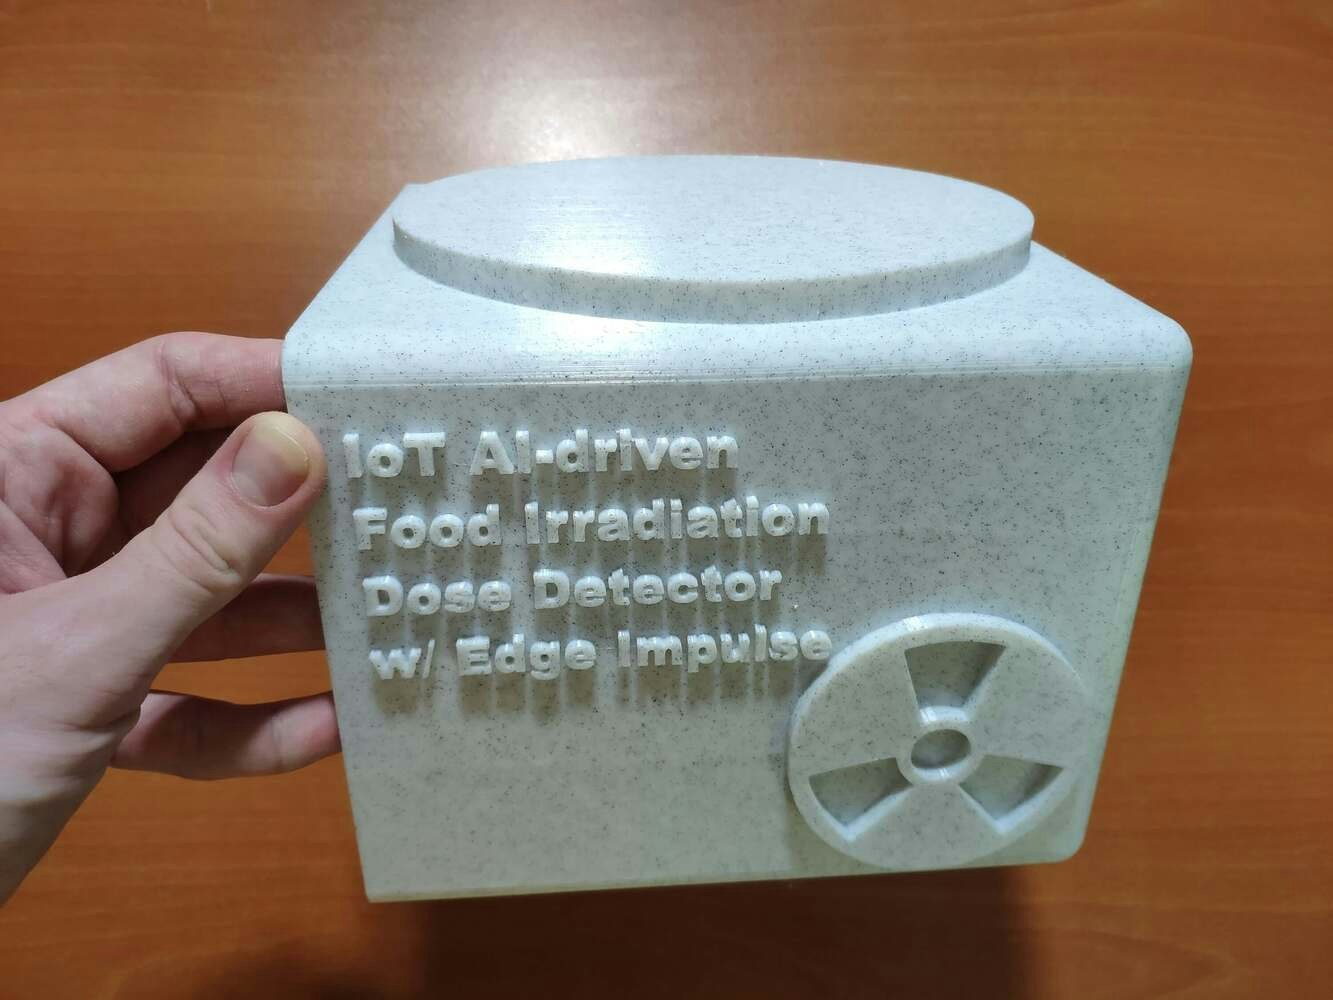
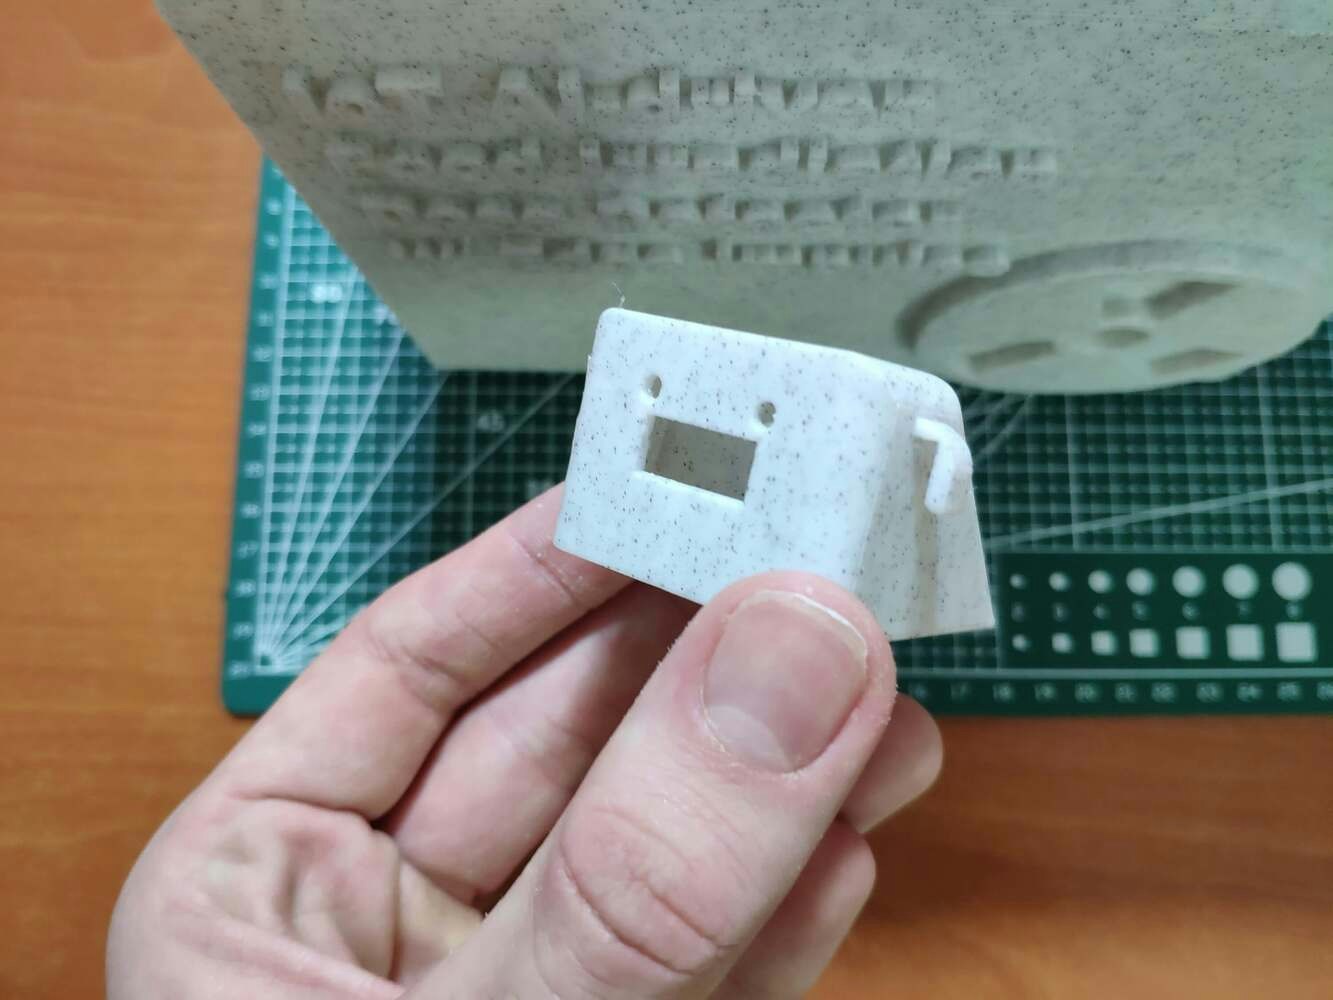
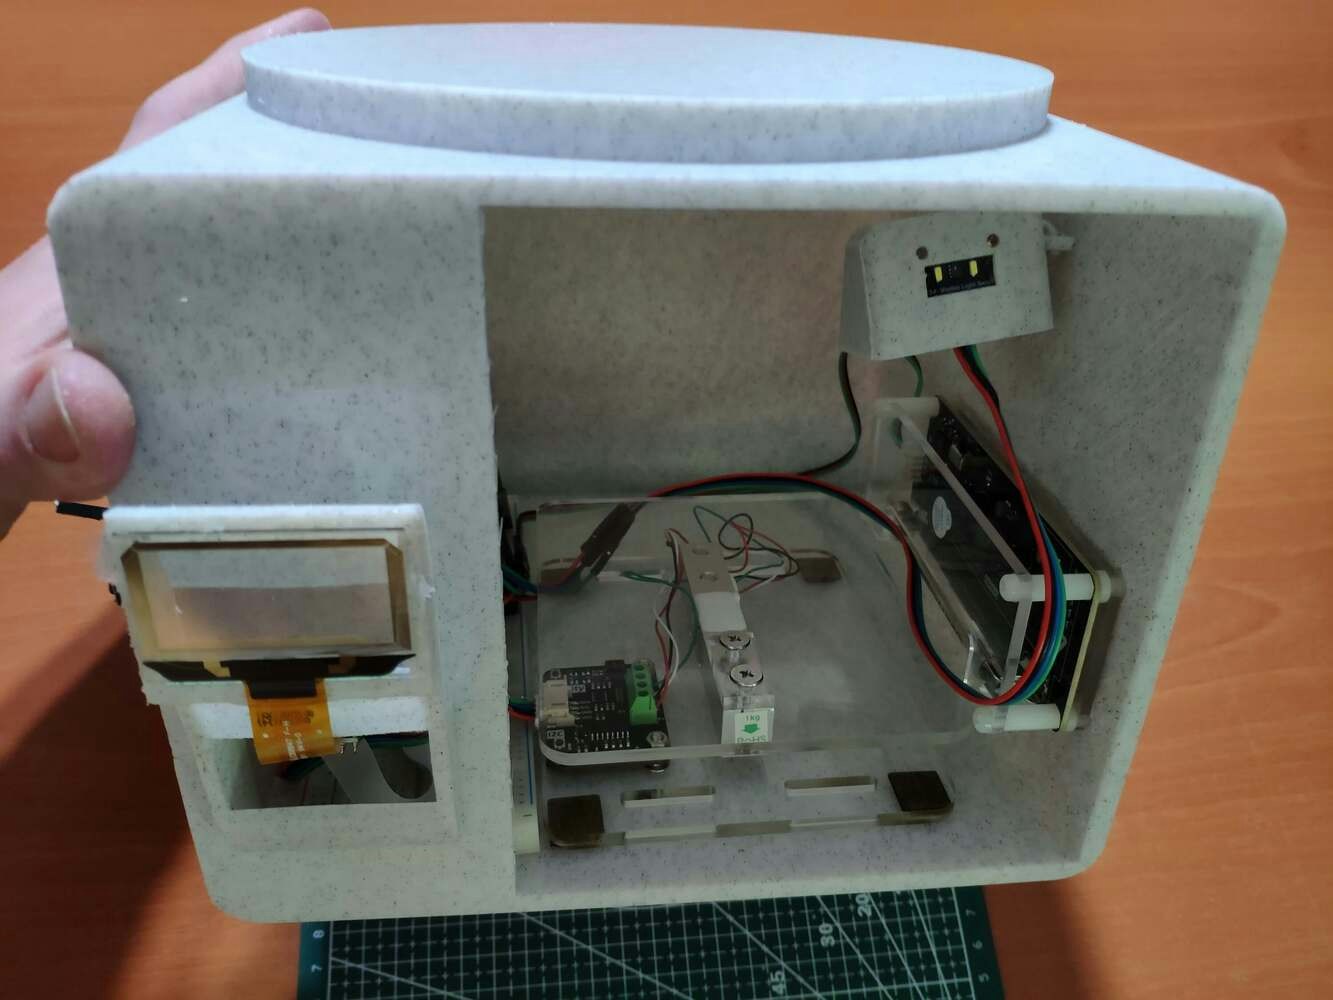
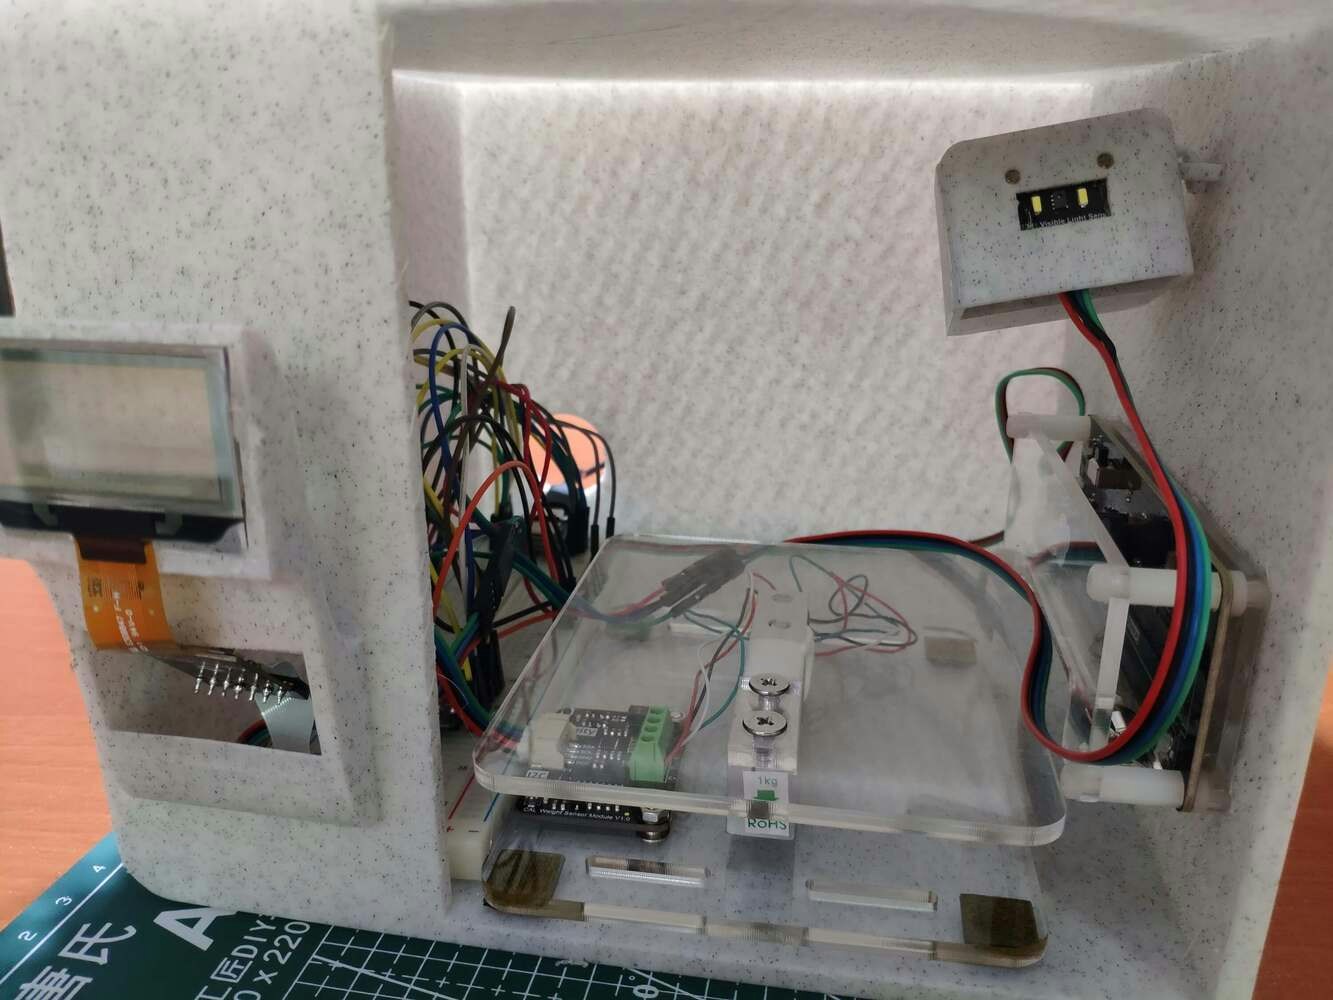
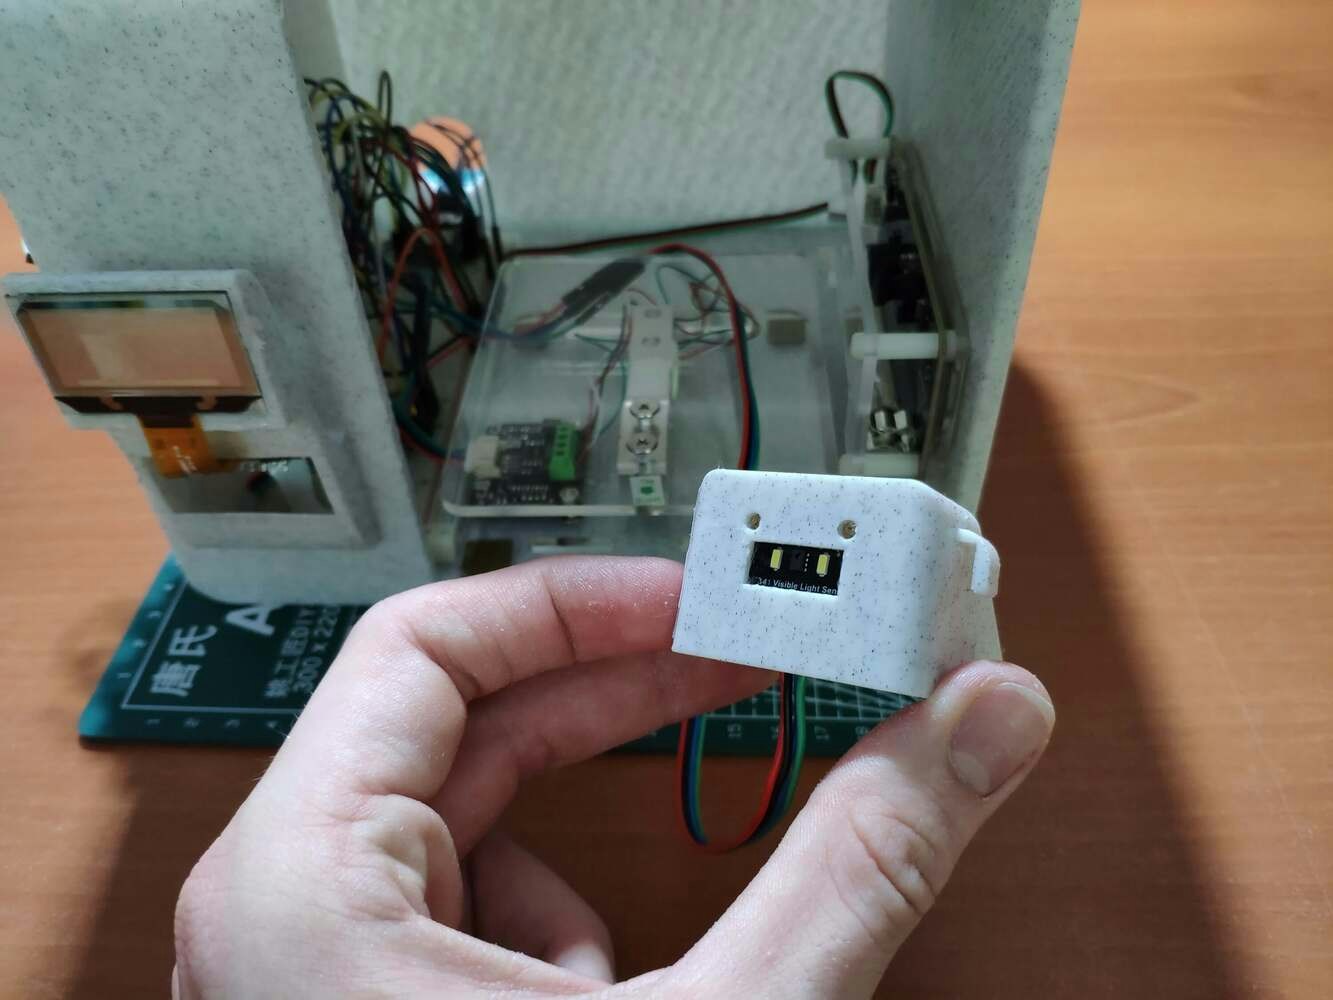
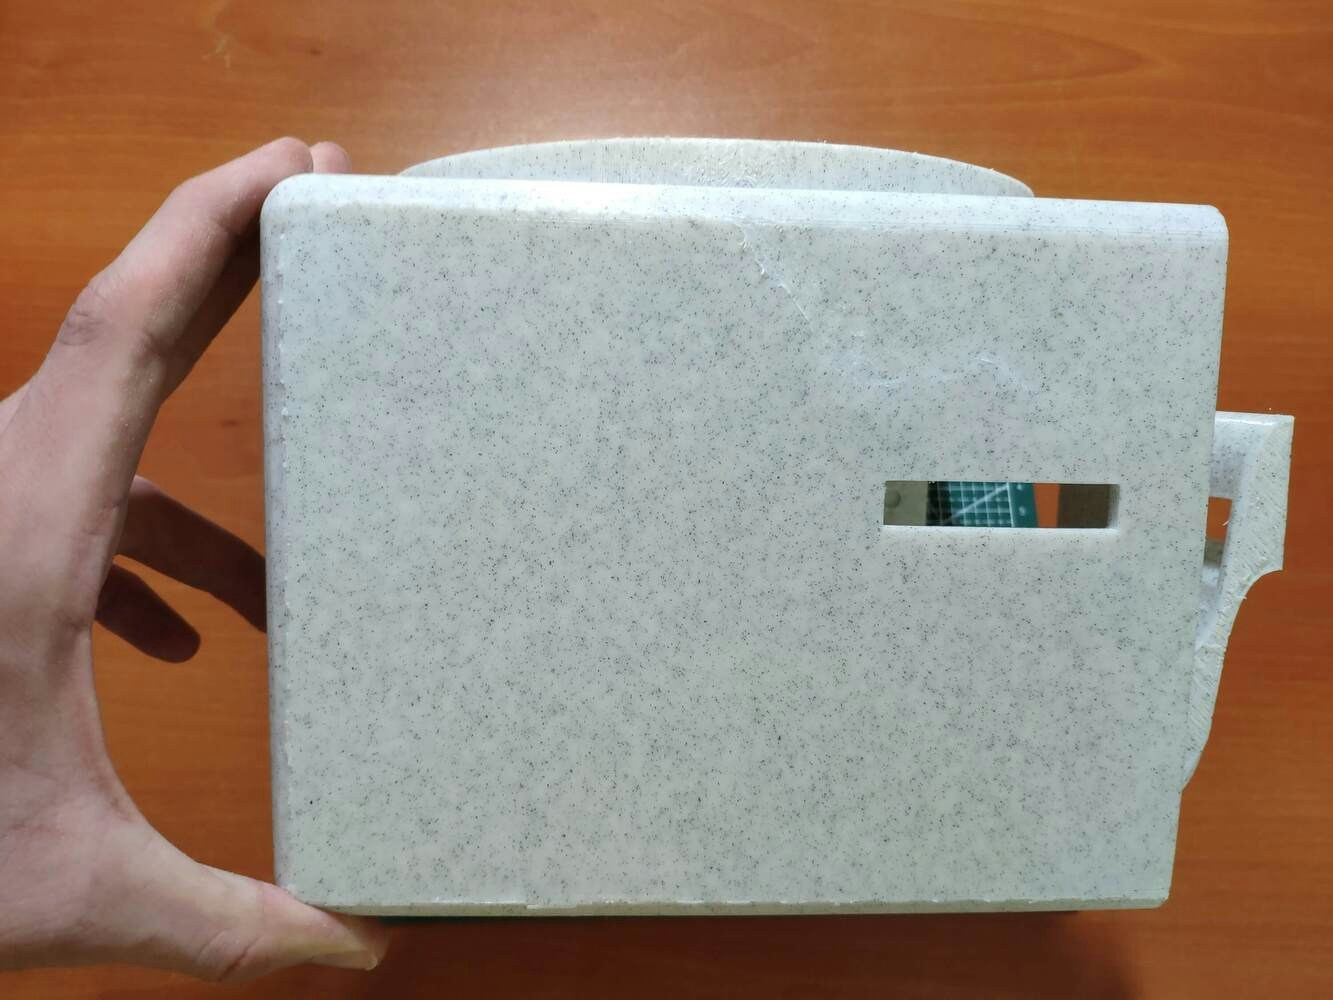
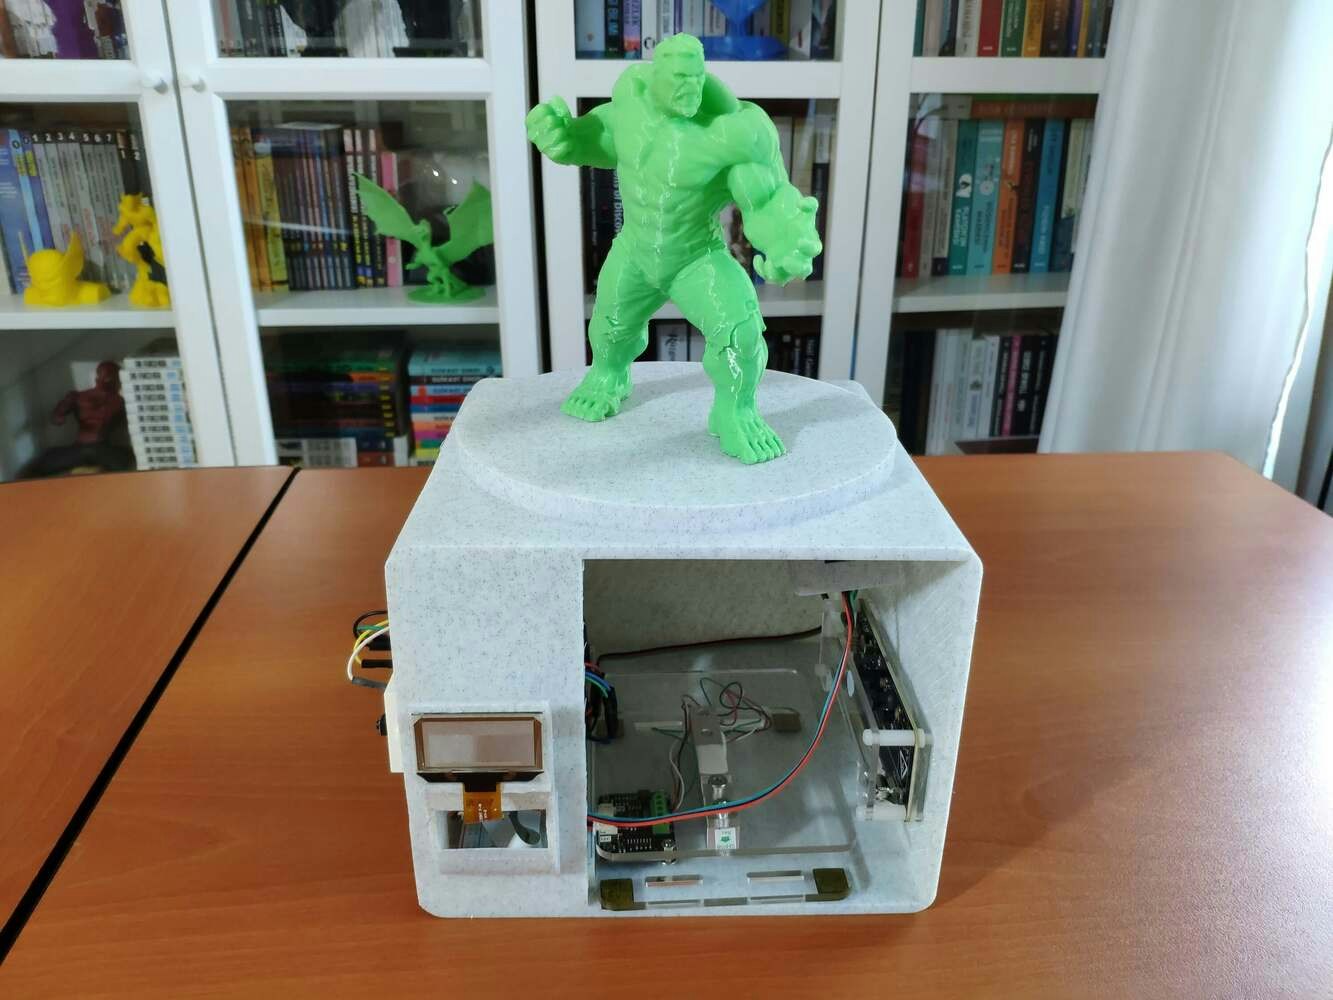
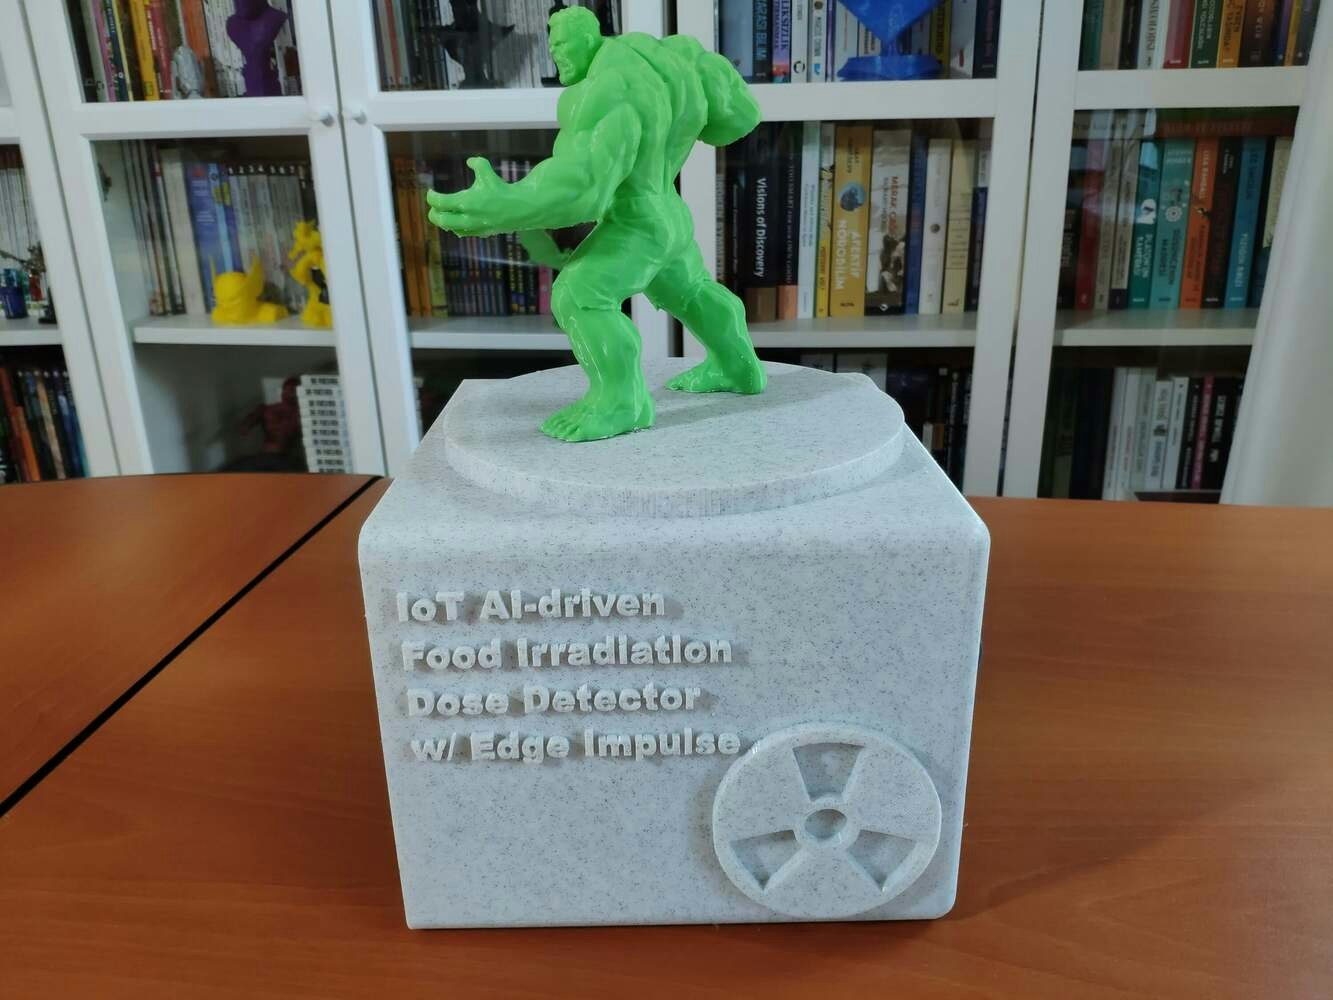
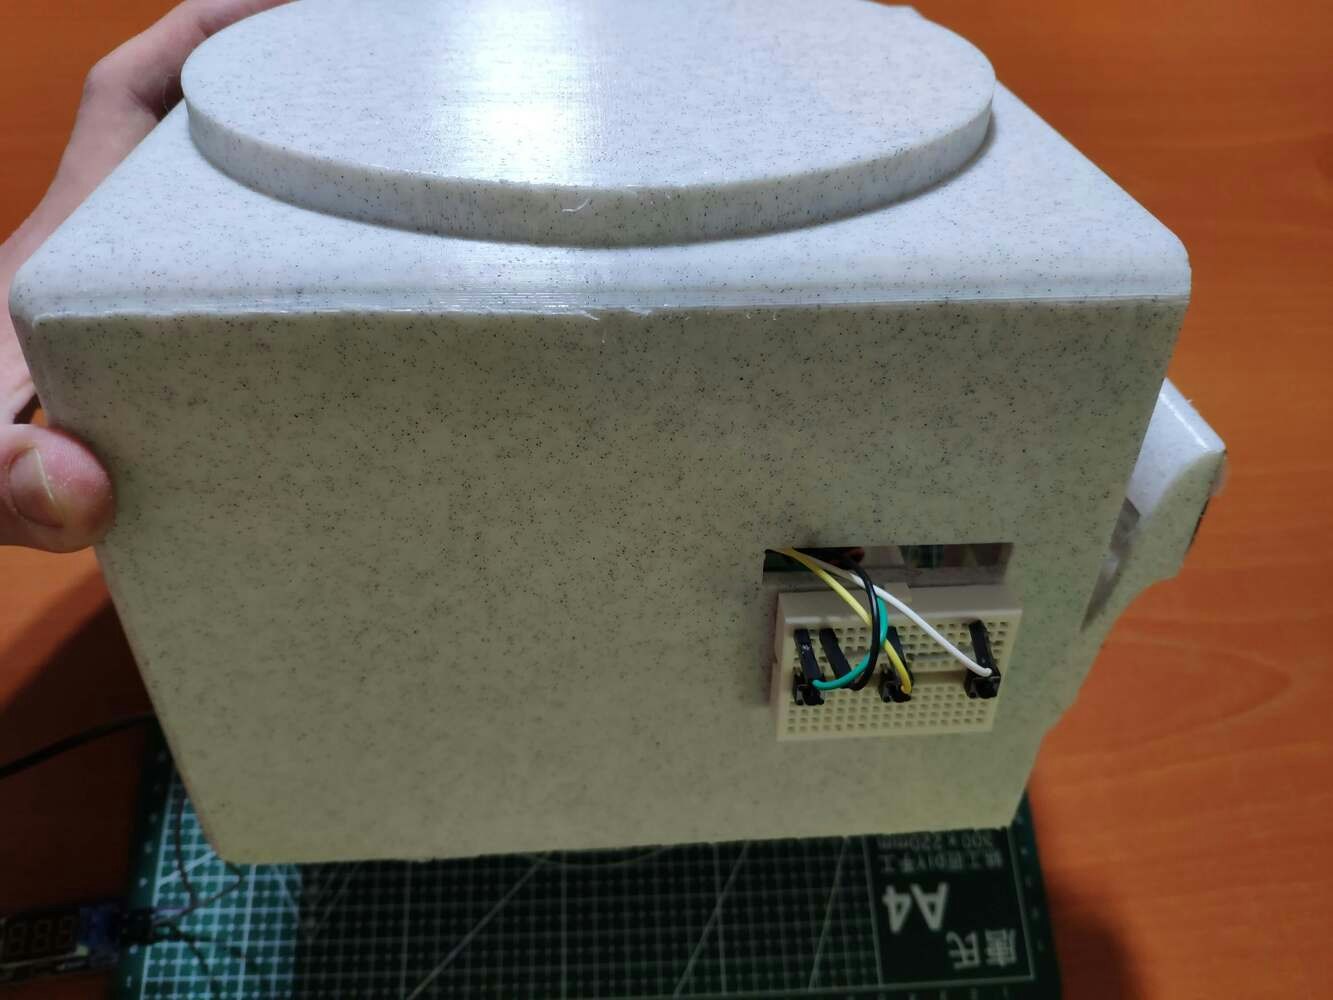 Finally, I affixed the Hulk replica to the top of the structure via the hot glue gun.
 ## Step 2: Developing a web application in PHP to collate data on food irradiation doses
To be able to log and process data packets transmitted by Beetle ESP32-C3, I decided to develop a web application in PHP named *food\_irradiation\_data\_logger*.
As shown below, the web application consists of two folders and five files:
* /assets
* * class.php
* * icon.png
* * index.css
* /data
* get\_data.php
* index.php
I also employed the web application to scale (normalize) and preprocess my data set so as to create appropriately formatted samples for Edge Impulse.
If the data type is not time series, Edge Impulse requires a CSV file with a header indicating data fields per sample to upload data with CSV files. Since Edge Impulse can infer the uploaded sample's label from its file name, the application reads the given data set in the MySQL database and generate a CSV file (sample) for each data record, named according to the assigned food irradiation dose class. Also, the application utilizes the unique row number under the *id* data field as the sample number to identify each generated CSV file:
* Regulated.training.sample\_101.csv
* Unsafe.training.sample\_542.csv
* Hazardous.training.sample\_152.csv
You can download and inspect the web application in the ZIP file format below.
📁 *class.php*
In the *class.php* file, in order to run all functions successfully, I created two classes named *\_main* and *sample*: the latter inherits from the former.
:star: Define the *\_main* class and its functions:
:star: In the ***init*** function, define the required variables for the MySQL database.
```
public function __init__($conn, $table){
$this->conn = $conn;
$this->table = $table;
}
```
:star: In the *insert\_new\_data* function, append the given measurements and food irradiation dose class to the given database table.
```
public function insert_new_data($d1, $d2, $d3, $d4, $d5, $d6, $d7, $d8, $d9, $d10, $d11, $d12, $c){
$sql = "INSERT INTO `$this->table`(`weight`, `f1`, `f2`, `f3`, `f4`, `f5`, `f6`, `f7`, `f8`, `cpm`, `nsv`, `usv`, `class`) VALUES ('$d1', '$d2', '$d3', '$d4', '$d5', '$d6', '$d7', '$d8', '$d9', '$d10', '$d11', '$d12', '$c')";
if(mysqli_query($this->conn, $sql)){ return true; }else { return false; }
}
```
:star: In the *database\_create\_table* function, create the required database table.
```
public function database_create_table(){
// Create a new database table.
$sql_create = "CREATE TABLE `$this->table`(
id int AUTO_INCREMENT PRIMARY KEY NOT NULL,
weight varchar(255) NOT NULL,
f1 varchar(255) NOT NULL,
f2 varchar(255) NOT NULL,
f3 varchar(255) NOT NULL,
f4 varchar(255) NOT NULL,
f5 varchar(255) NOT NULL,
f6 varchar(255) NOT NULL,
f7 varchar(255) NOT NULL,
f8 varchar(255) NOT NULL,
cpm varchar(255) NOT NULL,
nsv varchar(255) NOT NULL,
usv varchar(255) NOT NULL,
`class` varchar(255) NOT NULL
);";
if(mysqli_query($this->conn, $sql_create)) echo("<br><br>Database Table Created Successfully!");
}
```
:star: Define the *sample* class, extending the *\_main* class, and its functions:
:star: Define the food irradiation dose class (label) names.
:star: In the *count\_samples* function, count the registered data records (samples) in the given database table.
```
public $class_names = ["Regulated", "Unsafe", "Hazardous"];
// Count the registered data records (samples) in the given database table.
public function count_samples(){
$count = [
"total" => mysqli_num_rows(mysqli_query($this->conn, "SELECT * FROM `$this->table`")),
"regulated" => mysqli_num_rows(mysqli_query($this->conn, "SELECT * FROM `$this->table` WHERE class='0'")),
"unsafe" => mysqli_num_rows(mysqli_query($this->conn, "SELECT * FROM `$this->table` WHERE class='1'")),
"hazardous" => mysqli_num_rows(mysqli_query($this->conn, "SELECT * FROM `$this->table` WHERE class='2'")),
];
return $count;
}
```
:star: In the *create\_sample\_files* function:
:star: Obtain the registered data records from the given database table.
:star: Scale (normalize) data items to define appropriately formatted inputs in the range of 0-1.
:star: Define the header indicating data elements.
:star: Create an array with the scaled data items.
:star: For each data record, create a CSV file (sample) named with the assigned irradiation dose class and identified with the unique row number under the *id* data field.
:star: Each sample includes twelve data items \[shape=(12,)]:
*\[15.877, 0.25, 0.76, 0.57, 0.8, 1.89, 2.85, 4.65, 3.63, 0.8, 5.31, 0.53]*
```
public function create_sample_files($type){
// Obtain the registered data records (samples) from the given database table.
$sql = "SELECT * FROM `$this->table`";
$result = mysqli_query($this->conn, $sql);
$check = mysqli_num_rows($result);
if($check > 0){
while($row = mysqli_fetch_assoc($result)){
// Scale (normalize) data items to define appropriately formatted inputs (samples).
$scaled = [
"weight" => $row["weight"] / 10,
"f1" => $row["f1"] / 100,
"f2" => $row["f2"] / 100,
"f3" => $row["f3"] / 100,
"f4" => $row["f4"] / 100,
"f5" => $row["f5"] / 100,
"f6" => $row["f6"] / 100,
"f7" => $row["f7"] / 100,
"f8" => $row["f8"] / 100,
"cpm" => $row["cpm"] / 100,
"nsv" => $row["nsv"] / 100,
"usv" => $row["usv"]
];
// Add the header as the first row.
$processed_data = [
['weight','f1','f2','f3','f4','f5','f6','f7','f8','cpm','nsv','usv'],
[$scaled["weight"],$scaled["f1"],$scaled["f2"],$scaled["f3"],$scaled["f4"],$scaled["f5"],$scaled["f6"],$scaled["f7"],$scaled["f8"],$scaled["cpm"],$scaled["nsv"],$scaled["usv"]]
];
$filename = "data/".$this->class_names[$row["class"]].".".$type.".sample_".$row["id"].".csv";
$f = fopen($filename, "w");
foreach($processed_data as $r){
fputcsv($f, $r);
}
fclose($f);
}
}
}
```
:star: In the *download\_samples* function, download all generated CSV files (samples) in the ZIP file format.
```
public function download_samples($zipname){
if(count(scandir("data")) > 2){
$zip = new ZipArchive;
$zip->open($zipname, ZipArchive::CREATE);
foreach(glob("data/*.csv") as $sample){
$zip->addFile($sample);
}
$zip->close();
header('Content-Type: application/zip');
header("Content-Disposition: attachment; filename='$zipname'");
header('Content-Length: ' . filesize($zipname));
header("Location: $zipname");
}else{
header("Location: .");
exit();
}
}
```
:star: Define the required MySQL database connection settings for Raspberry Pi.
```
$server = array(
"name" => "localhost",
"username" => "root",
"password" => "bot",
"database" => "foodirradiation",
"table" => "entries"
);
$conn = mysqli_connect($server["name"], $server["username"], $server["password"], $server["database"]);
```
📁 *get\_data.php*
:star: Include the *class.php* file.
:star: Define the *food* object of the *\_main* class with its required parameters.
```
include_once "assets/class.php";
// Define the new 'food' object:
$food = new _main();
$food->__init__($conn, $server["table"]);
```
:star: Obtain the transferred information from Beetle ESP32-C3.
:star: Then, insert the received measurements into the given database table.
```
if(isset($_GET["weight"]) && isset($_GET["F1"]) && isset($_GET["F2"]) && isset($_GET["F3"]) && isset($_GET["F4"]) && isset($_GET["F5"]) && isset($_GET["F6"]) && isset($_GET["F7"]) && isset($_GET["F8"]) && isset($_GET["CPM"]) && isset($_GET["nSv"]) && isset($_GET["uSv"]) && isset($_GET["class"])){
if($food->insert_new_data($_GET["weight"], $_GET["F1"], $_GET["F2"], $_GET["F3"], $_GET["F4"], $_GET["F5"], $_GET["F6"], $_GET["F7"], $_GET["F8"], $_GET["CPM"], $_GET["nSv"], $_GET["uSv"], $_GET["class"])){
echo("Data received and saved successfully!");
}else{
echo("Database error!");
}
}else{
echo("Waiting Data...");
}
```
:star: If requested, create the required database table *(entries)*.
```
if(isset($_GET["create_table"]) && $_GET["create_table"] == "OK") $food->database_create_table();
```
📁 *index.php*
:star: Include the *class.php* file.
:star: Define the *sample* object of the *sample* class with its required parameters.
```
include_once "assets/class.php";
// Define the new 'sample' object:
$sample = new sample();
$sample->__init__($conn, $server["table"]);
```
:star: Elicit the total number of data records (samples) for classes (labels) in the given database table.
```
$count = $sample->count_samples();
```
:star: If the user requests via the HTML form, create a CSV file (sample) for each data record in the given database table, depending on the selected data type: training or testing.
```
if(isset($_POST["data"]) && $_POST["data"] != ""){
$sample->create_sample_files($_POST["data"]);
}
```
:star: If the *Download* button is clicked, download all generated CSV files (samples) in the ZIP file format.
```
if(isset($_GET["download"])){
$sample->download_samples("data.zip");
}
```
## Step 2: Developing a web application in PHP to collate data on food irradiation doses
To be able to log and process data packets transmitted by Beetle ESP32-C3, I decided to develop a web application in PHP named *food\_irradiation\_data\_logger*.
As shown below, the web application consists of two folders and five files:
* /assets
* * class.php
* * icon.png
* * index.css
* /data
* get\_data.php
* index.php
I also employed the web application to scale (normalize) and preprocess my data set so as to create appropriately formatted samples for Edge Impulse.
If the data type is not time series, Edge Impulse requires a CSV file with a header indicating data fields per sample to upload data with CSV files. Since Edge Impulse can infer the uploaded sample's label from its file name, the application reads the given data set in the MySQL database and generate a CSV file (sample) for each data record, named according to the assigned food irradiation dose class. Also, the application utilizes the unique row number under the *id* data field as the sample number to identify each generated CSV file:
* Regulated.training.sample\_101.csv
* Unsafe.training.sample\_542.csv
* Hazardous.training.sample\_152.csv
You can download and inspect the web application in the ZIP file format below.
📁 *class.php*
In the *class.php* file, in order to run all functions successfully, I created two classes named *\_main* and *sample*: the latter inherits from the former.
:star: Define the *\_main* class and its functions:
:star: In the ***init*** function, define the required variables for the MySQL database.
```
public function __init__($conn, $table){
$this->conn = $conn;
$this->table = $table;
}
```
:star: In the *insert\_new\_data* function, append the given measurements and food irradiation dose class to the given database table.
```
public function insert_new_data($d1, $d2, $d3, $d4, $d5, $d6, $d7, $d8, $d9, $d10, $d11, $d12, $c){
$sql = "INSERT INTO `$this->table`(`weight`, `f1`, `f2`, `f3`, `f4`, `f5`, `f6`, `f7`, `f8`, `cpm`, `nsv`, `usv`, `class`) VALUES ('$d1', '$d2', '$d3', '$d4', '$d5', '$d6', '$d7', '$d8', '$d9', '$d10', '$d11', '$d12', '$c')";
if(mysqli_query($this->conn, $sql)){ return true; }else { return false; }
}
```
:star: In the *database\_create\_table* function, create the required database table.
```
public function database_create_table(){
// Create a new database table.
$sql_create = "CREATE TABLE `$this->table`(
id int AUTO_INCREMENT PRIMARY KEY NOT NULL,
weight varchar(255) NOT NULL,
f1 varchar(255) NOT NULL,
f2 varchar(255) NOT NULL,
f3 varchar(255) NOT NULL,
f4 varchar(255) NOT NULL,
f5 varchar(255) NOT NULL,
f6 varchar(255) NOT NULL,
f7 varchar(255) NOT NULL,
f8 varchar(255) NOT NULL,
cpm varchar(255) NOT NULL,
nsv varchar(255) NOT NULL,
usv varchar(255) NOT NULL,
`class` varchar(255) NOT NULL
);";
if(mysqli_query($this->conn, $sql_create)) echo("<br><br>Database Table Created Successfully!");
}
```
:star: Define the *sample* class, extending the *\_main* class, and its functions:
:star: Define the food irradiation dose class (label) names.
:star: In the *count\_samples* function, count the registered data records (samples) in the given database table.
```
public $class_names = ["Regulated", "Unsafe", "Hazardous"];
// Count the registered data records (samples) in the given database table.
public function count_samples(){
$count = [
"total" => mysqli_num_rows(mysqli_query($this->conn, "SELECT * FROM `$this->table`")),
"regulated" => mysqli_num_rows(mysqli_query($this->conn, "SELECT * FROM `$this->table` WHERE class='0'")),
"unsafe" => mysqli_num_rows(mysqli_query($this->conn, "SELECT * FROM `$this->table` WHERE class='1'")),
"hazardous" => mysqli_num_rows(mysqli_query($this->conn, "SELECT * FROM `$this->table` WHERE class='2'")),
];
return $count;
}
```
:star: In the *create\_sample\_files* function:
:star: Obtain the registered data records from the given database table.
:star: Scale (normalize) data items to define appropriately formatted inputs in the range of 0-1.
:star: Define the header indicating data elements.
:star: Create an array with the scaled data items.
:star: For each data record, create a CSV file (sample) named with the assigned irradiation dose class and identified with the unique row number under the *id* data field.
:star: Each sample includes twelve data items \[shape=(12,)]:
*\[15.877, 0.25, 0.76, 0.57, 0.8, 1.89, 2.85, 4.65, 3.63, 0.8, 5.31, 0.53]*
```
public function create_sample_files($type){
// Obtain the registered data records (samples) from the given database table.
$sql = "SELECT * FROM `$this->table`";
$result = mysqli_query($this->conn, $sql);
$check = mysqli_num_rows($result);
if($check > 0){
while($row = mysqli_fetch_assoc($result)){
// Scale (normalize) data items to define appropriately formatted inputs (samples).
$scaled = [
"weight" => $row["weight"] / 10,
"f1" => $row["f1"] / 100,
"f2" => $row["f2"] / 100,
"f3" => $row["f3"] / 100,
"f4" => $row["f4"] / 100,
"f5" => $row["f5"] / 100,
"f6" => $row["f6"] / 100,
"f7" => $row["f7"] / 100,
"f8" => $row["f8"] / 100,
"cpm" => $row["cpm"] / 100,
"nsv" => $row["nsv"] / 100,
"usv" => $row["usv"]
];
// Add the header as the first row.
$processed_data = [
['weight','f1','f2','f3','f4','f5','f6','f7','f8','cpm','nsv','usv'],
[$scaled["weight"],$scaled["f1"],$scaled["f2"],$scaled["f3"],$scaled["f4"],$scaled["f5"],$scaled["f6"],$scaled["f7"],$scaled["f8"],$scaled["cpm"],$scaled["nsv"],$scaled["usv"]]
];
$filename = "data/".$this->class_names[$row["class"]].".".$type.".sample_".$row["id"].".csv";
$f = fopen($filename, "w");
foreach($processed_data as $r){
fputcsv($f, $r);
}
fclose($f);
}
}
}
```
:star: In the *download\_samples* function, download all generated CSV files (samples) in the ZIP file format.
```
public function download_samples($zipname){
if(count(scandir("data")) > 2){
$zip = new ZipArchive;
$zip->open($zipname, ZipArchive::CREATE);
foreach(glob("data/*.csv") as $sample){
$zip->addFile($sample);
}
$zip->close();
header('Content-Type: application/zip');
header("Content-Disposition: attachment; filename='$zipname'");
header('Content-Length: ' . filesize($zipname));
header("Location: $zipname");
}else{
header("Location: .");
exit();
}
}
```
:star: Define the required MySQL database connection settings for Raspberry Pi.
```
$server = array(
"name" => "localhost",
"username" => "root",
"password" => "bot",
"database" => "foodirradiation",
"table" => "entries"
);
$conn = mysqli_connect($server["name"], $server["username"], $server["password"], $server["database"]);
```
📁 *get\_data.php*
:star: Include the *class.php* file.
:star: Define the *food* object of the *\_main* class with its required parameters.
```
include_once "assets/class.php";
// Define the new 'food' object:
$food = new _main();
$food->__init__($conn, $server["table"]);
```
:star: Obtain the transferred information from Beetle ESP32-C3.
:star: Then, insert the received measurements into the given database table.
```
if(isset($_GET["weight"]) && isset($_GET["F1"]) && isset($_GET["F2"]) && isset($_GET["F3"]) && isset($_GET["F4"]) && isset($_GET["F5"]) && isset($_GET["F6"]) && isset($_GET["F7"]) && isset($_GET["F8"]) && isset($_GET["CPM"]) && isset($_GET["nSv"]) && isset($_GET["uSv"]) && isset($_GET["class"])){
if($food->insert_new_data($_GET["weight"], $_GET["F1"], $_GET["F2"], $_GET["F3"], $_GET["F4"], $_GET["F5"], $_GET["F6"], $_GET["F7"], $_GET["F8"], $_GET["CPM"], $_GET["nSv"], $_GET["uSv"], $_GET["class"])){
echo("Data received and saved successfully!");
}else{
echo("Database error!");
}
}else{
echo("Waiting Data...");
}
```
:star: If requested, create the required database table *(entries)*.
```
if(isset($_GET["create_table"]) && $_GET["create_table"] == "OK") $food->database_create_table();
```
📁 *index.php*
:star: Include the *class.php* file.
:star: Define the *sample* object of the *sample* class with its required parameters.
```
include_once "assets/class.php";
// Define the new 'sample' object:
$sample = new sample();
$sample->__init__($conn, $server["table"]);
```
:star: Elicit the total number of data records (samples) for classes (labels) in the given database table.
```
$count = $sample->count_samples();
```
:star: If the user requests via the HTML form, create a CSV file (sample) for each data record in the given database table, depending on the selected data type: training or testing.
```
if(isset($_POST["data"]) && $_POST["data"] != ""){
$sample->create_sample_files($_POST["data"]);
}
```
:star: If the *Download* button is clicked, download all generated CSV files (samples) in the ZIP file format.
```
if(isset($_GET["download"])){
$sample->download_samples("data.zip");
}
```


 ## Step 3: Setting up a LAMP web server on Raspberry Pi
Since I decided to host my web application on a Raspberry Pi 3, I needed to set up a LAMP web server.
:hash: First of all, open a terminal window by selecting *Accessories ➡ Terminal* from the menu.
:hash: Then, install the *apache2* package by typing the following command into the terminal and pressing Enter:
*sudo apt-get install apache2 -y*
## Step 3: Setting up a LAMP web server on Raspberry Pi
Since I decided to host my web application on a Raspberry Pi 3, I needed to set up a LAMP web server.
:hash: First of all, open a terminal window by selecting *Accessories ➡ Terminal* from the menu.
:hash: Then, install the *apache2* package by typing the following command into the terminal and pressing Enter:
*sudo apt-get install apache2 -y*
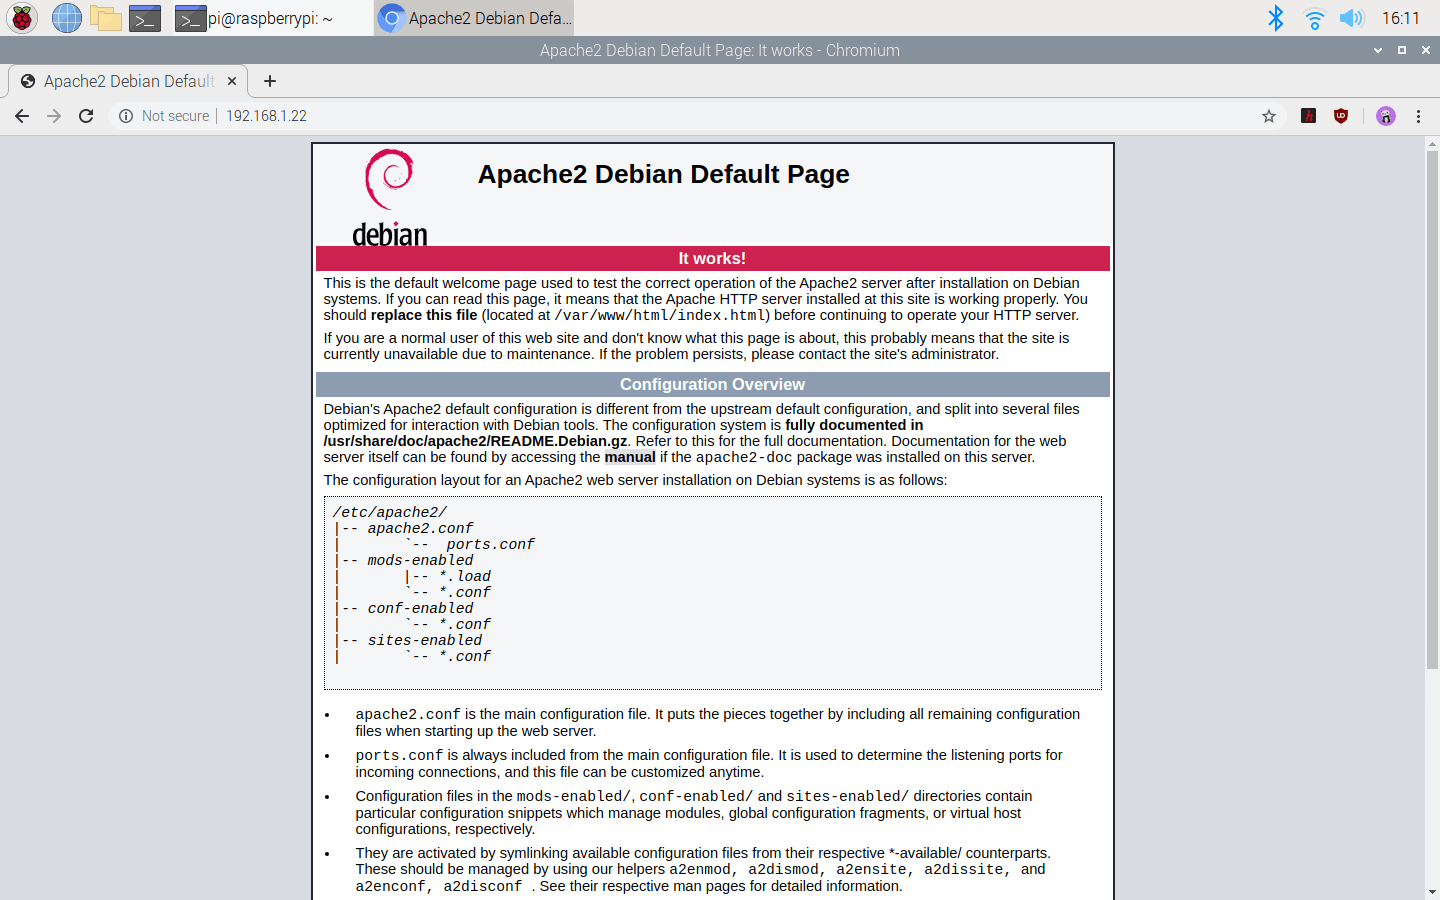
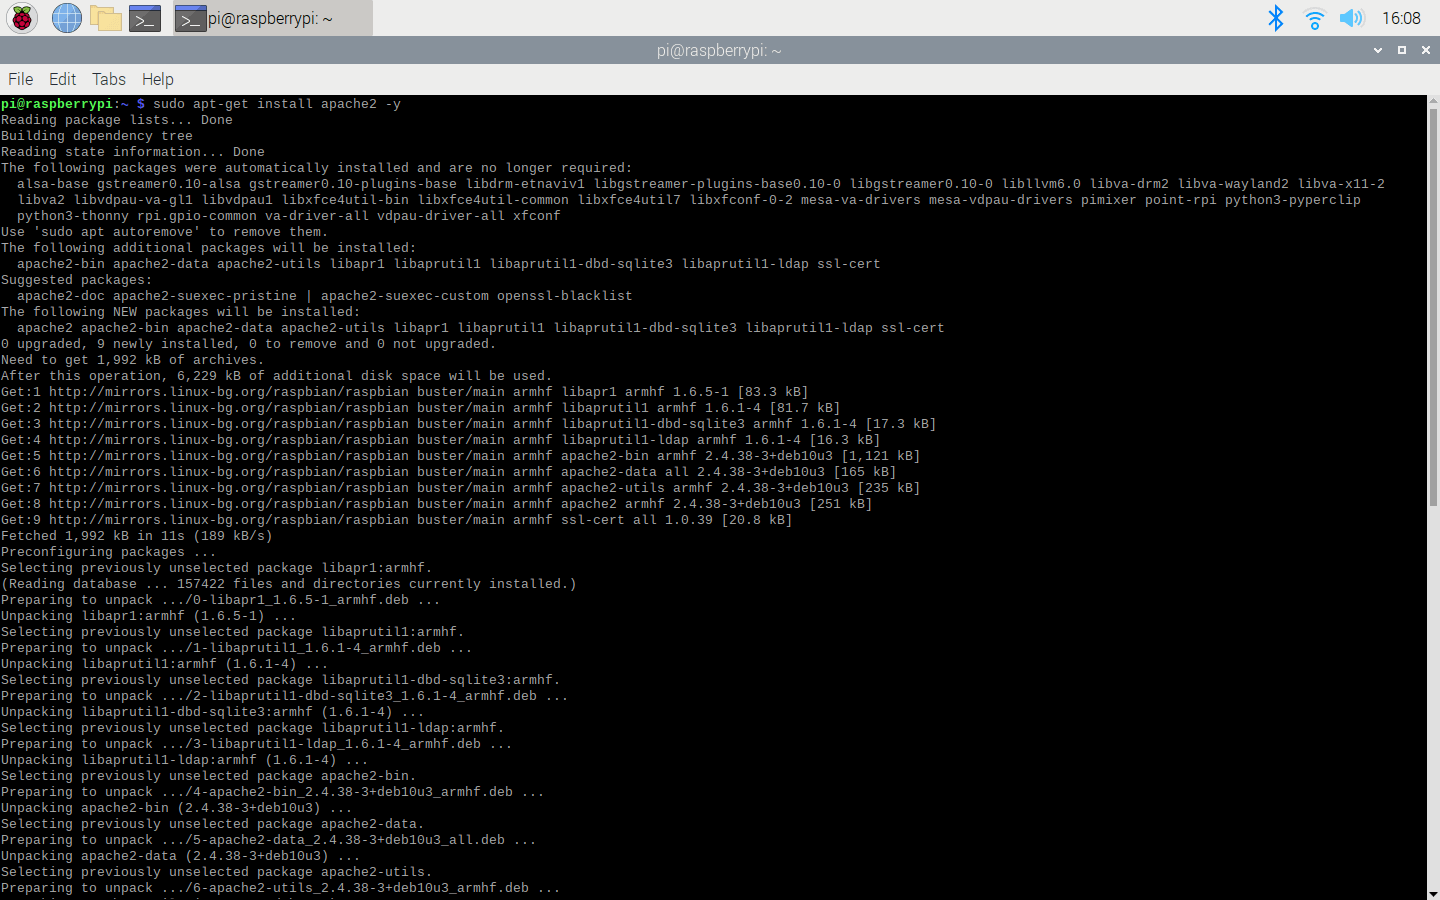 :hash: After installing the *apache2* package successfully, open Chromium Web Browser and navigate to *localhost* so as to test the web server.
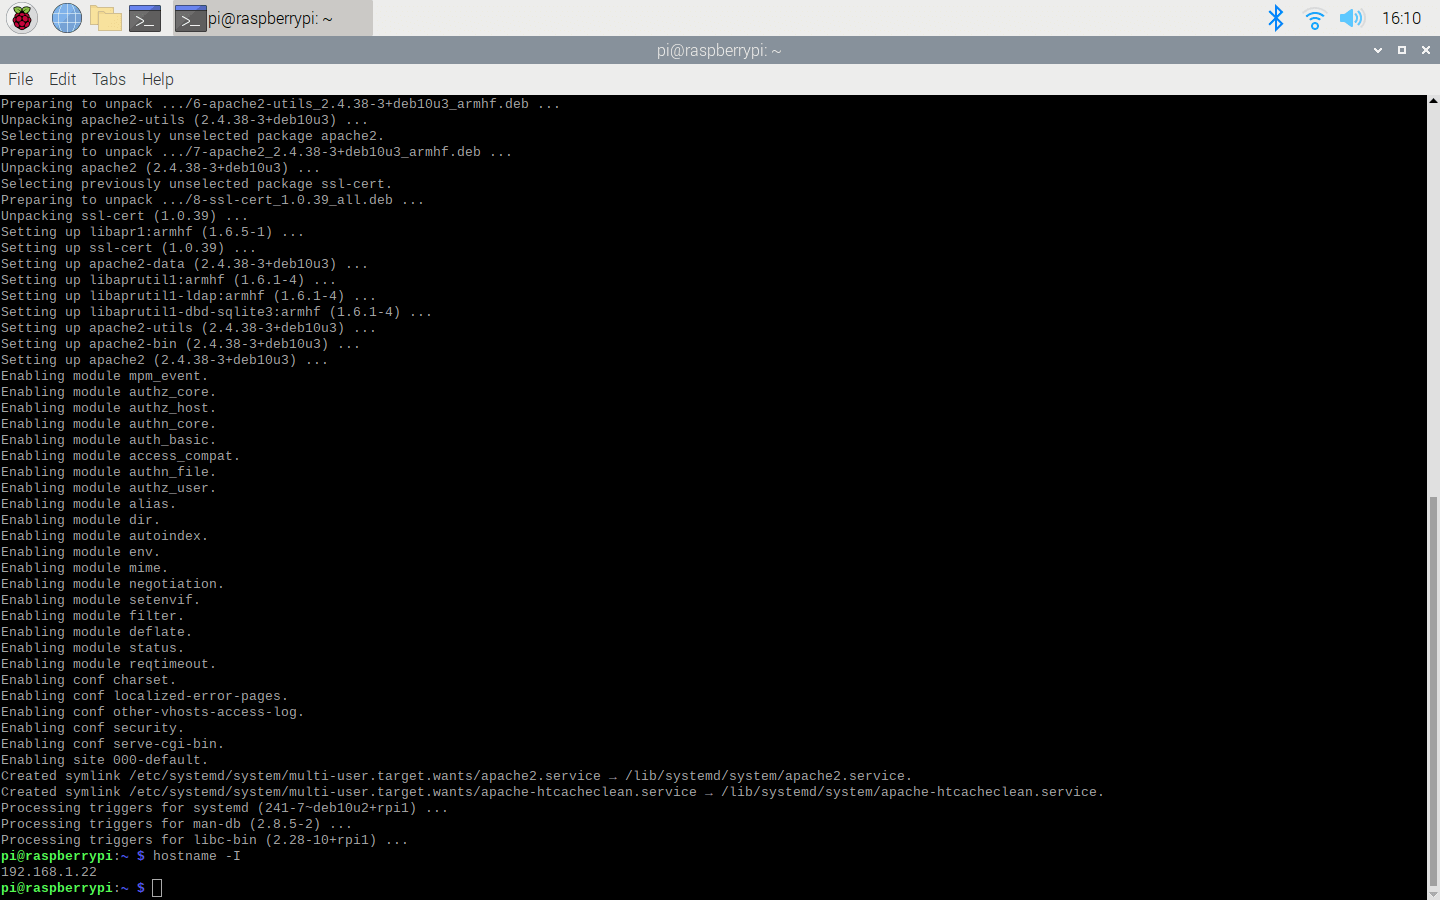
:hash: Then, enter the command below to the terminal to obtain the Raspberry Pi's IP address:
*hostname -I*
:hash: After installing the *apache2* package successfully, open Chromium Web Browser and navigate to *localhost* so as to test the web server.
:hash: Then, enter the command below to the terminal to obtain the Raspberry Pi's IP address:
*hostname -I*
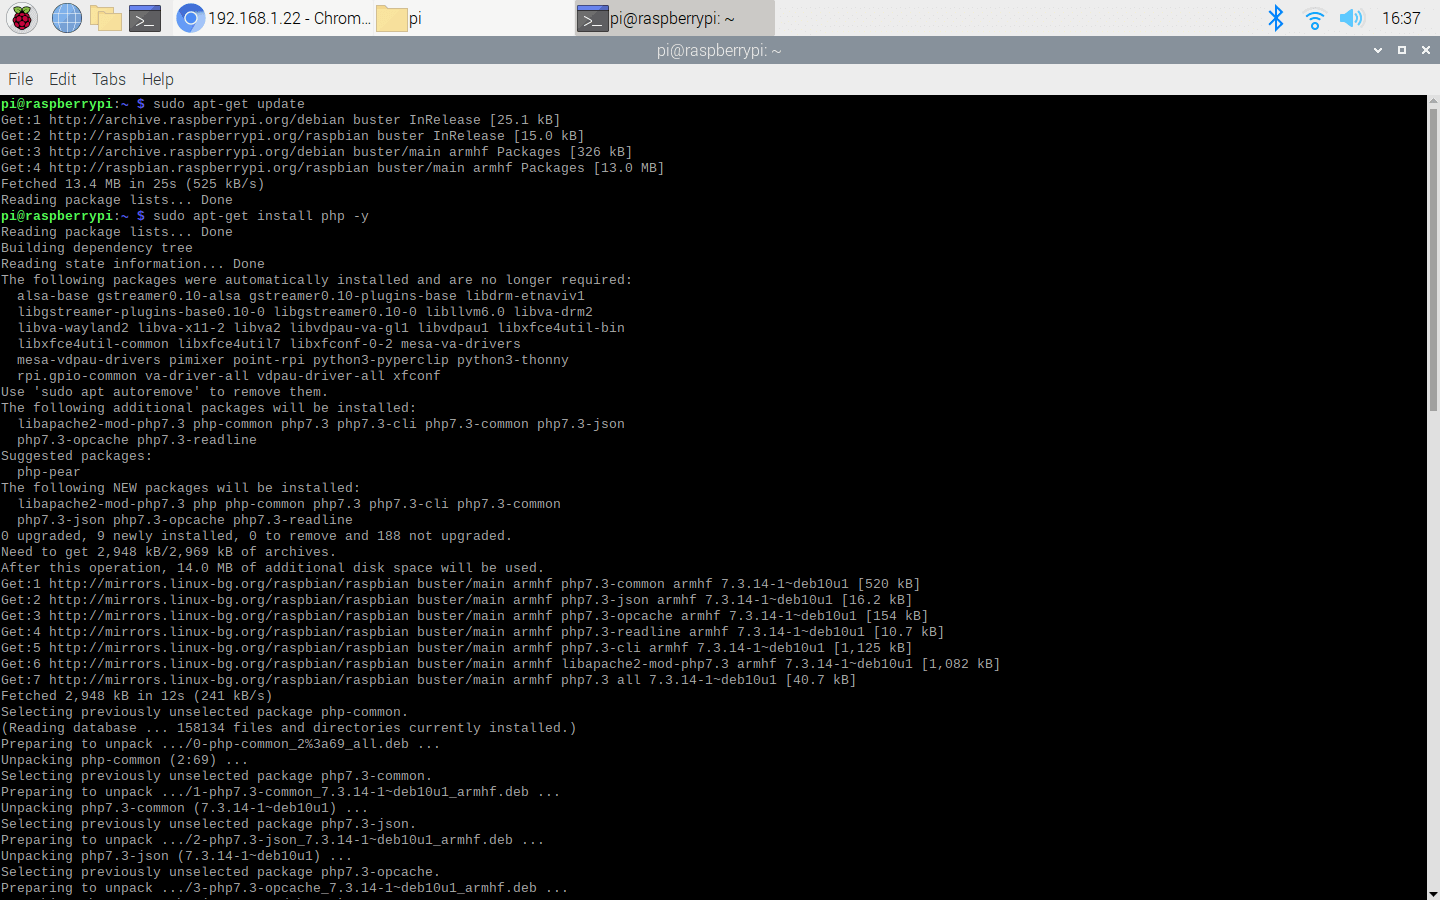
 :hash: To install the latest package versions successfully, update the Pi. Then, download the *PHP* package by entering these commands below to the terminal:
*sudo apt-get update*
*sudo apt-get install php -y*
:hash: To install the latest package versions successfully, update the Pi. Then, download the *PHP* package by entering these commands below to the terminal:
*sudo apt-get update*
*sudo apt-get install php -y*
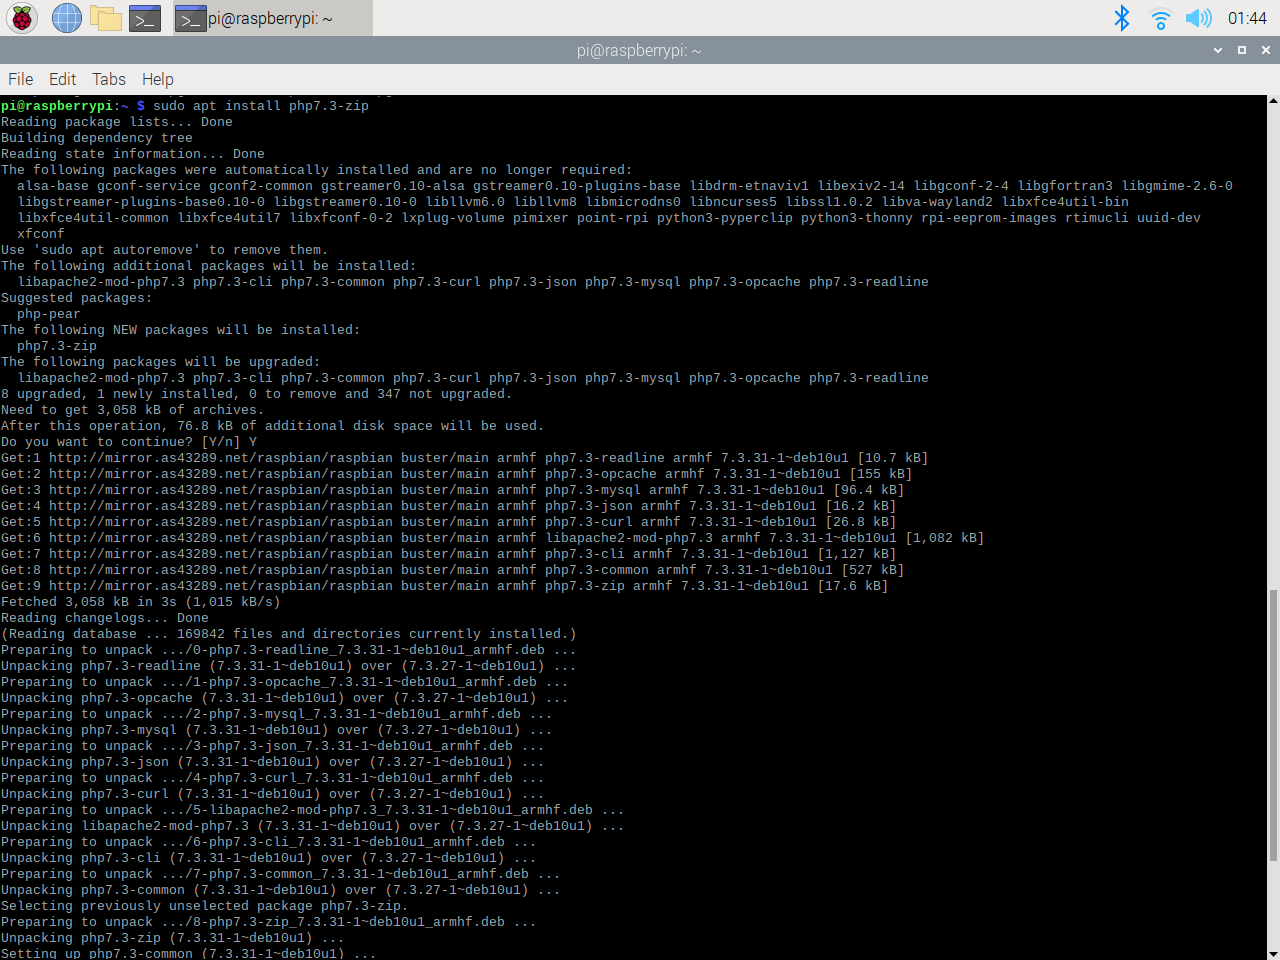
 :hash: To be able to create files in the ZIP file format with the web application, install the *php-zip* package:
*sudo apt install php7.3-zip*
:hash: To be able to create files in the ZIP file format with the web application, install the *php-zip* package:
*sudo apt install php7.3-zip*
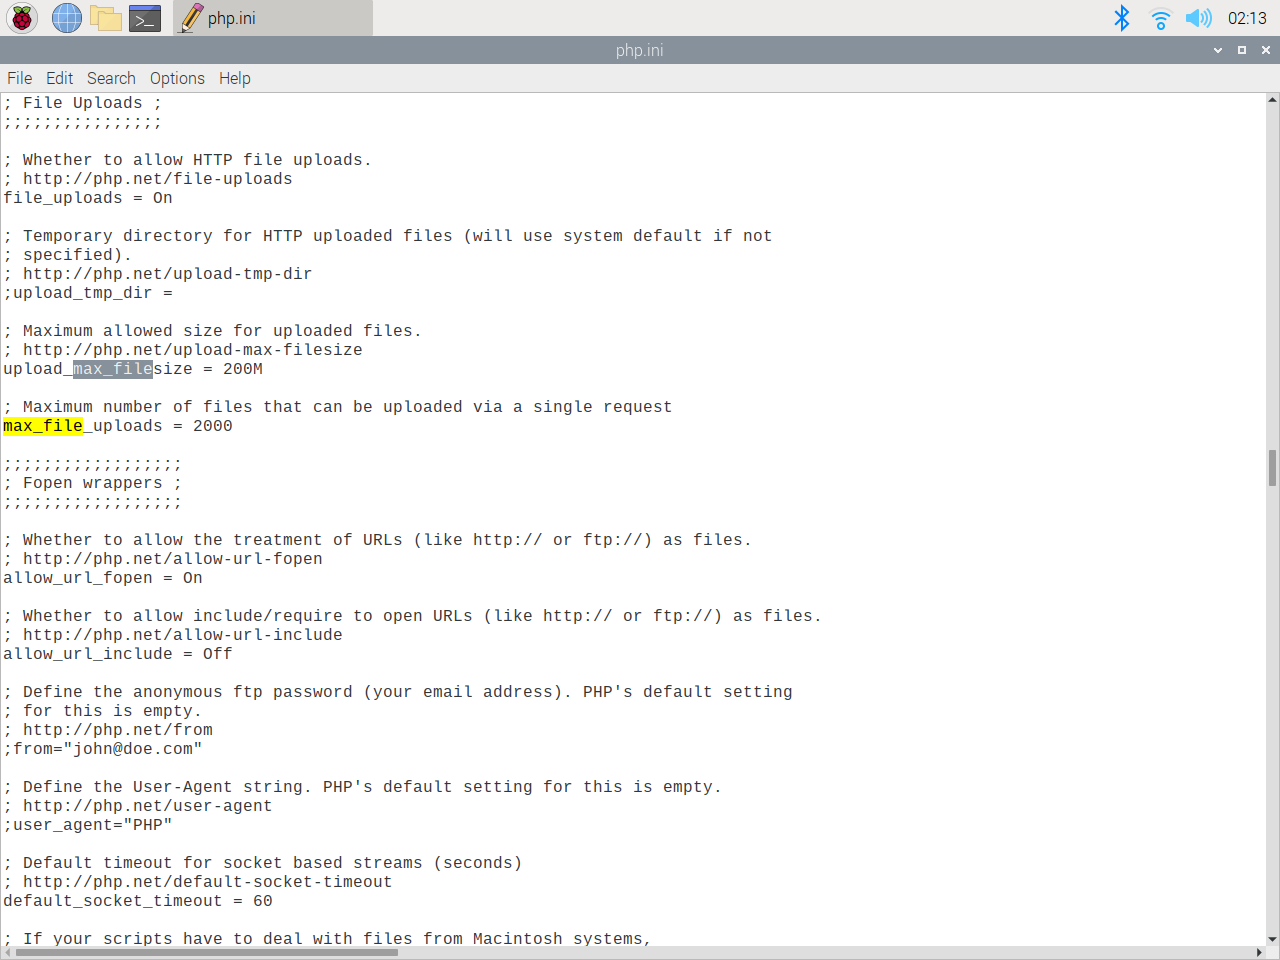
 :hash: Since the web application creates a large ZIP file with the generated CSV files (samples), open the *php.ini* file in order to modify these configurations:
* upload\_max\_filesize
* max\_file\_uploads
:hash: Then, restart the *apache* server to activate the installed packages on the web server:
*sudo service apache2 restart*
:hash: Since the web application creates a large ZIP file with the generated CSV files (samples), open the *php.ini* file in order to modify these configurations:
* upload\_max\_filesize
* max\_file\_uploads
:hash: Then, restart the *apache* server to activate the installed packages on the web server:
*sudo service apache2 restart*
 ## Step 3.1: Creating a MySQL database in MariaDB
Since I needed to log measurements transmitted by Beetle ESP32-C3 so as to create appropriately formatted samples for Edge Impulse, I also set up a MariaDB server on Raspberry Pi 3.
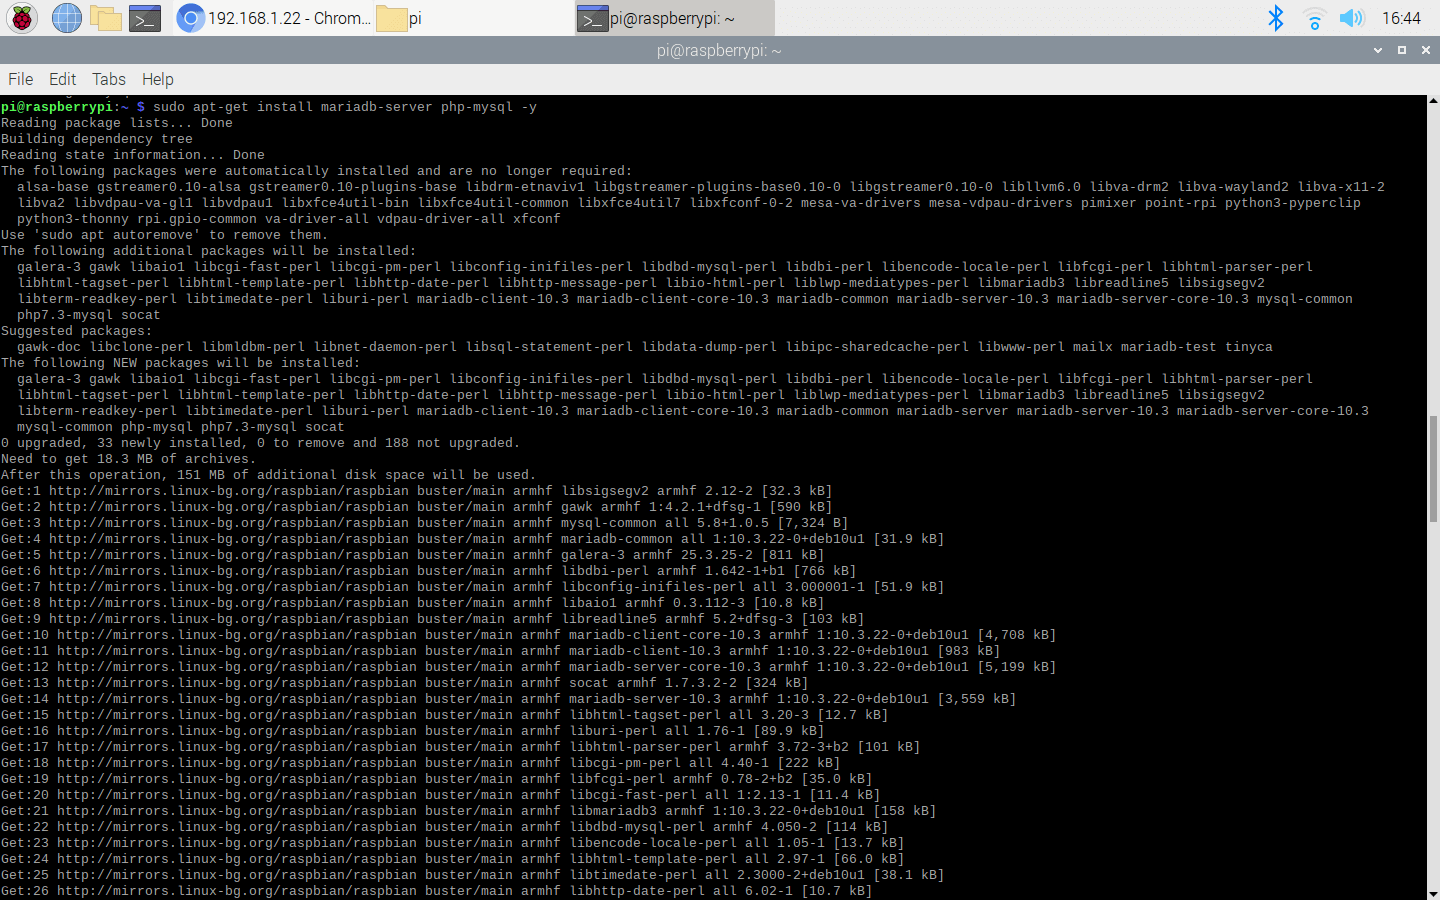
:hash: First of all, install the MariaDB (MySQL) server and *PHP-MySQL* packages by entering the following command into the terminal:
*sudo apt-get install mariadb-server php-mysql -y*
## Step 3.1: Creating a MySQL database in MariaDB
Since I needed to log measurements transmitted by Beetle ESP32-C3 so as to create appropriately formatted samples for Edge Impulse, I also set up a MariaDB server on Raspberry Pi 3.
:hash: First of all, install the MariaDB (MySQL) server and *PHP-MySQL* packages by entering the following command into the terminal:
*sudo apt-get install mariadb-server php-mysql -y*
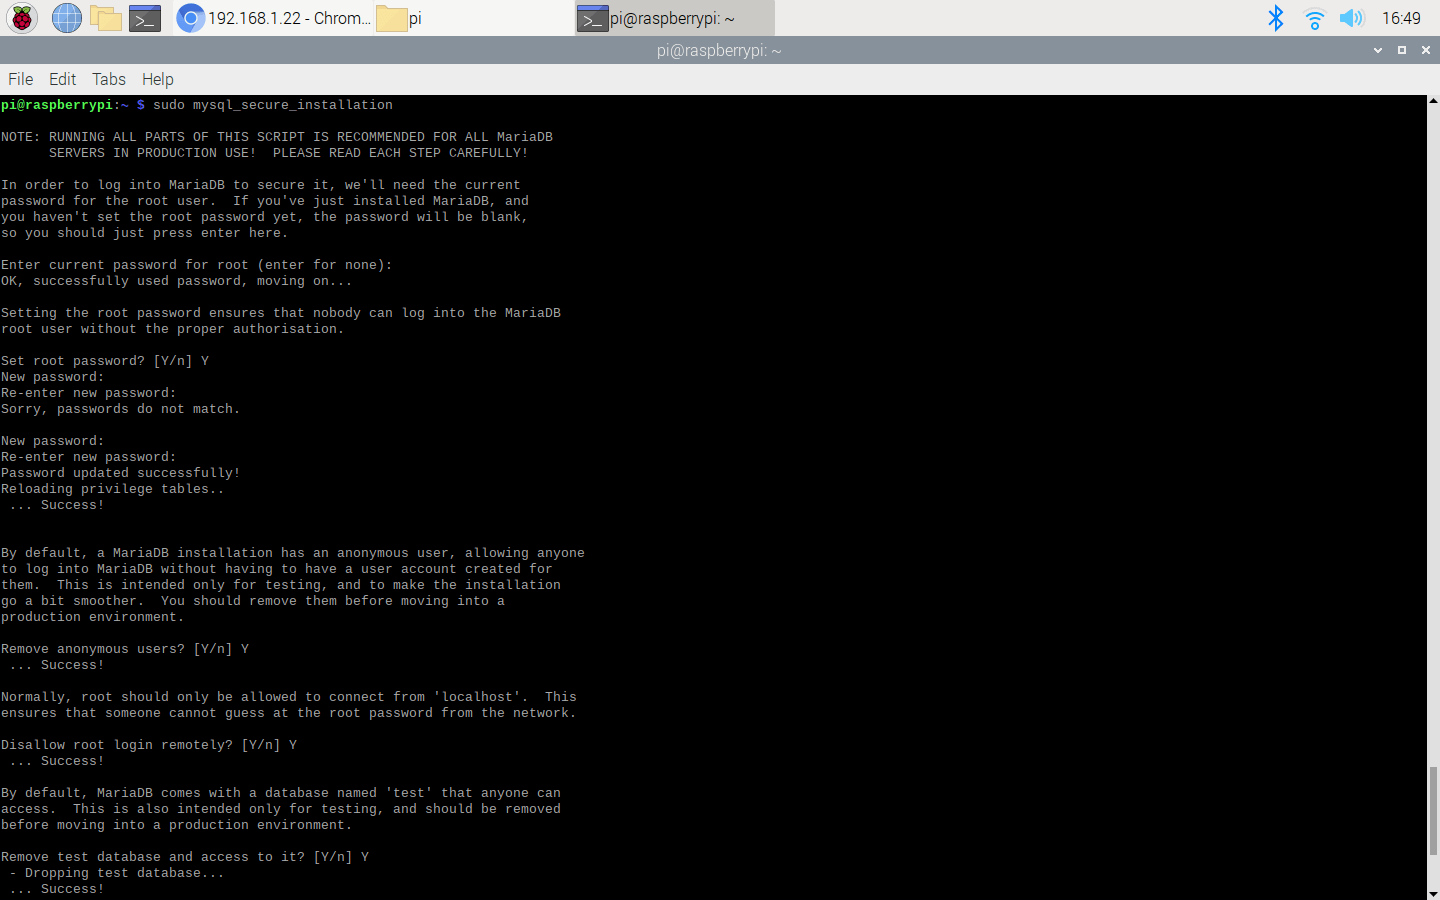
 :hash: To create a new user, run the MySQL secure installation command in the terminal window:
*sudo mysql\_secure\_installation*
:hash: When requested, type the current password for the root user (enter for none). Then, press Enter.
:hash: Type in Y and press Enter to set the root password.
:hash: Type in *bot* at the *New password:* prompt, and press Enter.
:hash: Type in Y to remove anonymous users.
:hash: Type in Y to disallow root login remotely.
:hash: Type in Y to remove the test database and its access permissions.
:hash: Type in Y to reload privilege tables.
:hash: After successfully setting the MariaDB server, the terminal prints: *All done! Thanks for using MariaDB!*
:hash: To create a new user, run the MySQL secure installation command in the terminal window:
*sudo mysql\_secure\_installation*
:hash: When requested, type the current password for the root user (enter for none). Then, press Enter.
:hash: Type in Y and press Enter to set the root password.
:hash: Type in *bot* at the *New password:* prompt, and press Enter.
:hash: Type in Y to remove anonymous users.
:hash: Type in Y to disallow root login remotely.
:hash: Type in Y to remove the test database and its access permissions.
:hash: Type in Y to reload privilege tables.
:hash: After successfully setting the MariaDB server, the terminal prints: *All done! Thanks for using MariaDB!*
 :hash: Finally, to create a new database in the MariaDB server, run the MySQL interface in the terminal:
*sudo mysql -uroot -p*
:hash: Then, enter the recently changed root password - *bot*.
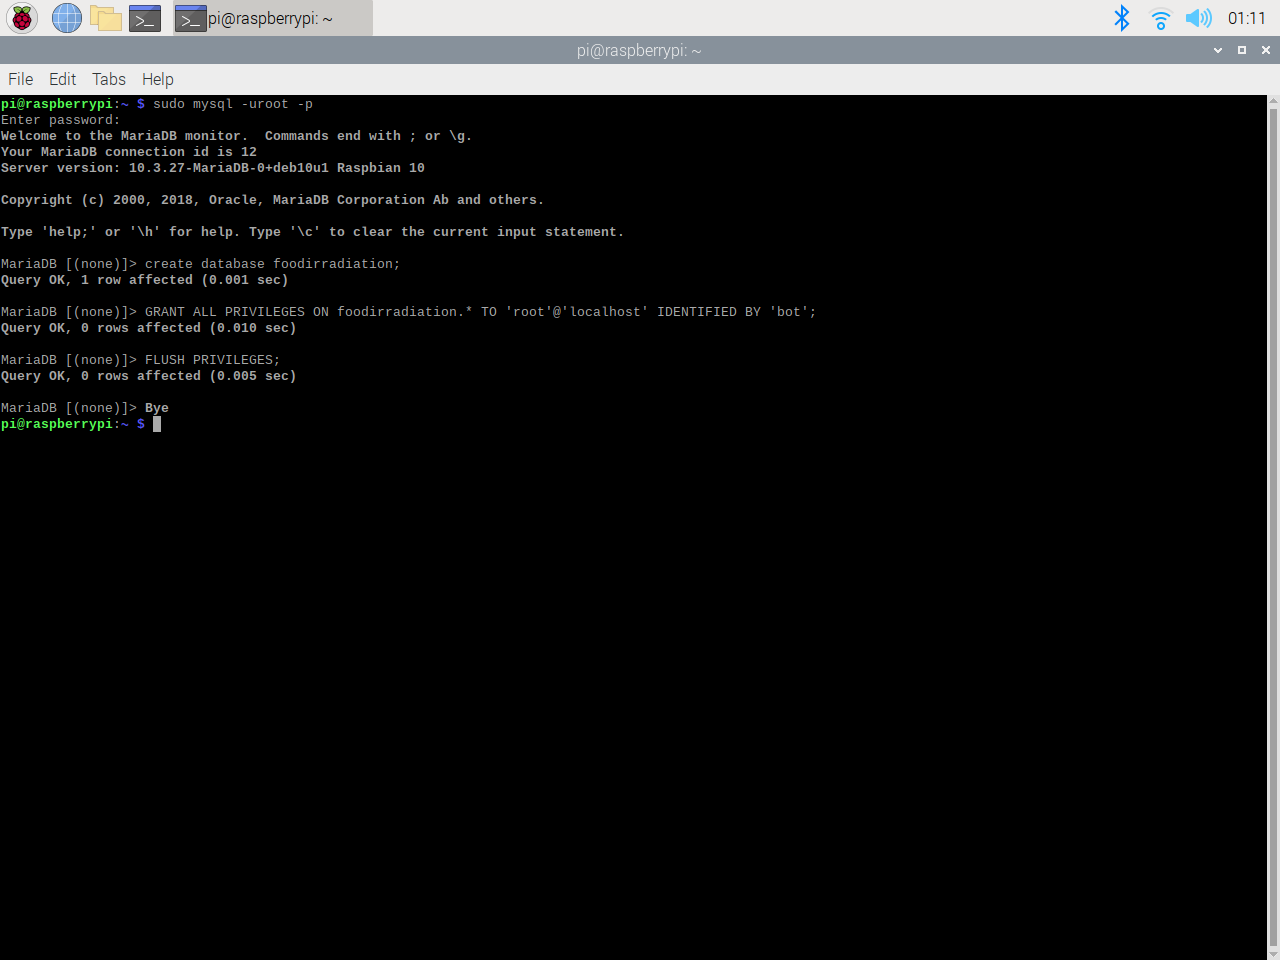
:hash: When the terminal shows the *MariaDB \[(none)]>* prompt, create the new database *(foodirradiation)* by utilizing these commands below:
```
create database foodirradiation;
GRANT ALL PRIVILEGES ON foodirradiation.* TO 'root'@'localhost' IDENTIFIED BY 'bot';
FLUSH PRIVILEGES;
```
:hash: Press Ctrl + D to exit the *MariaDB \[(none)]>* prompt.
:hash: Finally, to create a new database in the MariaDB server, run the MySQL interface in the terminal:
*sudo mysql -uroot -p*
:hash: Then, enter the recently changed root password - *bot*.
:hash: When the terminal shows the *MariaDB \[(none)]>* prompt, create the new database *(foodirradiation)* by utilizing these commands below:
```
create database foodirradiation;
GRANT ALL PRIVILEGES ON foodirradiation.* TO 'root'@'localhost' IDENTIFIED BY 'bot';
FLUSH PRIVILEGES;
```
:hash: Press Ctrl + D to exit the *MariaDB \[(none)]>* prompt.
 ## Step 3.2: Setting and running the web application on Raspberry Pi
As discussed above, I set up a LAMP web server on my Raspberry Pi 3 to run the web application, but you can run it on any server as long as it is a PHP server.
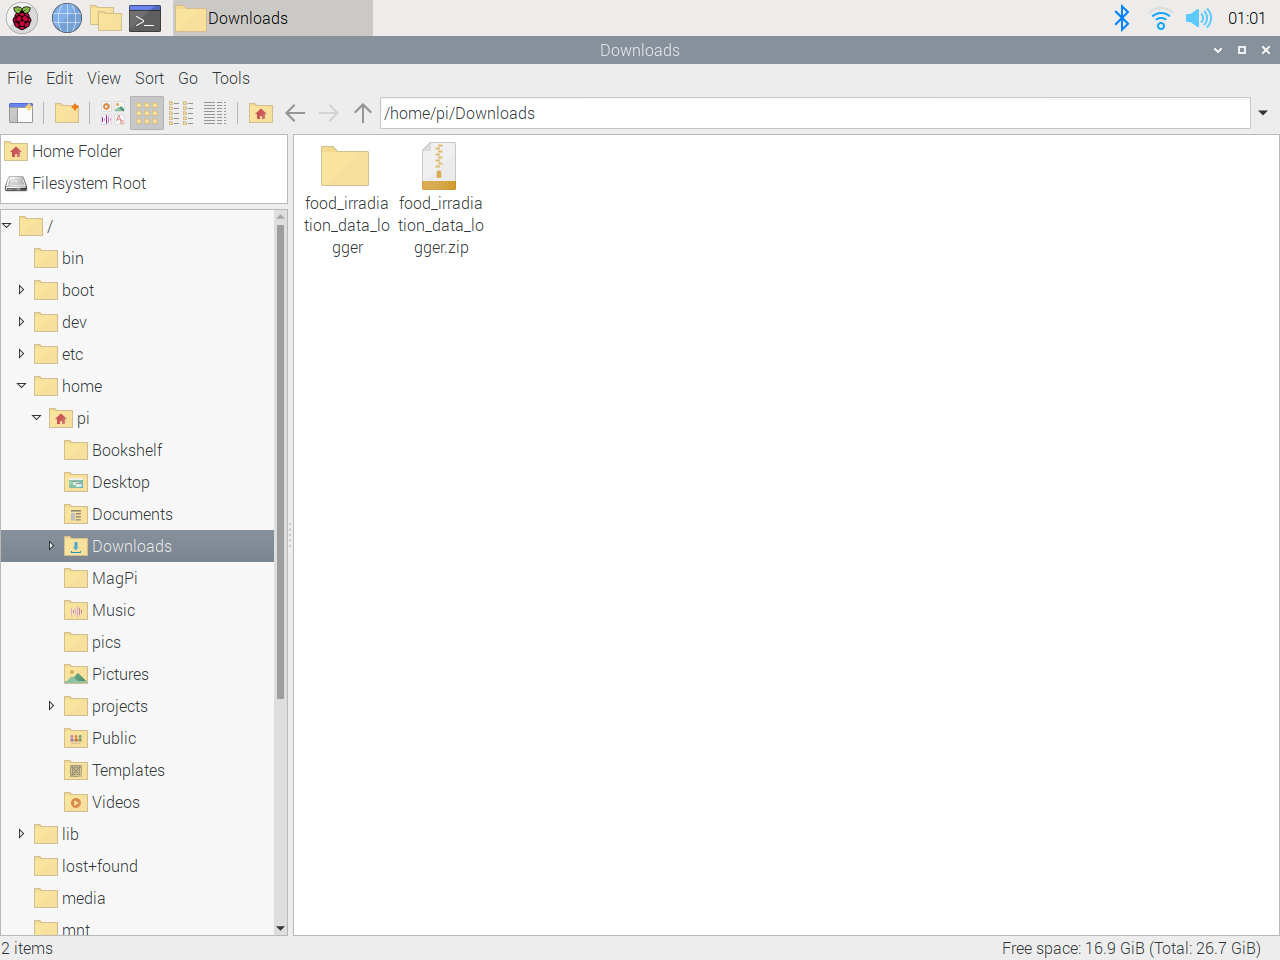
:hash: First of all, install and extract the *food\_irradiation\_data\_logger.zip* folder.
## Step 3.2: Setting and running the web application on Raspberry Pi
As discussed above, I set up a LAMP web server on my Raspberry Pi 3 to run the web application, but you can run it on any server as long as it is a PHP server.
:hash: First of all, install and extract the *food\_irradiation\_data\_logger.zip* folder.
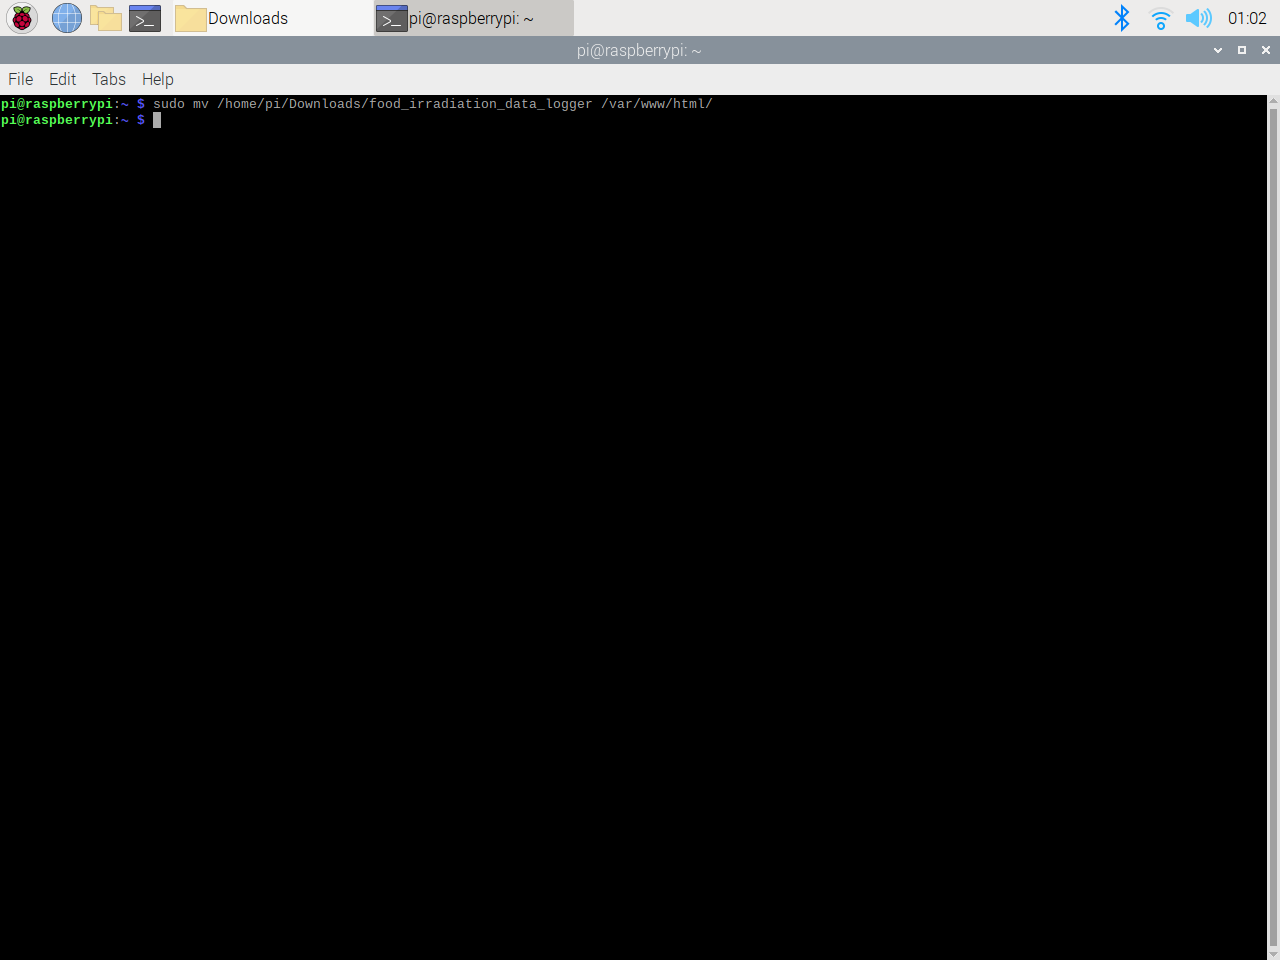
 :hash: Then, move the application folder *(food\_irradiation\_data\_logger)* to the Apache server *(/var/www/html)* by using the terminal since the Apache server is a protected location.
*sudo mv /home/pi/Downloads/food\_irradiation\_data\_logger /var/www/html/*
:hash: Then, move the application folder *(food\_irradiation\_data\_logger)* to the Apache server *(/var/www/html)* by using the terminal since the Apache server is a protected location.
*sudo mv /home/pi/Downloads/food\_irradiation\_data\_logger /var/www/html/*
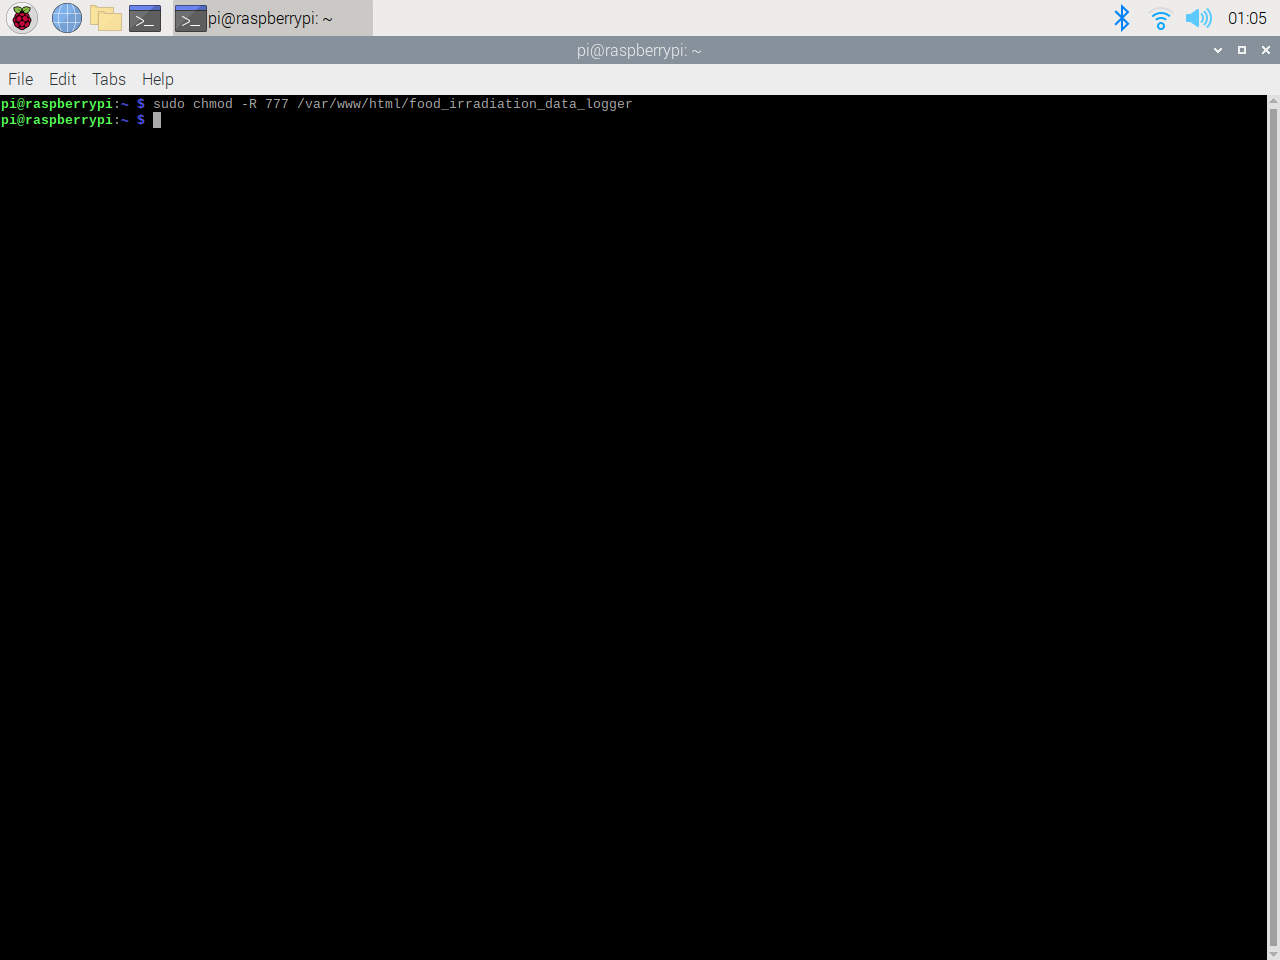
 :hash: Since the Apache server is a protected location, it throws an error while attempting to modify the files and folders in it. Therefore, before utilizing the web application to create CSV files (samples) and download them in the ZIP file format, change the web application's folder permission by using the terminal:
*sudo chmod -R 777 /var/www/html/food\_irradiation\_data\_logger*
:hash: Since the Apache server is a protected location, it throws an error while attempting to modify the files and folders in it. Therefore, before utilizing the web application to create CSV files (samples) and download them in the ZIP file format, change the web application's folder permission by using the terminal:
*sudo chmod -R 777 /var/www/html/food\_irradiation\_data\_logger*
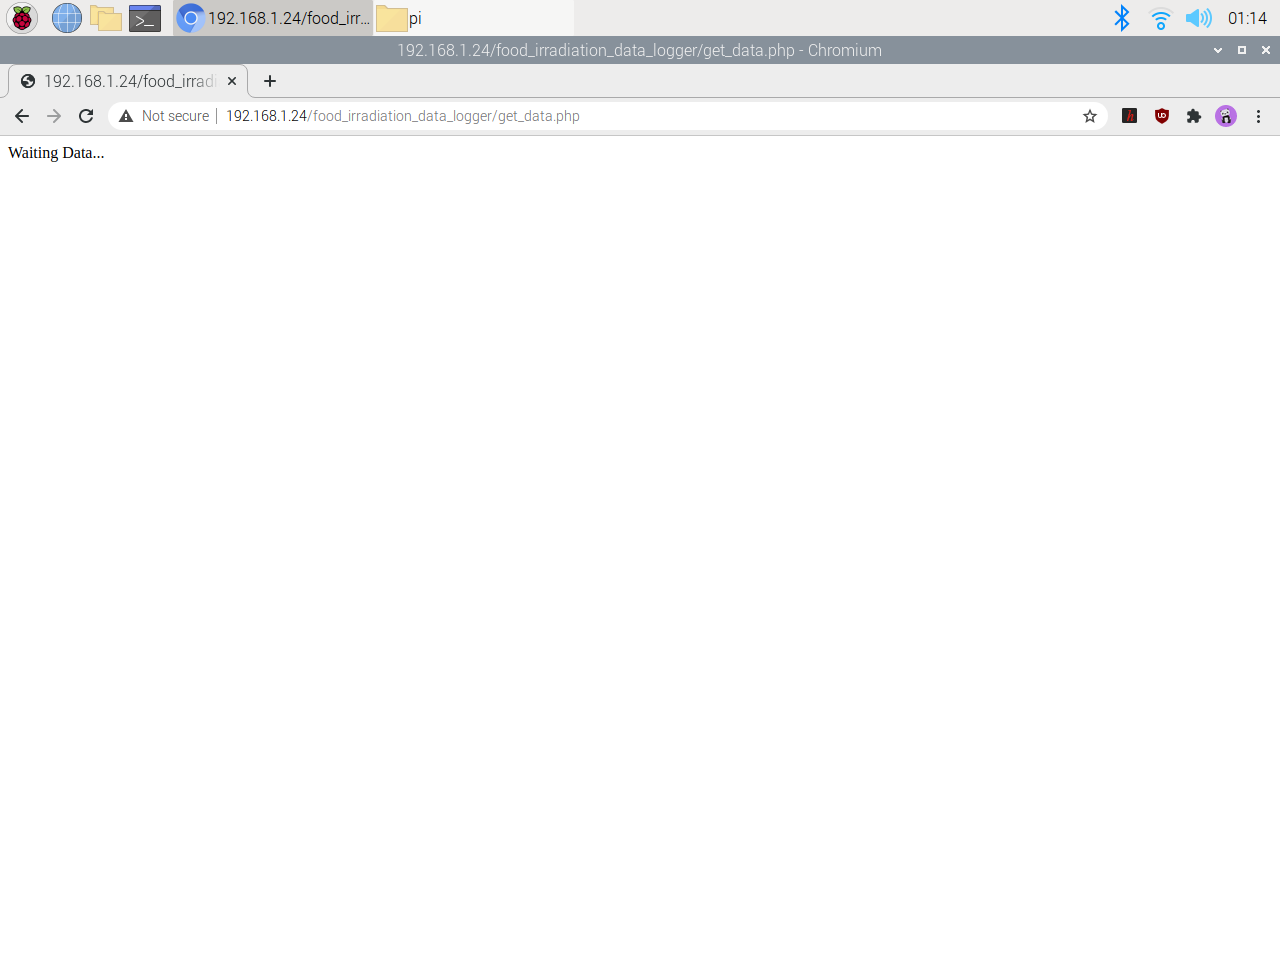
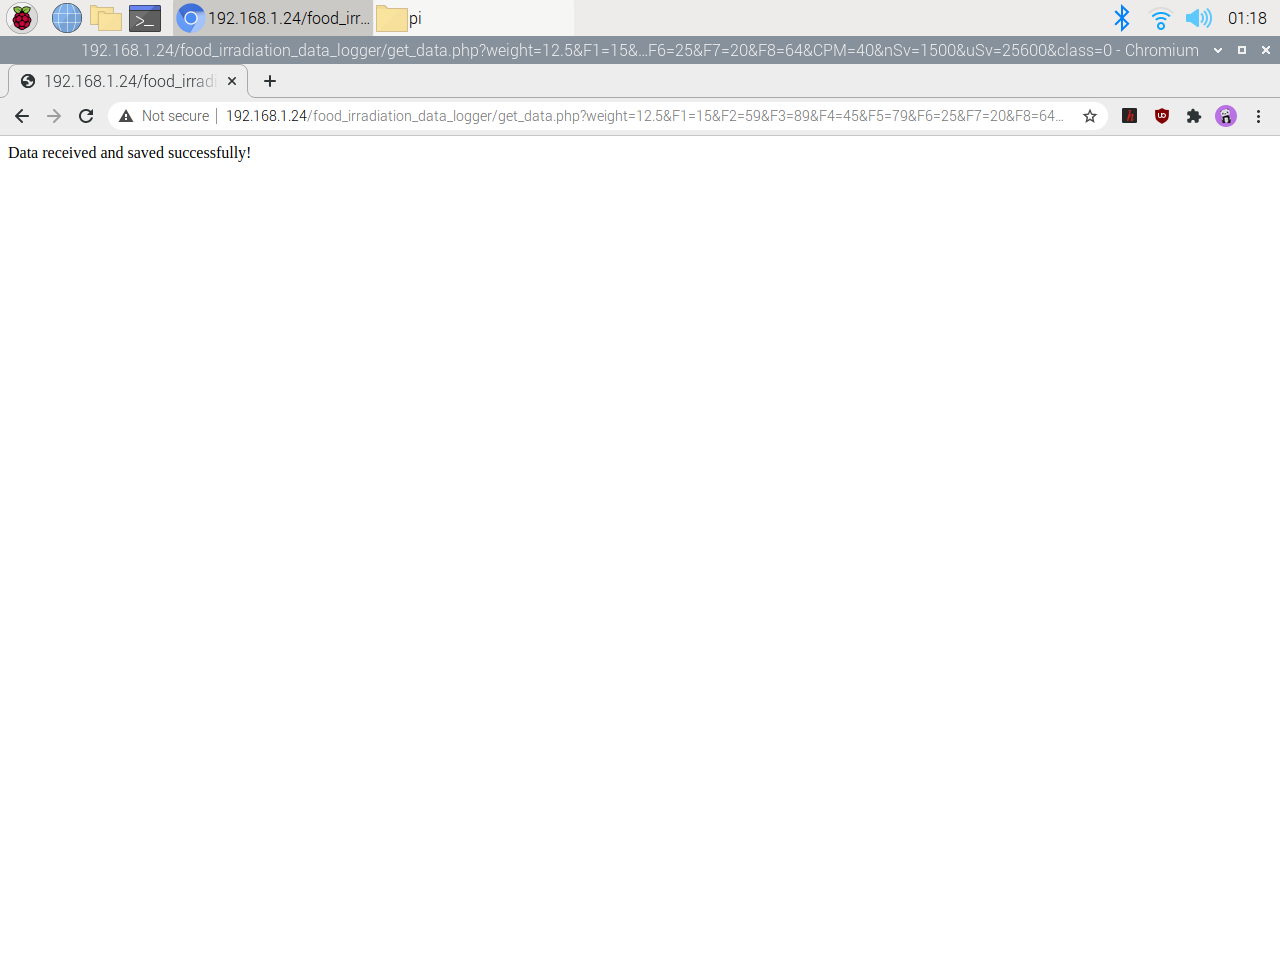
 💻 On the *get\_data.php* file:
:star: If the web application did not receive measurements from Beetle ESP32-C3 via an HTTP GET request, it prints: *Waiting Data...*
:star: Otherwise, the web application prints: *Data received and saved successfully!*
*localhost/food\_irradiation\_data\_logger/get\_data.php*
💻 On the *get\_data.php* file:
:star: If the web application did not receive measurements from Beetle ESP32-C3 via an HTTP GET request, it prints: *Waiting Data...*
:star: Otherwise, the web application prints: *Data received and saved successfully!*
*localhost/food\_irradiation\_data\_logger/get\_data.php*
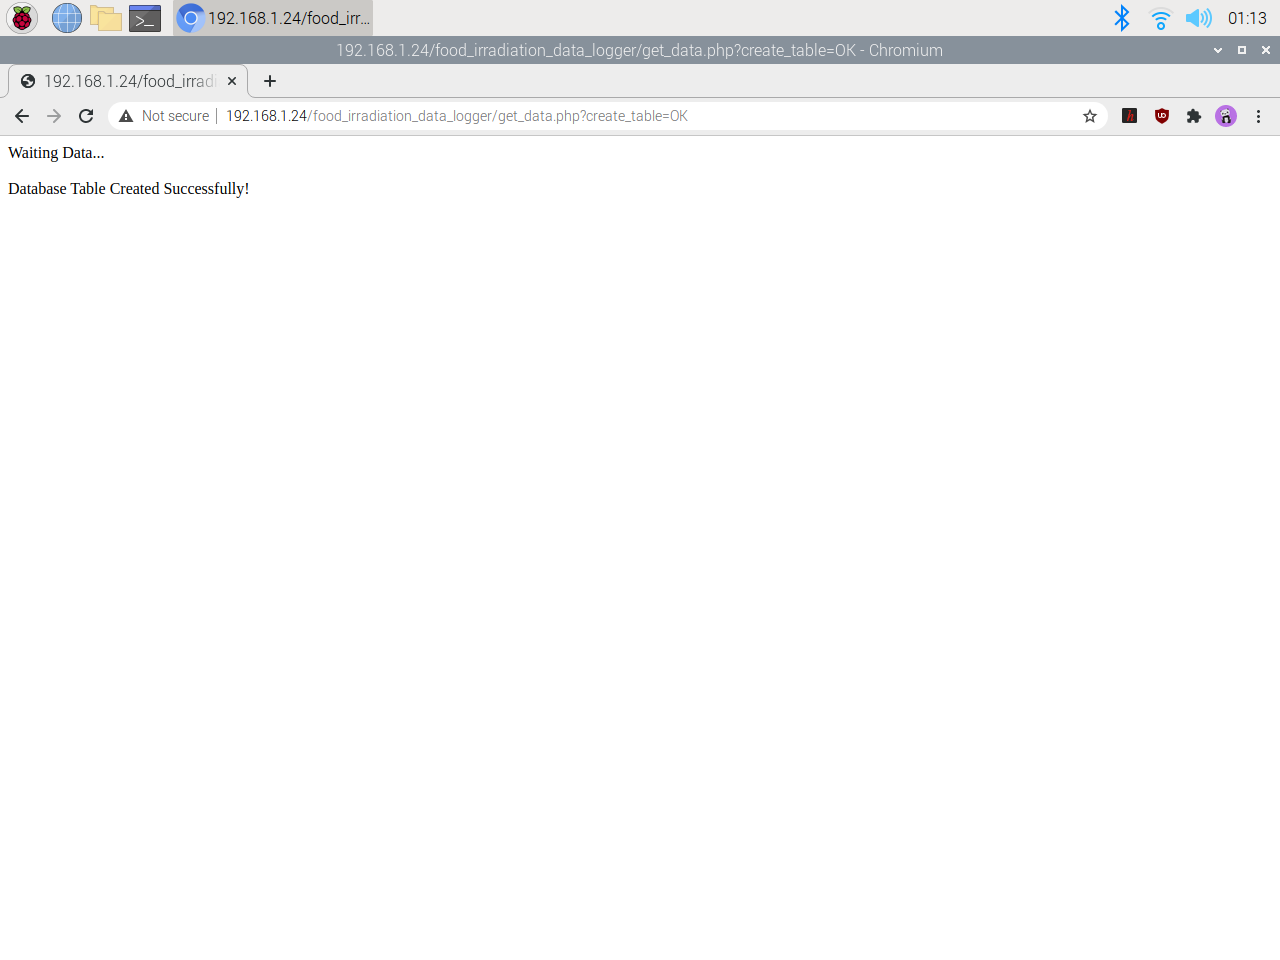
 :star: If the *create\_table* parameter is set as OK, the web application creates the requested database table *(entries)* and prints: *Database Table Created Successfully!*
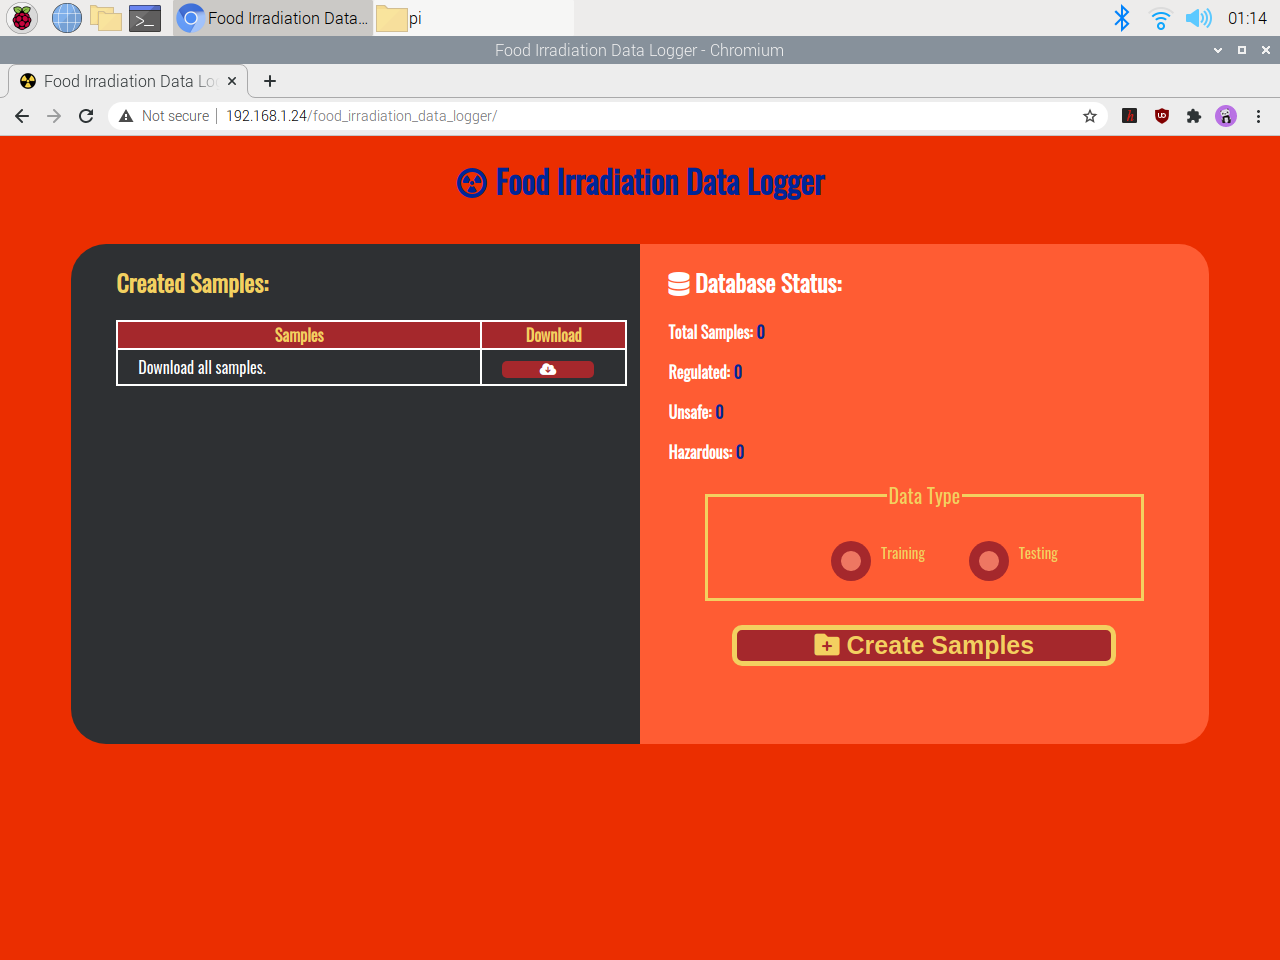
 💻 On the *index.php* file:
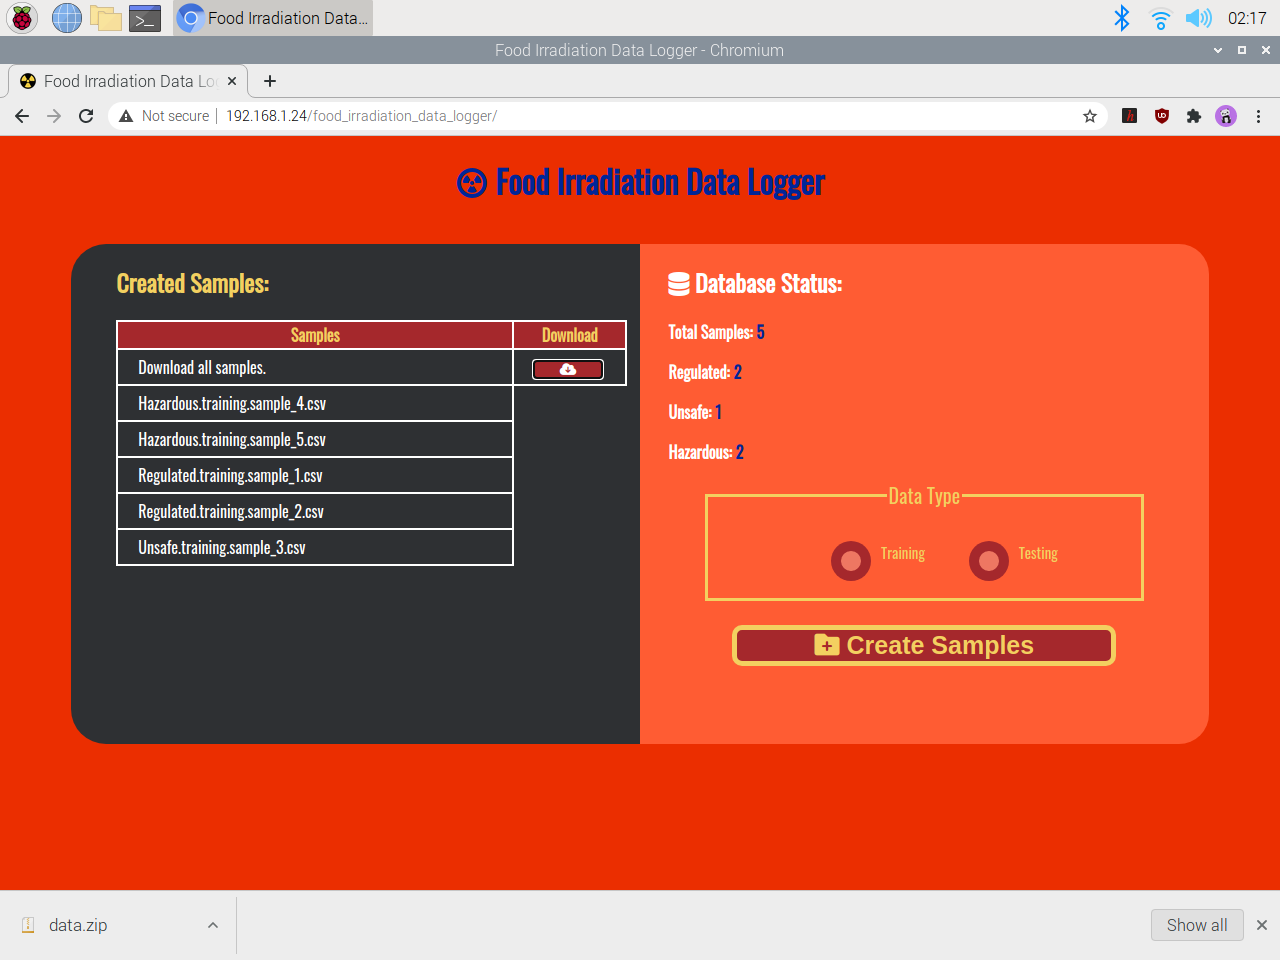
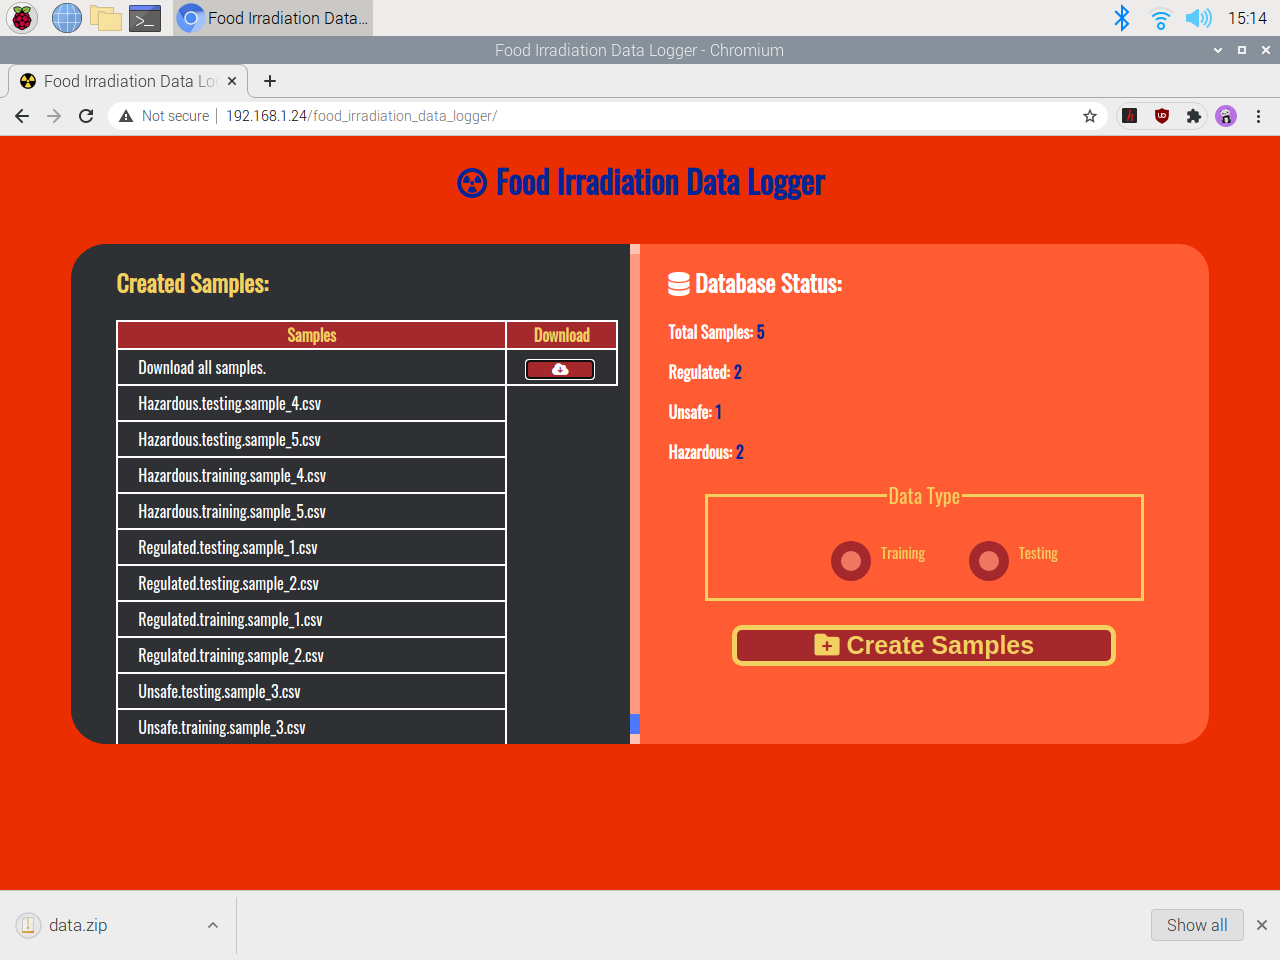
:star: The application interface shows created sample names and data record numbers for each class in the MySQL database.
:star: If the user clicks the *Create Samples* submit button on the HTML form, the web application generates CSV files (samples) for Edge Impulse, depending on the selected data type (training or testing).
💻 On the *index.php* file:
:star: The application interface shows created sample names and data record numbers for each class in the MySQL database.
:star: If the user clicks the *Create Samples* submit button on the HTML form, the web application generates CSV files (samples) for Edge Impulse, depending on the selected data type (training or testing).
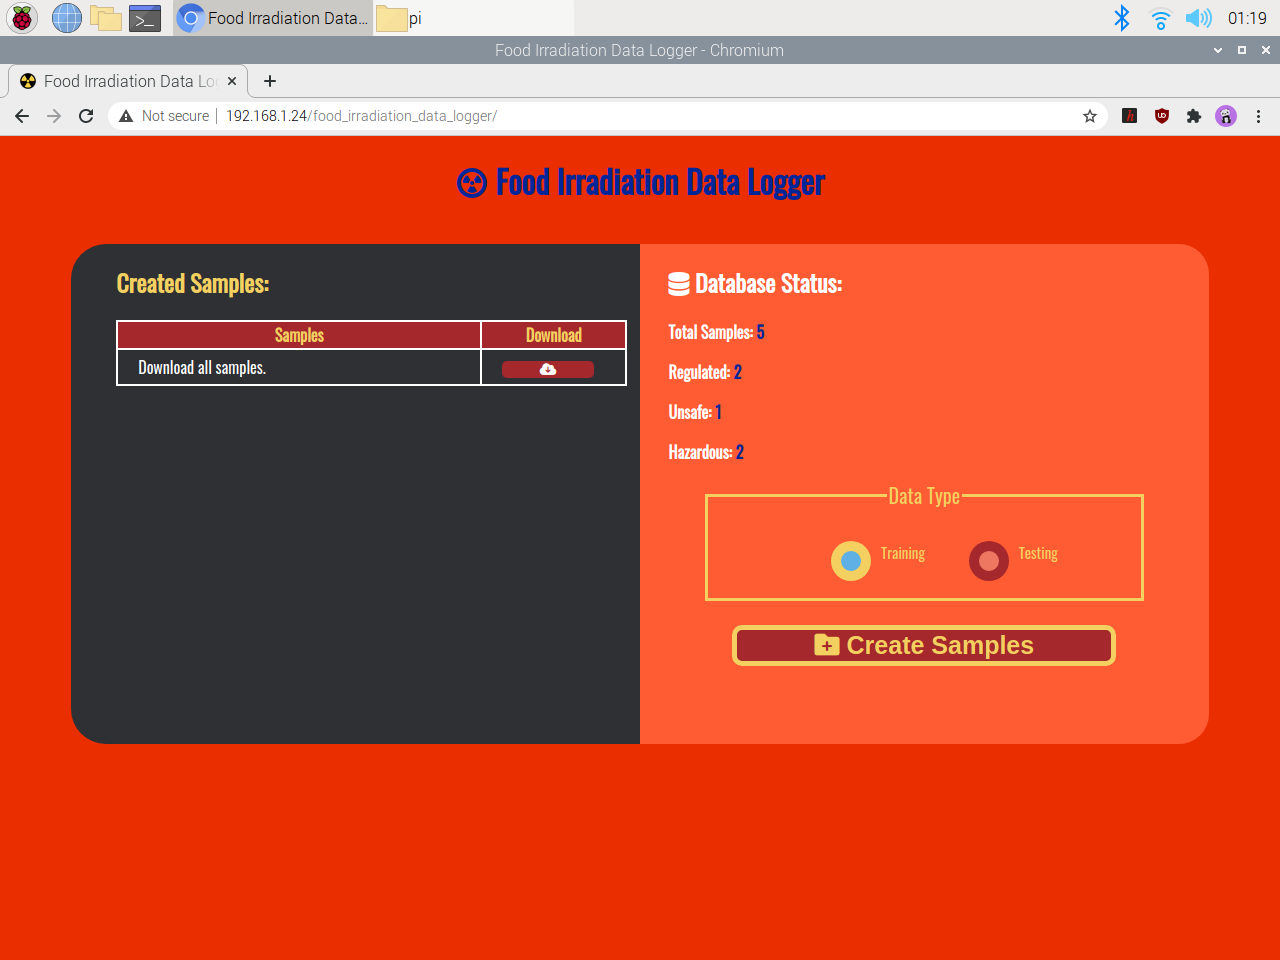
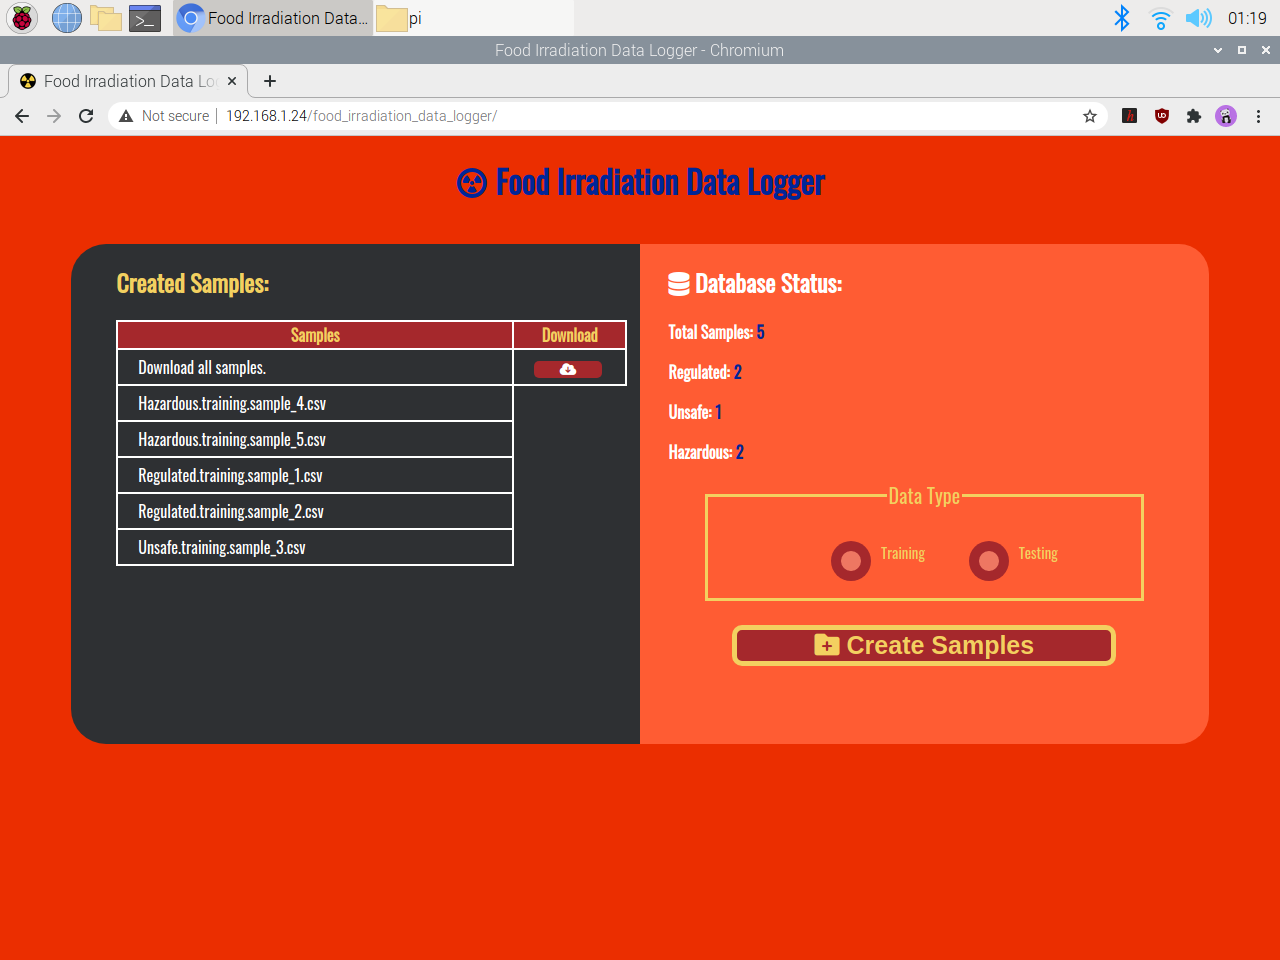
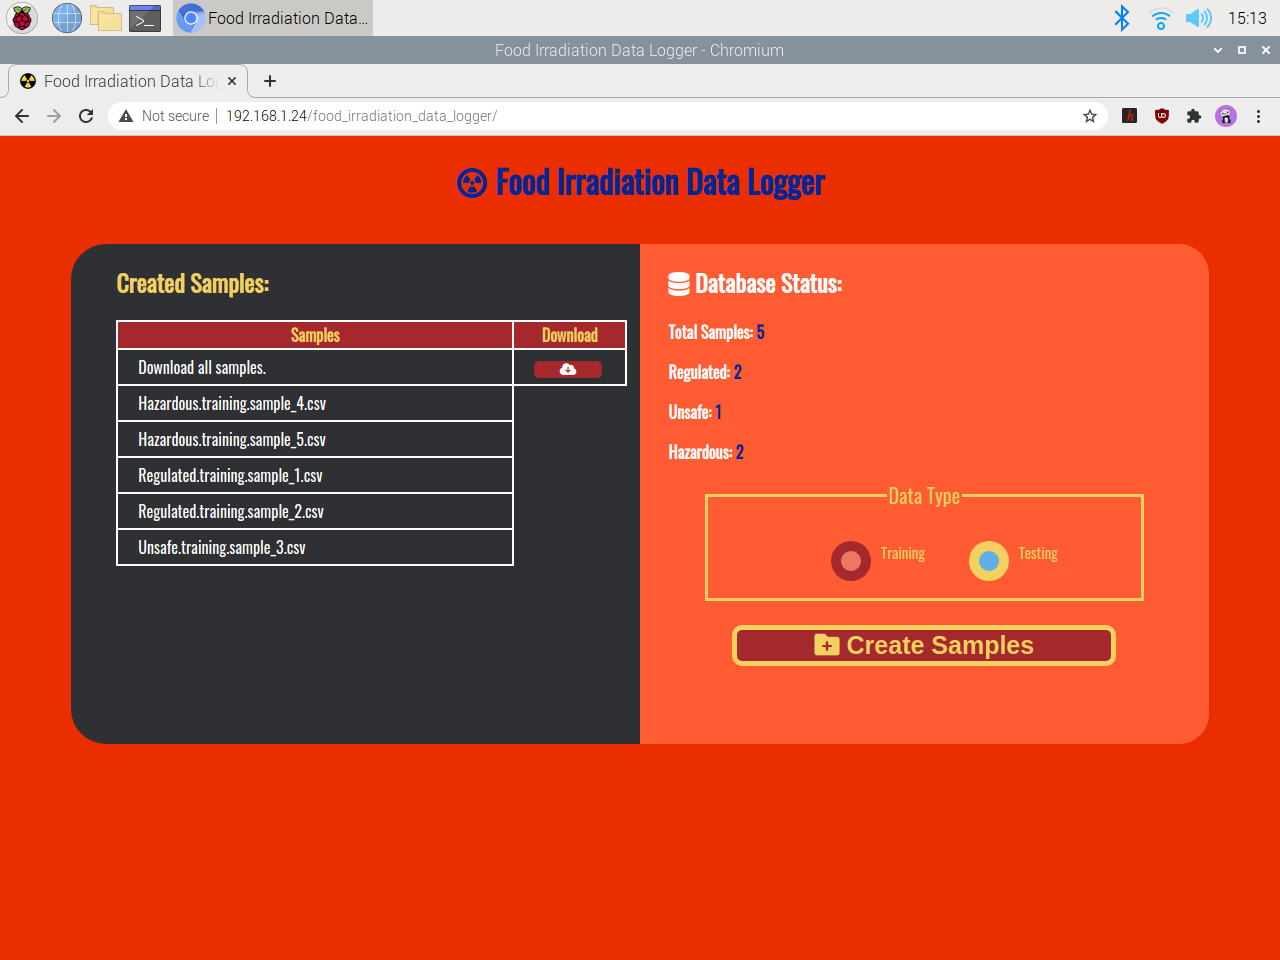
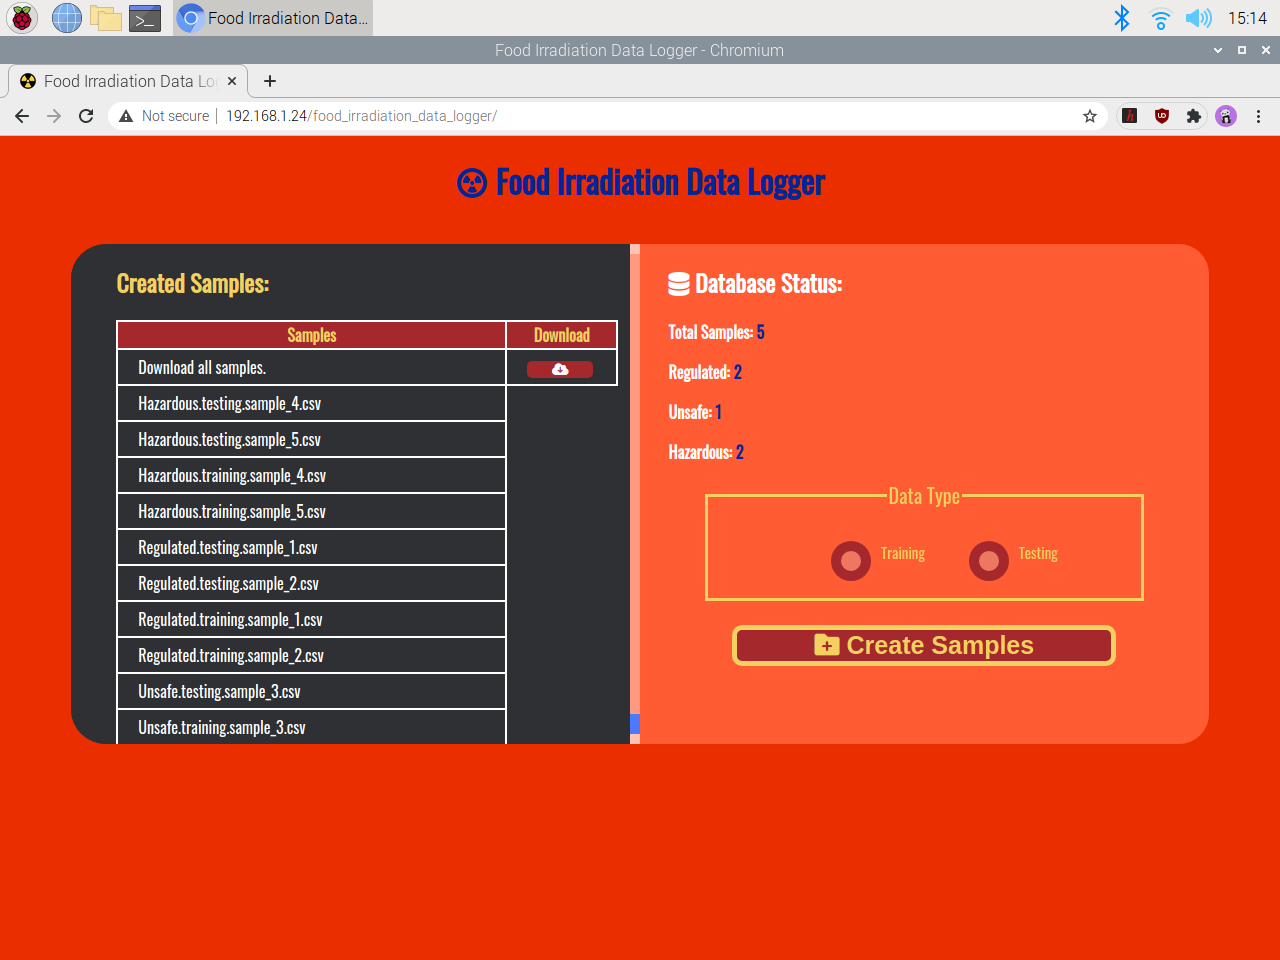 :star: If the user clicks the *Download* button, the application downloads all generated CSV files (samples) in the ZIP file format *(data.zip)*.
 ## Step 4: Setting up Beetle ESP32-C3 on the Arduino IDE
Before proceeding with the following steps, I needed to set up Beetle ESP32-C3 on the Arduino IDE and install the required libraries for this project.
If your computer cannot recognize Beetle ESP32-C3 when plugged in via a USB cable, connect Pin 9 to GND (pull-down) and try again.
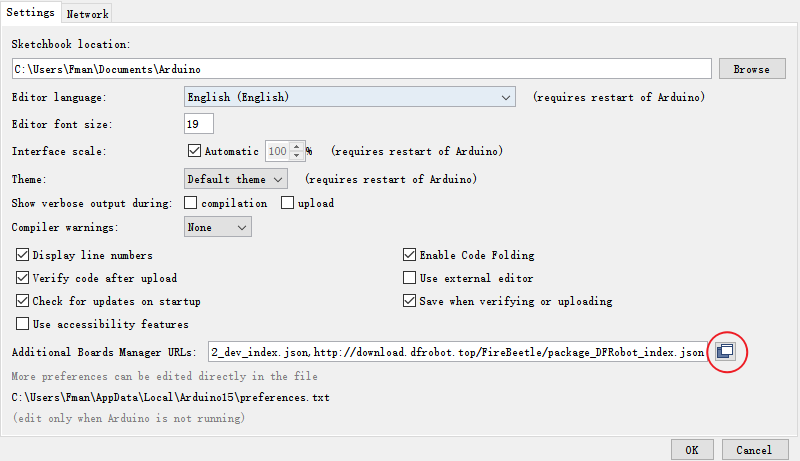
:hash: To add the ESP32-C3 board package to the Arduino IDE, navigate to *File ➡ Preferences* and paste the URL below under *Additional Boards Manager URLs*.
*[https://raw.githubusercontent.com/espressif/arduino-esp32/gh-pages/package\\\_esp32\\\_index.json](https://raw.githubusercontent.com/espressif/arduino-esp32/gh-pages/package\\_esp32\\_index.json)*
## Step 4: Setting up Beetle ESP32-C3 on the Arduino IDE
Before proceeding with the following steps, I needed to set up Beetle ESP32-C3 on the Arduino IDE and install the required libraries for this project.
If your computer cannot recognize Beetle ESP32-C3 when plugged in via a USB cable, connect Pin 9 to GND (pull-down) and try again.
:hash: To add the ESP32-C3 board package to the Arduino IDE, navigate to *File ➡ Preferences* and paste the URL below under *Additional Boards Manager URLs*.
*[https://raw.githubusercontent.com/espressif/arduino-esp32/gh-pages/package\\\_esp32\\\_index.json](https://raw.githubusercontent.com/espressif/arduino-esp32/gh-pages/package\\_esp32\\_index.json)*
.png?fit=max&auto=format&n=577XzA-QE9Zpi0WI&q=85&s=6853fd172baa059e47a927f8c42cfc1c)
 :hash: Then, to install the required core, navigate to *Tools ➡ Board ➡ Boards Manager* and search for *esp32*.
.png?fit=max&auto=format&n=577XzA-QE9Zpi0WI&q=85&s=d9dd78144a45783d7aace0861d02bf67)
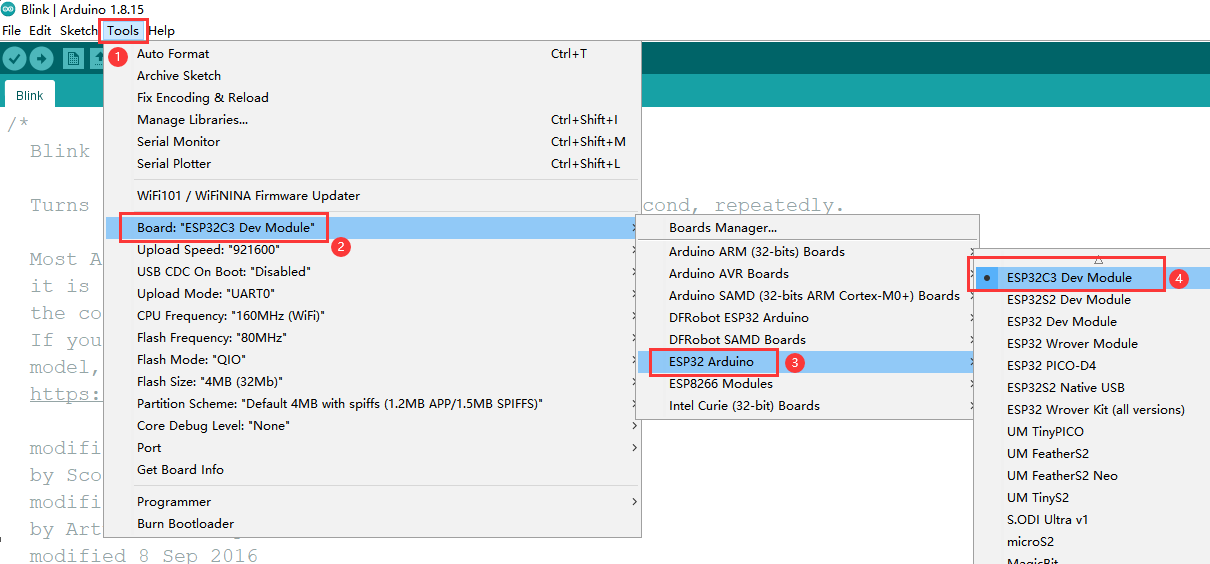
.png?fit=max&auto=format&n=577XzA-QE9Zpi0WI&q=85&s=2f71270f8dbe72f085f3089b2d45f44a) :hash: After installing the core, navigate to *Tools > Board > ESP32 Arduino* and select *ESP32C3 Dev Module*.
:hash: After installing the core, navigate to *Tools > Board > ESP32 Arduino* and select *ESP32C3 Dev Module*.
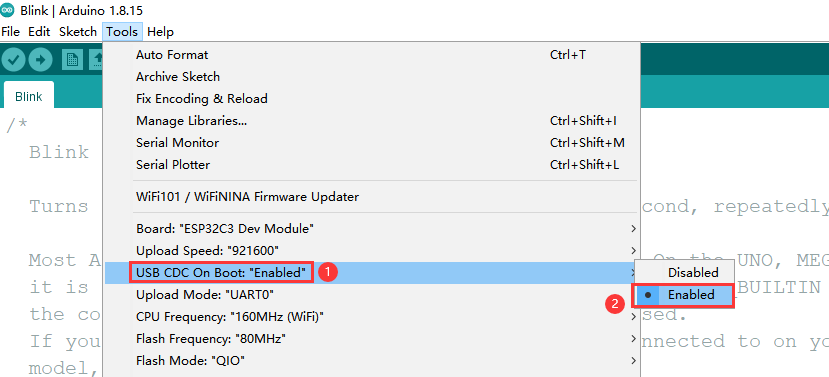
 :hash: To print data on the serial monitor, enable *USB CDC On Boot* after setting Beetle ESP32-C3.
 :hash: Finally, download the required libraries for the Geiger counter module, the I2C HX711 weight sensor, the AS7341 visible light sensor, and the SSD1309 OLED transparent screen:
DFRobot\_Geiger | [Download](https://github.com/cdjq/DFRobot_Geiger) DFRobot\_HX711\_I2C | [Download](https://github.com/DFRobot/DFRobot_HX711_I2C) DFRobot\_AS7341 | [Download](https://github.com/DFRobot/DFRobot_AS7341) U8g2\_Arduino | [Download](https://github.com/DFRobot/U8g2_Arduino)
## Step 4.1: Displaying images on the SSD1309 transparent OLED screen
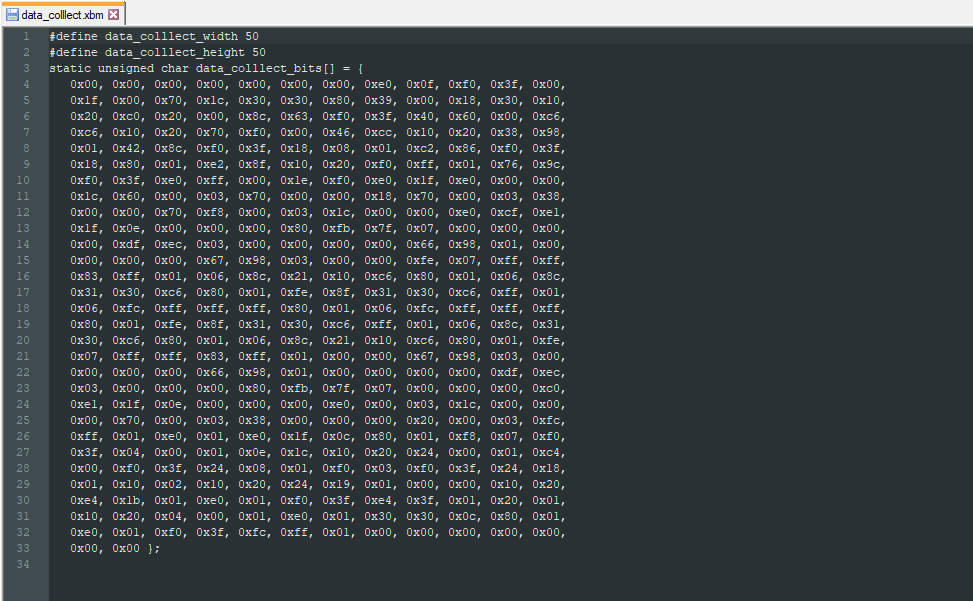
To display images (monochrome) on the SSD1309 transparent OLED screen successfully, I needed to convert PNG or JPG files into the XBM (X Bitmap Graphic) file format.
:hash: First of all, download [GIMP](https://www.gimp.org/).
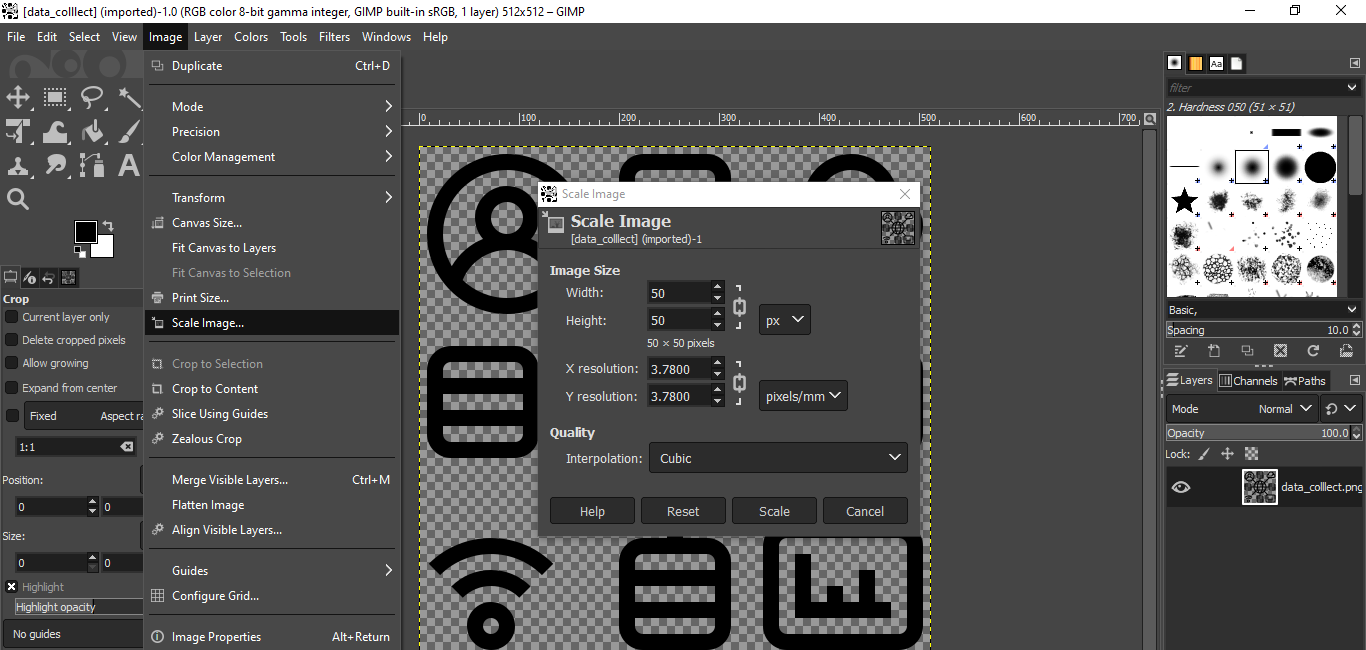
:hash: Then, upload an image (black and white) and go to *Image ➡ Scale Image...* to resize the uploaded image.
:hash: Finally, download the required libraries for the Geiger counter module, the I2C HX711 weight sensor, the AS7341 visible light sensor, and the SSD1309 OLED transparent screen:
DFRobot\_Geiger | [Download](https://github.com/cdjq/DFRobot_Geiger) DFRobot\_HX711\_I2C | [Download](https://github.com/DFRobot/DFRobot_HX711_I2C) DFRobot\_AS7341 | [Download](https://github.com/DFRobot/DFRobot_AS7341) U8g2\_Arduino | [Download](https://github.com/DFRobot/U8g2_Arduino)
## Step 4.1: Displaying images on the SSD1309 transparent OLED screen
To display images (monochrome) on the SSD1309 transparent OLED screen successfully, I needed to convert PNG or JPG files into the XBM (X Bitmap Graphic) file format.
:hash: First of all, download [GIMP](https://www.gimp.org/).
:hash: Then, upload an image (black and white) and go to *Image ➡ Scale Image...* to resize the uploaded image.
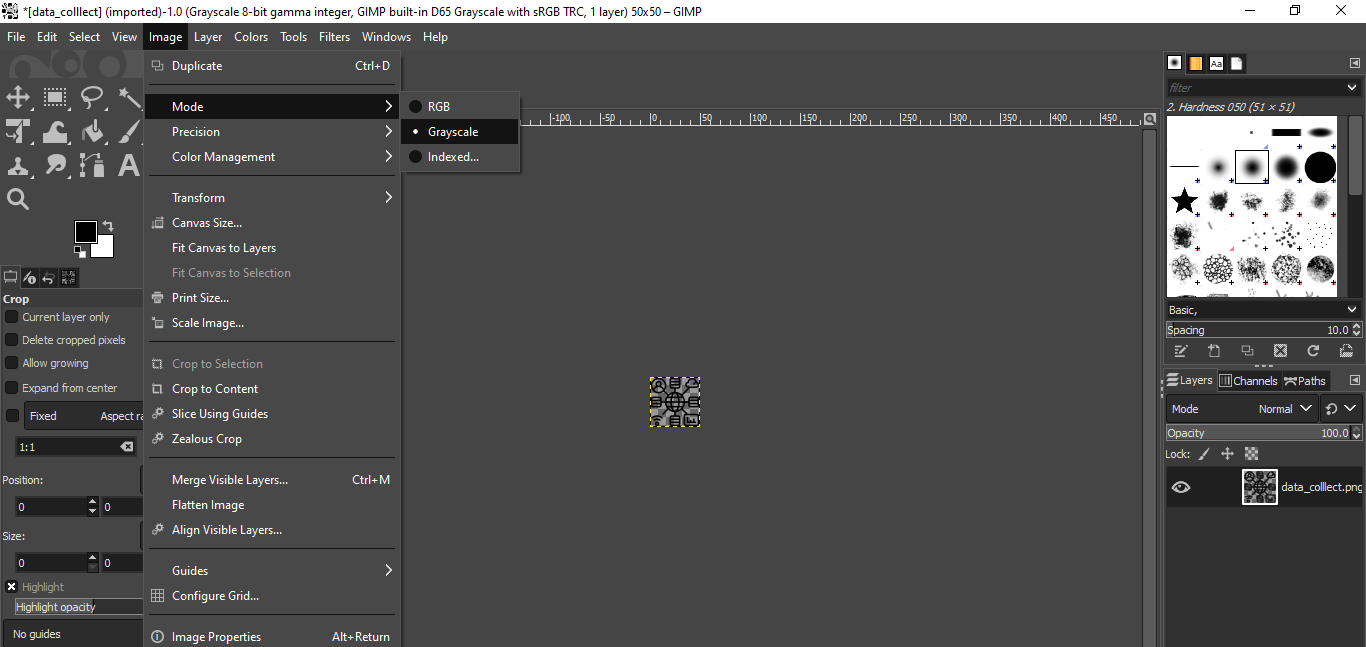
 :hash: Go to *Image ➡ Mode* and select *Grayscale*.
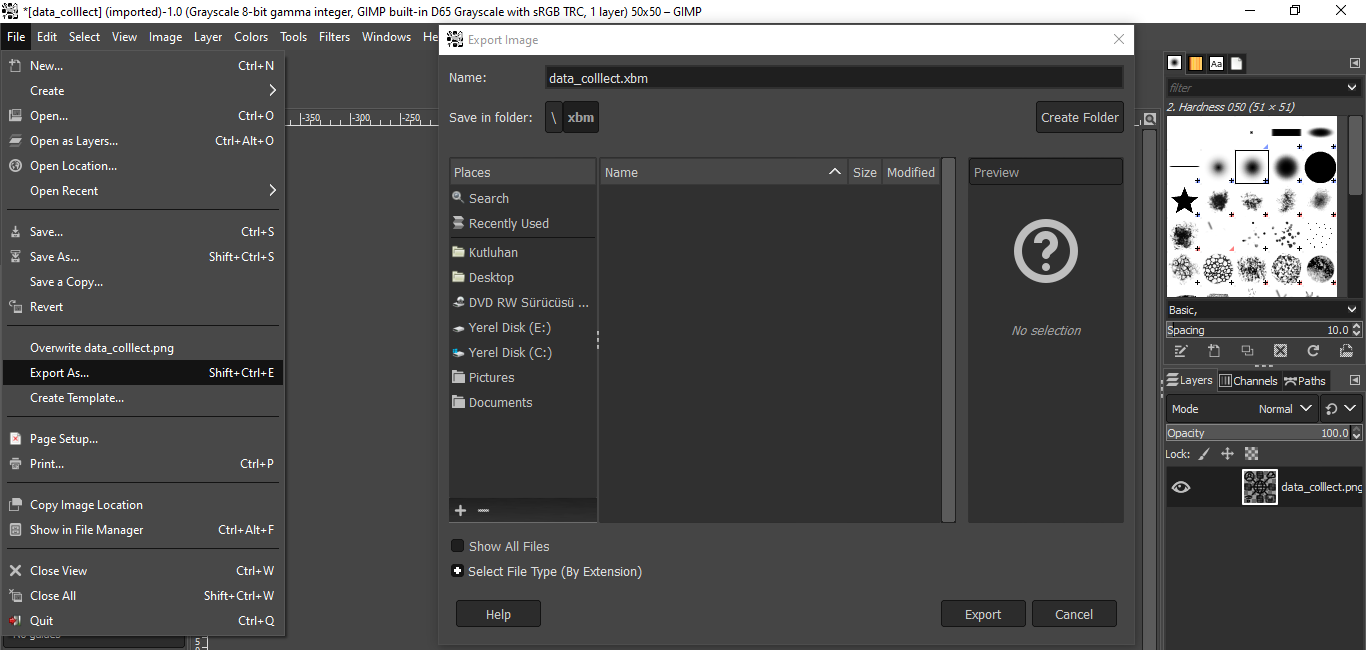
 :hash: Finally, export the image as an XBM file.
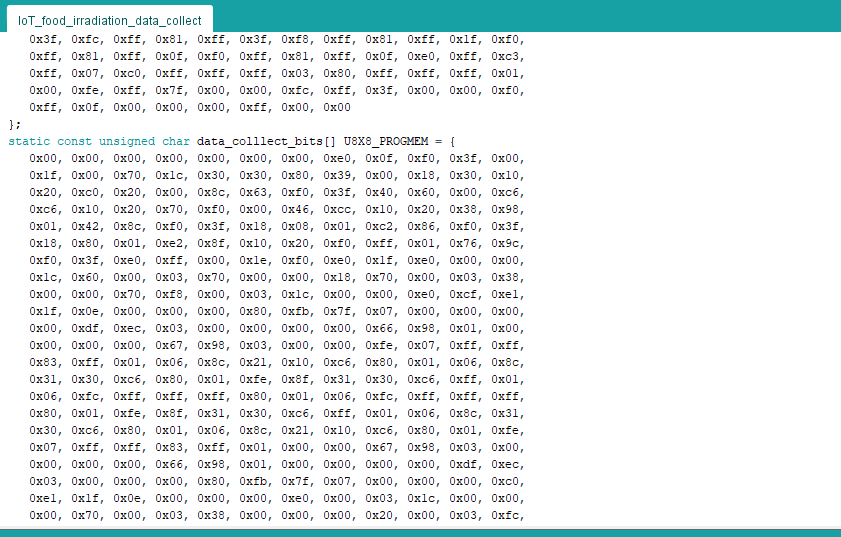
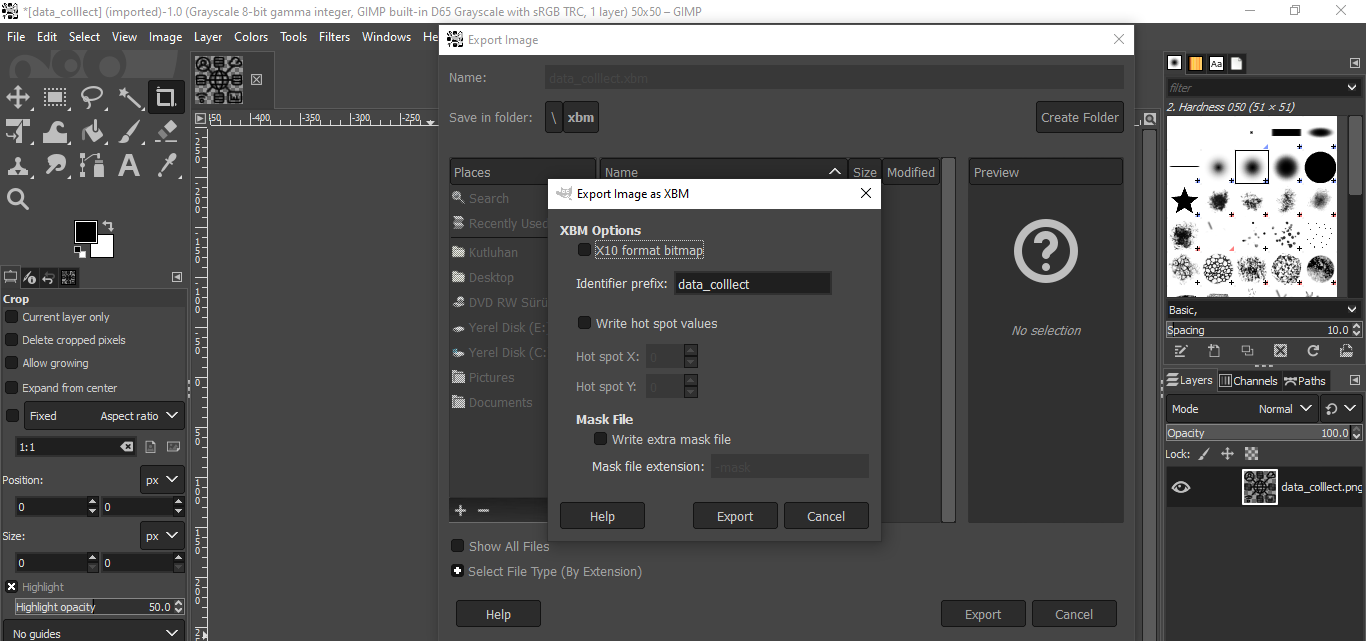 :hash: After exporting the image, add the generated data array to the code and print it on the screen.
```
u8g2.firstPage();
do{
//u8g2.setBitmapMode(true /* transparent*/);
u8g2.drawXBMP( /* x=*/36 , /* y=*/0 , /* width=*/50 , /* height=*/50 , data_colllect_bits);
}while(u8g2.nextPage());
```
:hash: After exporting the image, add the generated data array to the code and print it on the screen.
```
u8g2.firstPage();
do{
//u8g2.setBitmapMode(true /* transparent*/);
u8g2.drawXBMP( /* x=*/36 , /* y=*/0 , /* width=*/50 , /* height=*/50 , data_colllect_bits);
}while(u8g2.nextPage());
```
 ## Step 5: Collecting and storing food irradiation data w/ Beetle ESP32-C3
After setting up Beetle ESP32-C3 and installing the required libraries, I programmed Beetle ESP32-C3 to collect ionizing radiation, weight, and visible light (color) measurements in order to store them on the MySQL database and create appropriately formatted samples for Edge Impulse.
* CPM (Counts per Minute)
* nSv/h (nanoSieverts per hour)
* μSv/h (microSieverts per hour)
* Weight (g)
* F1 (405 - 425 nm)
* F2 (435 - 455 nm)
* F3 (470 - 490 nm)
* F4 (505 - 525 nm)
* F5 (545 - 565 nm)
* F6 (580 - 600 nm)
* F7 (620 - 640 nm)
* F8 (670 - 690 nm)
Since I needed to assign food irradiation dose levels (classes) theoretically as labels for each data record while collecting data from foods to create a valid data set, I utilized the control buttons attached to Beetle ESP32-C3 so as to choose among irradiation dose classes. After selecting an irradiation dose class, Beetle ESP32-C3 appends the selected class to the collected data and then transmits that data packet to the web application.
* Control Button (A) ➡ Regulated
* Control Button (B) ➡ Unsafe
* Control Button (C) ➡ Hazardous
You can download the *IoT\_food\_irradiation\_data\_collect.ino* file to try and inspect the code for collecting ionizing radiation, weight, and visible light (color) measurements and for transferring information to a given web application.
:star: Include the required libraries.
```
#include <WiFi.h>
#include <DFRobot_Geiger.h>
#include <DFRobot_HX711_I2C.h>
#include <U8g2lib.h>
#include <SPI.h>
#include "DFRobot_AS7341.h"
```
:star: Define the Wi-Fi network settings and use the *WiFiClient* class to create TCP connections.
```
char ssid[] = "<_SSID_>"; // your network SSID (name)
char pass[] = "<_PASSWORD_>"; // your network password (use for WPA, or use as key for WEP)
int keyIndex = 0; // your network key Index number (needed only for WEP)
// Define the server (Raspberry Pi).
char server[] = "192.168.1.20";
// Define the web application path.
String application = "/food_irradiation_data_logger/get_data.php";
// Initialize the WiFi client library.
WiFiClient client; /* WiFiSSLClient client; */
```
:star: Define the Geiger counter module.
:star: Define the I2C HX711 weight sensor.
:star: Define the AS7341 visible light sensor settings and objects.
```
DFRobot_Geiger geiger(5);
// Define the HX711 weight sensor.
DFRobot_HX711_I2C MyScale;
// Define the AS7341 object.
DFRobot_AS7341 as7341;
// Define AS7341 data objects:
DFRobot_AS7341::sModeOneData_t data1;
DFRobot_AS7341::sModeTwoData_t data2;
```
:star: Define the 1.51” SSD1309 OLED transparent display settings.
```
#define OLED_DC 1
#define OLED_CS 7
#define OLED_RST 2
U8G2_SSD1309_128X64_NONAME2_1_4W_HW_SPI u8g2(/* rotation=*/U8G2_R0, /* cs=*/ OLED_CS, /* dc=*/ OLED_DC,/* reset=*/OLED_RST);
```
:star: Define monochrome graphics. :star: Initialize the SSD1309 OLED transparent display.
```
u8g2.begin();
u8g2.setFontPosTop();
//u8g2.setDrawColor(0);
```
:star: In the *err\_msg* function, display the error message on the SSD1309 OLED transparent screen.
```
void err_msg(){
// Show the error message on the SSD1309 transparent display.
u8g2.firstPage();
do{
//u8g2.setBitmapMode(true /* transparent*/);
u8g2.drawXBMP( /* x=*/44 , /* y=*/0 , /* width=*/40 , /* height=*/40 , error_bits);
u8g2.setFont(u8g2_font_4x6_tr);
u8g2.drawStr(0, 47, "Check the serial monitor to see");
u8g2.drawStr(40, 55, "the error!");
}while(u8g2.nextPage());
}
```
:star: Check the connection status between the weight (HX711) sensor and Beetle ESP32-C3.
```
while (!MyScale.begin()) {
Serial.println("HX711 initialization is failed!");
err_msg();
delay(1000);
}
Serial.println("HX711 initialization is successful!");
```
:star: Set the calibration weight (g) and threshold (g) to calibrate the weight sensor automatically.
:star: Display the current calibration value on the serial monitor.
```
MyScale.setCalWeight(100);
// Set the calibration threshold (g).
MyScale.setThreshold(30);
// Display the current calibration value.
Serial.print("\nCalibration Value: "); Serial.println(MyScale.getCalibration());
MyScale.setCalibration(MyScale.getCalibration());
delay(1000);
```
:star: Check the connection status between the AS7341 visible light sensor and Beetle ESP32-C3. Then, enable the built-in LED on the AS7341 sensor.
```
while (as7341.begin() != 0) {
Serial.println("AS7341 initialization is failed!");
err_msg();
delay(1000);
}
Serial.println("AS7341 initialization is successful!");
// Enable the built-in LED on the AS7341 sensor.
as7341.enableLed(true);
```
:star: Initialize the Wi-Fi module.
:star: Attempt to connect to the given Wi-Fi network.
```
WiFi.begin(ssid, pass);
// Attempt to connect to the WiFi network:
while(WiFi.status() != WL_CONNECTED){
// Wait for the connection:
delay(500);
Serial.print(".");
}
// If connected to the network successfully:
Serial.println("Connected to the WiFi network successfully!");
u8g2.firstPage();
do{
u8g2.setFont(u8g2_font_open_iconic_all_8x_t);
u8g2.drawGlyph(/* x=*/32, /* y=*/0, /* encoding=*/247);
}while(u8g2.nextPage());
delay(2000);
```
:star: In the *get\_Weight* function, obtain the weight (g) measurement generated by the I2C HX711 weight sensor.
```
void get_Weight(){
weight = MyScale.readWeight();
if(weight < 0.5) weight = 0;
Serial.print("\nWeight: "); Serial.print(weight); Serial.println(" g");
delay(1000);
}
```
:star: In the *get\_Visual\_Light* function, start spectrum measurement with the AS7341 sensor and read the value of sensor data channel 0\~5 under these channel mapping modes:
* eF1F4ClearNIR
* eF5F8ClearNIR
```
void get_Visual_Light(){
// Start spectrum measurement:
// Channel mapping mode: 1.eF1F4ClearNIR
as7341.startMeasure(as7341.eF1F4ClearNIR);
// Read the value of sensor data channel 0~5, under eF1F4ClearNIR
data1 = as7341.readSpectralDataOne();
// Channel mapping mode: 2.eF5F8ClearNIR
as7341.startMeasure(as7341.eF5F8ClearNIR);
// Read the value of sensor data channel 0~5, under eF5F8ClearNIR
data2 = as7341.readSpectralDataTwo();
// Print data:
Serial.print("\nF1(405-425nm): "); Serial.println(data1.ADF1);
Serial.print("F2(435-455nm): "); Serial.println(data1.ADF2);
Serial.print("F3(470-490nm): "); Serial.println(data1.ADF3);
Serial.print("F4(505-525nm): "); Serial.println(data1.ADF4);
Serial.print("F5(545-565nm): "); Serial.println(data2.ADF5);
Serial.print("F6(580-600nm): "); Serial.println(data2.ADF6);
Serial.print("F7(620-640nm): "); Serial.println(data2.ADF7);
Serial.print("F8(670-690nm): "); Serial.println(data2.ADF8);
// CLEAR and NIR:
Serial.print("Clear_1: "); Serial.println(data1.ADCLEAR);
Serial.print("NIR_1: "); Serial.println(data1.ADNIR);
Serial.print("Clear_2: "); Serial.println(data2.ADCLEAR);
Serial.print("NIR_2: "); Serial.println(data2.ADNIR);
delay(1000);
}
```
:star: In the *activate\_Geiger\_counter* function:
:star: Initialize the Geiger counter module and enable the external interrupt.
:star: Every three seconds, pause the count to turn off the external interrupt trigger.
:star: Evaluate the current CPM (Counts per Minute) by dropping the edge pulse within three seconds: the error is ±3CPM.
:star: Obtain the current nSv/h (nanoSieverts per hour).
:star: Obtain the current μSv/h (microSieverts per hour).
```
void activate_Geiger_counter(){
// Initialize the Geiger counter module and enable the external interrupt.
geiger.start();
delay(3000);
// If necessary, pause the count and turn off the external interrupt trigger.
geiger.pause();
// Evaluate the current CPM (Counts per Minute) by dropping the edge pulse within 3 seconds: the error is ±3CPM.
Serial.print("\nCPM: "); Serial.println(geiger.getCPM());
// Get the current nSv/h (nanoSieverts per hour).
Serial.print("nSv/h: "); Serial.println(geiger.getnSvh());
// Get the current μSv/h (microSieverts per hour).
Serial.print("μSv/h: "); Serial.println(geiger.getuSvh());
}
```
:star: In the *drawNumber* function, convert numbers to char arrays with the *itoa* function so as to display them on the SSD1309 OLED transparent screen.
```
void drawNumber(int x, int y, int __){
char buf[7];
u8g2.drawStr(x, y, itoa(__, buf, 10));
}
```
:star: In the *home\_screen* function, display the collected data on the SSD1309 OLED transparent screen.
```
void home_screen(int y, int x, int s){
u8g2.firstPage();
do{
u8g2.setFont(u8g2_font_open_iconic_all_2x_t);
u8g2.drawGlyph(/* x=*/0, /* y=*/y-3, /* encoding=*/142);
u8g2.drawGlyph(/* x=*/0, /* y=*/y+s-3, /* encoding=*/259);
u8g2.drawGlyph(/* x=*/0, /* y=*/y+(2*s)-3, /* encoding=*/280);
u8g2.setFont(u8g2_font_freedoomr10_mu);
u8g2.drawStr(25, y, "WEIGHT:"); drawNumber(x, y, weight);
u8g2.drawStr(25, y+s, "F1:"); drawNumber(x, y+s, data1.ADF1);
u8g2.drawStr(25, y+(2*s), "CPM:"); drawNumber(x, y+(2*s), geiger.getCPM());
}while(u8g2.nextPage());
}
```
:star: In the *make\_a\_get\_request* function:
:star: Connect to the web application named *food\_irradiation\_data\_logger*.
:star: Create the query string with the collected data.
:star: Make an HTTP GET request with the data parameters to the web application.
:star: Wait until the client is available, then fetch the response from the web application.
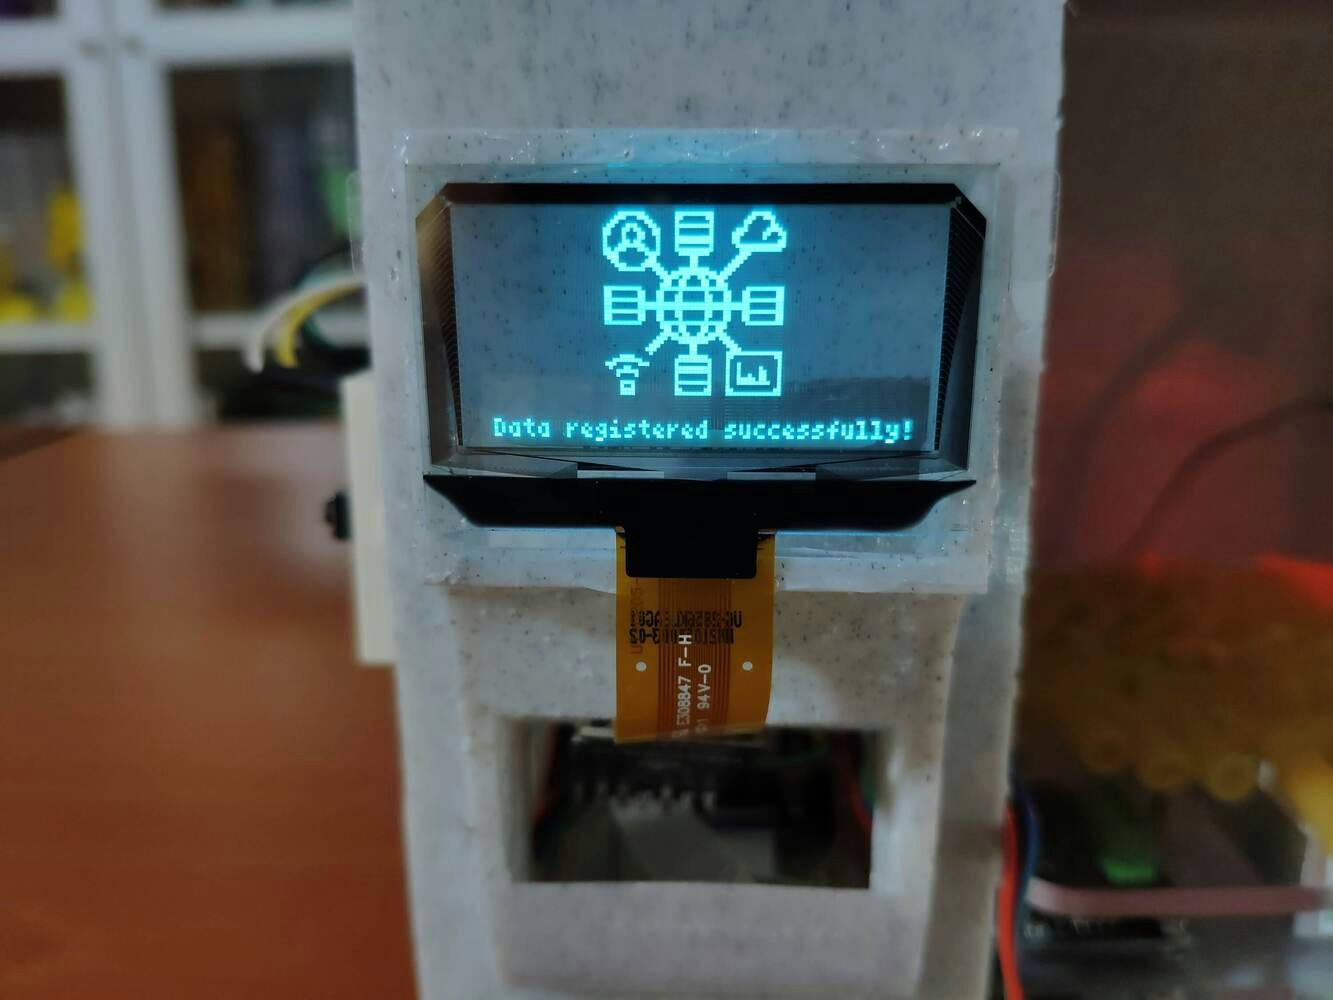
:star: If there is a response from the server and the web application appends the transferred data packet to the MySQL database successfully, print *Data registered successfully!* on the serial monitor and the SSD1309 screen.
```
void make_a_get_request(String _class){
// Connect to the web application named food_irradiation_data_logger. Change '80' with '443' if you are using SSL connection.
if (client.connect(server, 80)){
// If successful:
Serial.println("\nConnected to the web application successfully!");
// Create the query string:
String query = application+"?weight="+String(weight)+"&F1="+data1.ADF1+"&F2="+data1.ADF2+"&F3="+data1.ADF3+"&F4="+data1.ADF4+"&F5="+data2.ADF5+"&F6="+data2.ADF6+"&F7="+data2.ADF7+"&F8="+data2.ADF8;
query += "&CPM="+String(geiger.getCPM())+"&nSv="+String(geiger.getnSvh())+"&uSv="+String(geiger.getuSvh());
query += "&class="+_class;
// Make an HTTP Get request:
client.println("GET " + query + " HTTP/1.1");
client.println("Host: 192.168.1.20");
client.println("Connection: close");
client.println();
}else{
Serial.println("\nConnection failed to the web application!");
err_msg();
}
delay(2000); // Wait 2 seconds after connecting...
// If there are incoming bytes available, get the response from the web application.
String response = "";
while (client.available()) { char c = client.read(); response += c; }
if(response != "" && response.indexOf("Data received and saved successfully!") > 0){
Serial.println("Data registered successfully!");
u8g2.firstPage();
do{
//u8g2.setBitmapMode(true /* transparent*/);
u8g2.drawXBMP( /* x=*/36 , /* y=*/0 , /* width=*/50 , /* height=*/50 , data_colllect_bits);
u8g2.setFont(u8g2_font_4x6_tr);
u8g2.drawStr(6, 55, "Data registered successfully!");
}while(u8g2.nextPage());
}
}
```
:star: According to the pressed control button (A, B, or C), transmit the data packet to the given web application, including the selected food irradiation dose class.
```
if(!digitalRead(button_A)) make_a_get_request("0");
if(!digitalRead(button_B)) make_a_get_request("1");
if(!digitalRead(button_C)) make_a_get_request("2");
```
## Step 5: Collecting and storing food irradiation data w/ Beetle ESP32-C3
After setting up Beetle ESP32-C3 and installing the required libraries, I programmed Beetle ESP32-C3 to collect ionizing radiation, weight, and visible light (color) measurements in order to store them on the MySQL database and create appropriately formatted samples for Edge Impulse.
* CPM (Counts per Minute)
* nSv/h (nanoSieverts per hour)
* μSv/h (microSieverts per hour)
* Weight (g)
* F1 (405 - 425 nm)
* F2 (435 - 455 nm)
* F3 (470 - 490 nm)
* F4 (505 - 525 nm)
* F5 (545 - 565 nm)
* F6 (580 - 600 nm)
* F7 (620 - 640 nm)
* F8 (670 - 690 nm)
Since I needed to assign food irradiation dose levels (classes) theoretically as labels for each data record while collecting data from foods to create a valid data set, I utilized the control buttons attached to Beetle ESP32-C3 so as to choose among irradiation dose classes. After selecting an irradiation dose class, Beetle ESP32-C3 appends the selected class to the collected data and then transmits that data packet to the web application.
* Control Button (A) ➡ Regulated
* Control Button (B) ➡ Unsafe
* Control Button (C) ➡ Hazardous
You can download the *IoT\_food\_irradiation\_data\_collect.ino* file to try and inspect the code for collecting ionizing radiation, weight, and visible light (color) measurements and for transferring information to a given web application.
:star: Include the required libraries.
```
#include <WiFi.h>
#include <DFRobot_Geiger.h>
#include <DFRobot_HX711_I2C.h>
#include <U8g2lib.h>
#include <SPI.h>
#include "DFRobot_AS7341.h"
```
:star: Define the Wi-Fi network settings and use the *WiFiClient* class to create TCP connections.
```
char ssid[] = "<_SSID_>"; // your network SSID (name)
char pass[] = "<_PASSWORD_>"; // your network password (use for WPA, or use as key for WEP)
int keyIndex = 0; // your network key Index number (needed only for WEP)
// Define the server (Raspberry Pi).
char server[] = "192.168.1.20";
// Define the web application path.
String application = "/food_irradiation_data_logger/get_data.php";
// Initialize the WiFi client library.
WiFiClient client; /* WiFiSSLClient client; */
```
:star: Define the Geiger counter module.
:star: Define the I2C HX711 weight sensor.
:star: Define the AS7341 visible light sensor settings and objects.
```
DFRobot_Geiger geiger(5);
// Define the HX711 weight sensor.
DFRobot_HX711_I2C MyScale;
// Define the AS7341 object.
DFRobot_AS7341 as7341;
// Define AS7341 data objects:
DFRobot_AS7341::sModeOneData_t data1;
DFRobot_AS7341::sModeTwoData_t data2;
```
:star: Define the 1.51” SSD1309 OLED transparent display settings.
```
#define OLED_DC 1
#define OLED_CS 7
#define OLED_RST 2
U8G2_SSD1309_128X64_NONAME2_1_4W_HW_SPI u8g2(/* rotation=*/U8G2_R0, /* cs=*/ OLED_CS, /* dc=*/ OLED_DC,/* reset=*/OLED_RST);
```
:star: Define monochrome graphics. :star: Initialize the SSD1309 OLED transparent display.
```
u8g2.begin();
u8g2.setFontPosTop();
//u8g2.setDrawColor(0);
```
:star: In the *err\_msg* function, display the error message on the SSD1309 OLED transparent screen.
```
void err_msg(){
// Show the error message on the SSD1309 transparent display.
u8g2.firstPage();
do{
//u8g2.setBitmapMode(true /* transparent*/);
u8g2.drawXBMP( /* x=*/44 , /* y=*/0 , /* width=*/40 , /* height=*/40 , error_bits);
u8g2.setFont(u8g2_font_4x6_tr);
u8g2.drawStr(0, 47, "Check the serial monitor to see");
u8g2.drawStr(40, 55, "the error!");
}while(u8g2.nextPage());
}
```
:star: Check the connection status between the weight (HX711) sensor and Beetle ESP32-C3.
```
while (!MyScale.begin()) {
Serial.println("HX711 initialization is failed!");
err_msg();
delay(1000);
}
Serial.println("HX711 initialization is successful!");
```
:star: Set the calibration weight (g) and threshold (g) to calibrate the weight sensor automatically.
:star: Display the current calibration value on the serial monitor.
```
MyScale.setCalWeight(100);
// Set the calibration threshold (g).
MyScale.setThreshold(30);
// Display the current calibration value.
Serial.print("\nCalibration Value: "); Serial.println(MyScale.getCalibration());
MyScale.setCalibration(MyScale.getCalibration());
delay(1000);
```
:star: Check the connection status between the AS7341 visible light sensor and Beetle ESP32-C3. Then, enable the built-in LED on the AS7341 sensor.
```
while (as7341.begin() != 0) {
Serial.println("AS7341 initialization is failed!");
err_msg();
delay(1000);
}
Serial.println("AS7341 initialization is successful!");
// Enable the built-in LED on the AS7341 sensor.
as7341.enableLed(true);
```
:star: Initialize the Wi-Fi module.
:star: Attempt to connect to the given Wi-Fi network.
```
WiFi.begin(ssid, pass);
// Attempt to connect to the WiFi network:
while(WiFi.status() != WL_CONNECTED){
// Wait for the connection:
delay(500);
Serial.print(".");
}
// If connected to the network successfully:
Serial.println("Connected to the WiFi network successfully!");
u8g2.firstPage();
do{
u8g2.setFont(u8g2_font_open_iconic_all_8x_t);
u8g2.drawGlyph(/* x=*/32, /* y=*/0, /* encoding=*/247);
}while(u8g2.nextPage());
delay(2000);
```
:star: In the *get\_Weight* function, obtain the weight (g) measurement generated by the I2C HX711 weight sensor.
```
void get_Weight(){
weight = MyScale.readWeight();
if(weight < 0.5) weight = 0;
Serial.print("\nWeight: "); Serial.print(weight); Serial.println(" g");
delay(1000);
}
```
:star: In the *get\_Visual\_Light* function, start spectrum measurement with the AS7341 sensor and read the value of sensor data channel 0\~5 under these channel mapping modes:
* eF1F4ClearNIR
* eF5F8ClearNIR
```
void get_Visual_Light(){
// Start spectrum measurement:
// Channel mapping mode: 1.eF1F4ClearNIR
as7341.startMeasure(as7341.eF1F4ClearNIR);
// Read the value of sensor data channel 0~5, under eF1F4ClearNIR
data1 = as7341.readSpectralDataOne();
// Channel mapping mode: 2.eF5F8ClearNIR
as7341.startMeasure(as7341.eF5F8ClearNIR);
// Read the value of sensor data channel 0~5, under eF5F8ClearNIR
data2 = as7341.readSpectralDataTwo();
// Print data:
Serial.print("\nF1(405-425nm): "); Serial.println(data1.ADF1);
Serial.print("F2(435-455nm): "); Serial.println(data1.ADF2);
Serial.print("F3(470-490nm): "); Serial.println(data1.ADF3);
Serial.print("F4(505-525nm): "); Serial.println(data1.ADF4);
Serial.print("F5(545-565nm): "); Serial.println(data2.ADF5);
Serial.print("F6(580-600nm): "); Serial.println(data2.ADF6);
Serial.print("F7(620-640nm): "); Serial.println(data2.ADF7);
Serial.print("F8(670-690nm): "); Serial.println(data2.ADF8);
// CLEAR and NIR:
Serial.print("Clear_1: "); Serial.println(data1.ADCLEAR);
Serial.print("NIR_1: "); Serial.println(data1.ADNIR);
Serial.print("Clear_2: "); Serial.println(data2.ADCLEAR);
Serial.print("NIR_2: "); Serial.println(data2.ADNIR);
delay(1000);
}
```
:star: In the *activate\_Geiger\_counter* function:
:star: Initialize the Geiger counter module and enable the external interrupt.
:star: Every three seconds, pause the count to turn off the external interrupt trigger.
:star: Evaluate the current CPM (Counts per Minute) by dropping the edge pulse within three seconds: the error is ±3CPM.
:star: Obtain the current nSv/h (nanoSieverts per hour).
:star: Obtain the current μSv/h (microSieverts per hour).
```
void activate_Geiger_counter(){
// Initialize the Geiger counter module and enable the external interrupt.
geiger.start();
delay(3000);
// If necessary, pause the count and turn off the external interrupt trigger.
geiger.pause();
// Evaluate the current CPM (Counts per Minute) by dropping the edge pulse within 3 seconds: the error is ±3CPM.
Serial.print("\nCPM: "); Serial.println(geiger.getCPM());
// Get the current nSv/h (nanoSieverts per hour).
Serial.print("nSv/h: "); Serial.println(geiger.getnSvh());
// Get the current μSv/h (microSieverts per hour).
Serial.print("μSv/h: "); Serial.println(geiger.getuSvh());
}
```
:star: In the *drawNumber* function, convert numbers to char arrays with the *itoa* function so as to display them on the SSD1309 OLED transparent screen.
```
void drawNumber(int x, int y, int __){
char buf[7];
u8g2.drawStr(x, y, itoa(__, buf, 10));
}
```
:star: In the *home\_screen* function, display the collected data on the SSD1309 OLED transparent screen.
```
void home_screen(int y, int x, int s){
u8g2.firstPage();
do{
u8g2.setFont(u8g2_font_open_iconic_all_2x_t);
u8g2.drawGlyph(/* x=*/0, /* y=*/y-3, /* encoding=*/142);
u8g2.drawGlyph(/* x=*/0, /* y=*/y+s-3, /* encoding=*/259);
u8g2.drawGlyph(/* x=*/0, /* y=*/y+(2*s)-3, /* encoding=*/280);
u8g2.setFont(u8g2_font_freedoomr10_mu);
u8g2.drawStr(25, y, "WEIGHT:"); drawNumber(x, y, weight);
u8g2.drawStr(25, y+s, "F1:"); drawNumber(x, y+s, data1.ADF1);
u8g2.drawStr(25, y+(2*s), "CPM:"); drawNumber(x, y+(2*s), geiger.getCPM());
}while(u8g2.nextPage());
}
```
:star: In the *make\_a\_get\_request* function:
:star: Connect to the web application named *food\_irradiation\_data\_logger*.
:star: Create the query string with the collected data.
:star: Make an HTTP GET request with the data parameters to the web application.
:star: Wait until the client is available, then fetch the response from the web application.
:star: If there is a response from the server and the web application appends the transferred data packet to the MySQL database successfully, print *Data registered successfully!* on the serial monitor and the SSD1309 screen.
```
void make_a_get_request(String _class){
// Connect to the web application named food_irradiation_data_logger. Change '80' with '443' if you are using SSL connection.
if (client.connect(server, 80)){
// If successful:
Serial.println("\nConnected to the web application successfully!");
// Create the query string:
String query = application+"?weight="+String(weight)+"&F1="+data1.ADF1+"&F2="+data1.ADF2+"&F3="+data1.ADF3+"&F4="+data1.ADF4+"&F5="+data2.ADF5+"&F6="+data2.ADF6+"&F7="+data2.ADF7+"&F8="+data2.ADF8;
query += "&CPM="+String(geiger.getCPM())+"&nSv="+String(geiger.getnSvh())+"&uSv="+String(geiger.getuSvh());
query += "&class="+_class;
// Make an HTTP Get request:
client.println("GET " + query + " HTTP/1.1");
client.println("Host: 192.168.1.20");
client.println("Connection: close");
client.println();
}else{
Serial.println("\nConnection failed to the web application!");
err_msg();
}
delay(2000); // Wait 2 seconds after connecting...
// If there are incoming bytes available, get the response from the web application.
String response = "";
while (client.available()) { char c = client.read(); response += c; }
if(response != "" && response.indexOf("Data received and saved successfully!") > 0){
Serial.println("Data registered successfully!");
u8g2.firstPage();
do{
//u8g2.setBitmapMode(true /* transparent*/);
u8g2.drawXBMP( /* x=*/36 , /* y=*/0 , /* width=*/50 , /* height=*/50 , data_colllect_bits);
u8g2.setFont(u8g2_font_4x6_tr);
u8g2.drawStr(6, 55, "Data registered successfully!");
}while(u8g2.nextPage());
}
}
```
:star: According to the pressed control button (A, B, or C), transmit the data packet to the given web application, including the selected food irradiation dose class.
```
if(!digitalRead(button_A)) make_a_get_request("0");
if(!digitalRead(button_B)) make_a_get_request("1");
if(!digitalRead(button_C)) make_a_get_request("2");
```


 ## Step 5.1: Logging the collected data into the MySQL database
After uploading and running the code for collecting data and transmitting data packets to the web application on Beetle ESP32-C3:
☢:bento: The device waits for the Wi-Fi module to connect to the given Wi-Fi network.
## Step 5.1: Logging the collected data into the MySQL database
After uploading and running the code for collecting data and transmitting data packets to the web application on Beetle ESP32-C3:
☢:bento: The device waits for the Wi-Fi module to connect to the given Wi-Fi network.
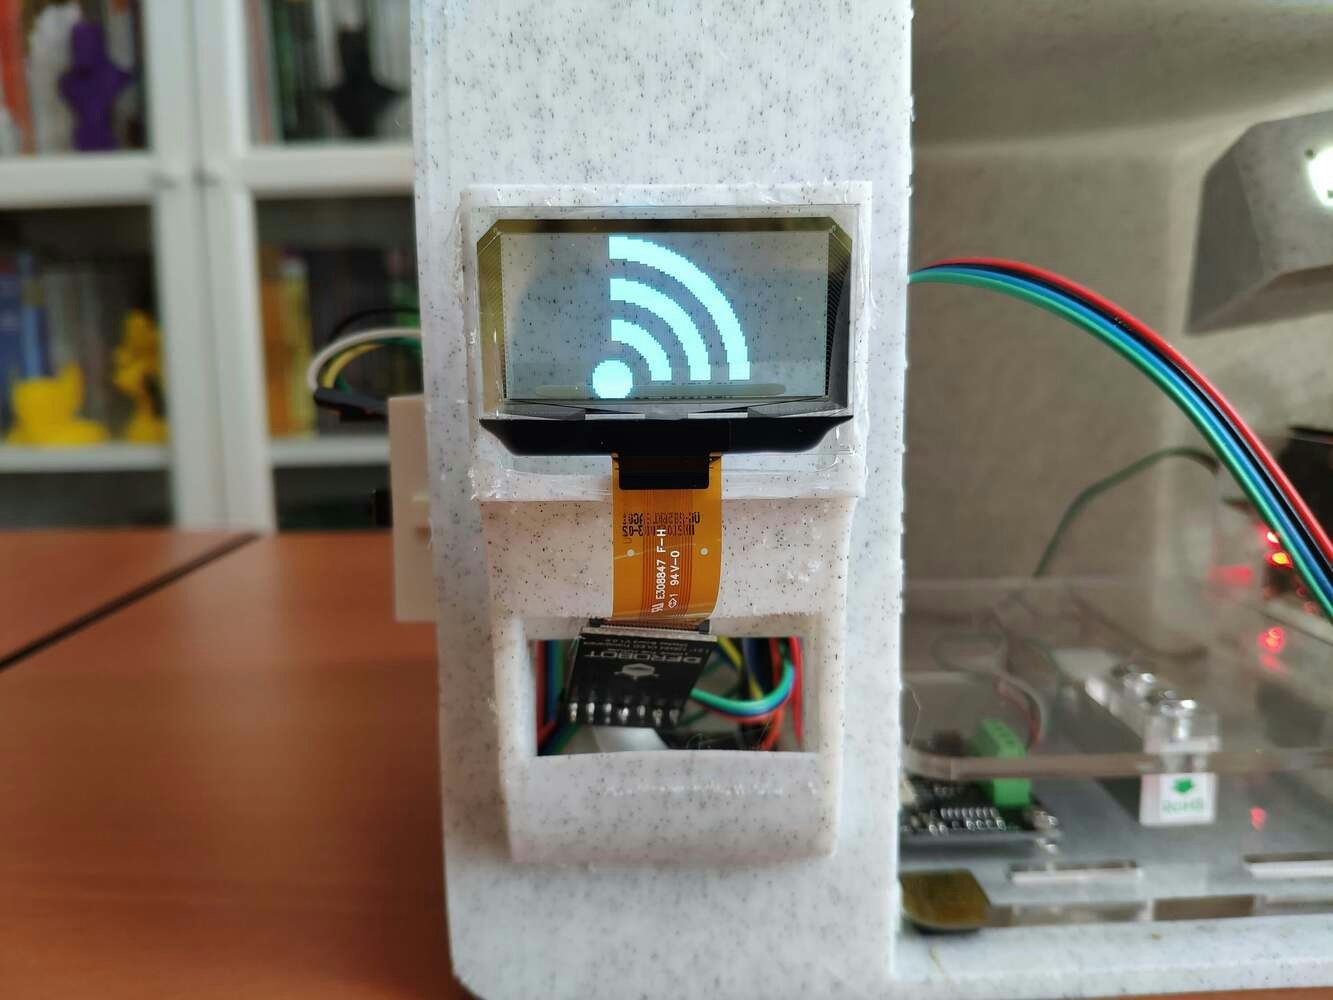 ☢:bento: Then, the device displays a modicum of the collected data on the SSD1309 OLED transparent screen.
* WEIGHT (g)
* F1 (405 - 425 nm)
* CPM (Counts per Minute)
☢:bento: The device allows the user to collect visible light (color) data at different angles with the movable handle.
☢:bento: Then, the device displays a modicum of the collected data on the SSD1309 OLED transparent screen.
* WEIGHT (g)
* F1 (405 - 425 nm)
* CPM (Counts per Minute)
☢:bento: The device allows the user to collect visible light (color) data at different angles with the movable handle.
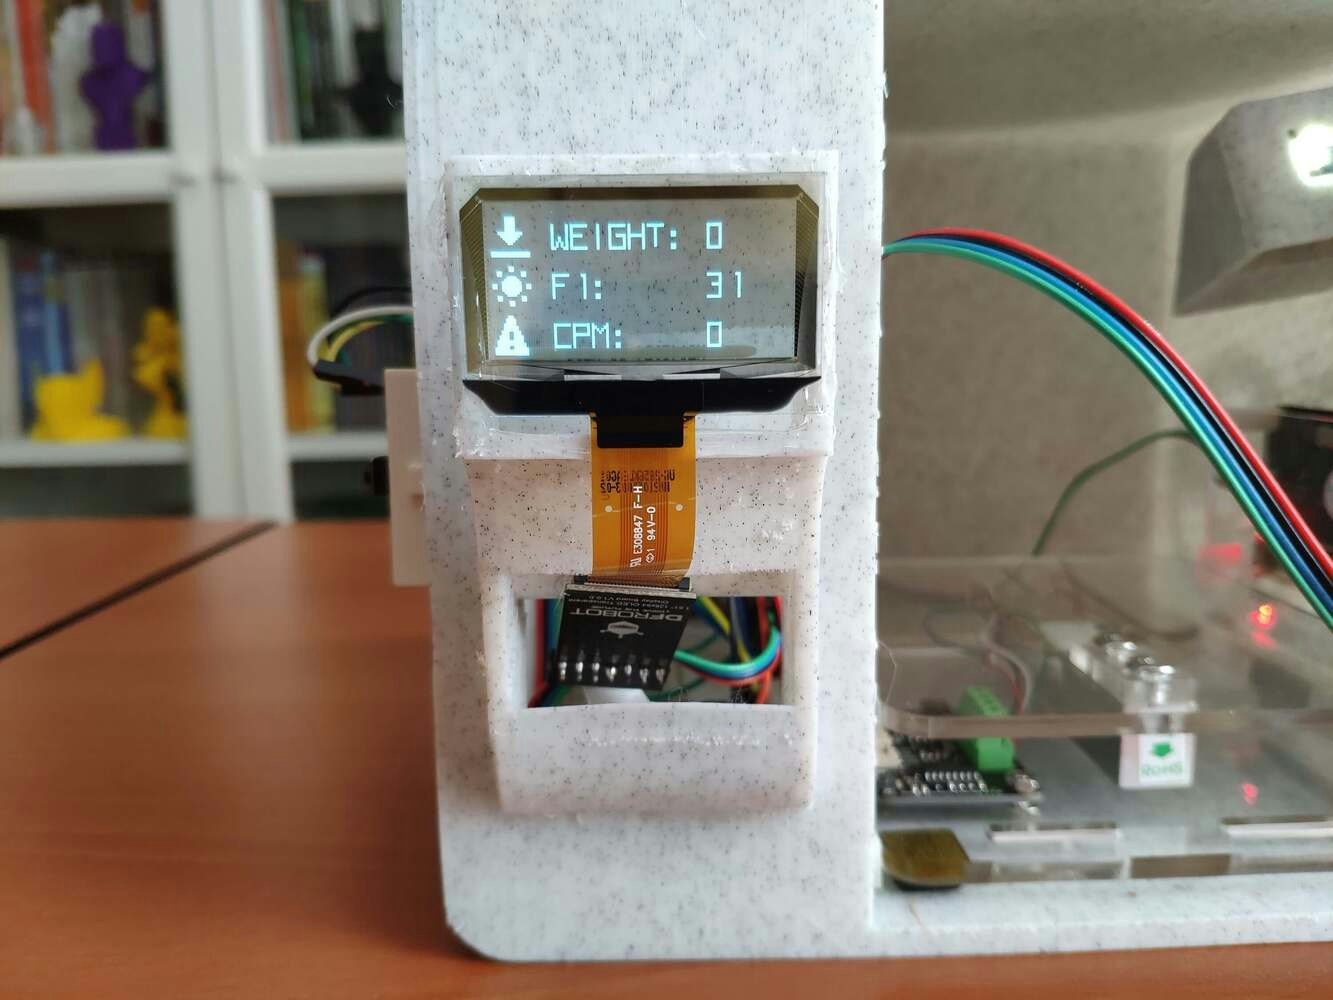
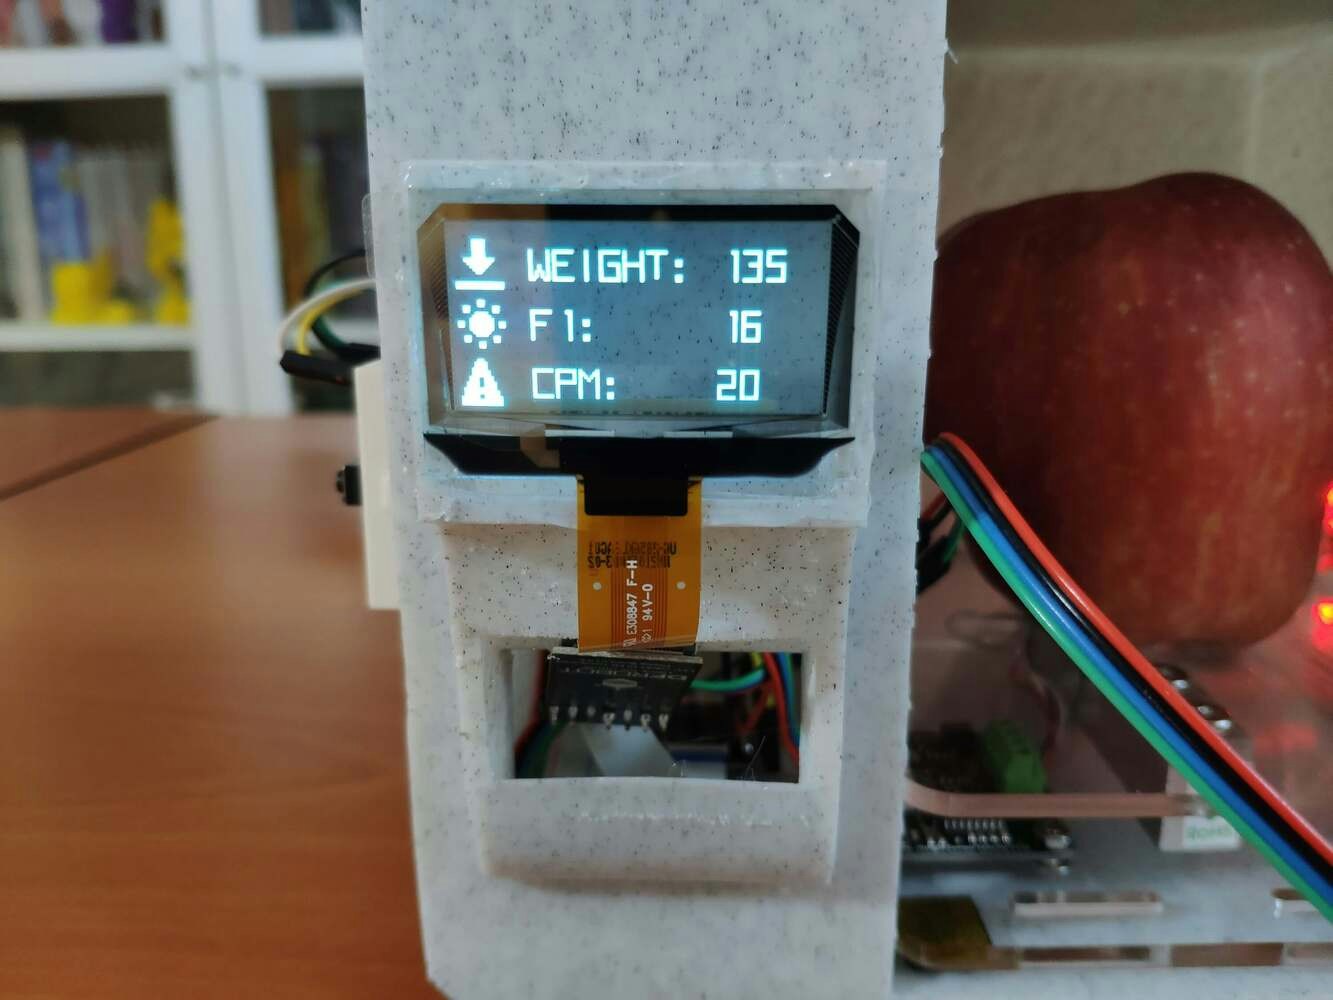 ☢:bento: If one of the control buttons (A, B, or C) is pressed, the device transmits the recently collected data by adding the selected food irradiation dose class to the given web application.
* Control Button (A) ➡ Regulated \[0]
* Control Button (B) ➡ Unsafe \[1]
* Control Button (C) ➡ Hazardous \[2]
☢:bento: Then, if the web application appends the transferred data packet to the MySQL database successfully, the device shows this message on the SSD1309 OLED transparent screen: *Data registered successfully!*
☢:bento: If Beetle ESP32-C3 throws an error while operating, the device shows the error message on the SSD1309 OLED transparent screen and prints the error details on the serial monitor.
☢:bento: If one of the control buttons (A, B, or C) is pressed, the device transmits the recently collected data by adding the selected food irradiation dose class to the given web application.
* Control Button (A) ➡ Regulated \[0]
* Control Button (B) ➡ Unsafe \[1]
* Control Button (C) ➡ Hazardous \[2]
☢:bento: Then, if the web application appends the transferred data packet to the MySQL database successfully, the device shows this message on the SSD1309 OLED transparent screen: *Data registered successfully!*
☢:bento: If Beetle ESP32-C3 throws an error while operating, the device shows the error message on the SSD1309 OLED transparent screen and prints the error details on the serial monitor.
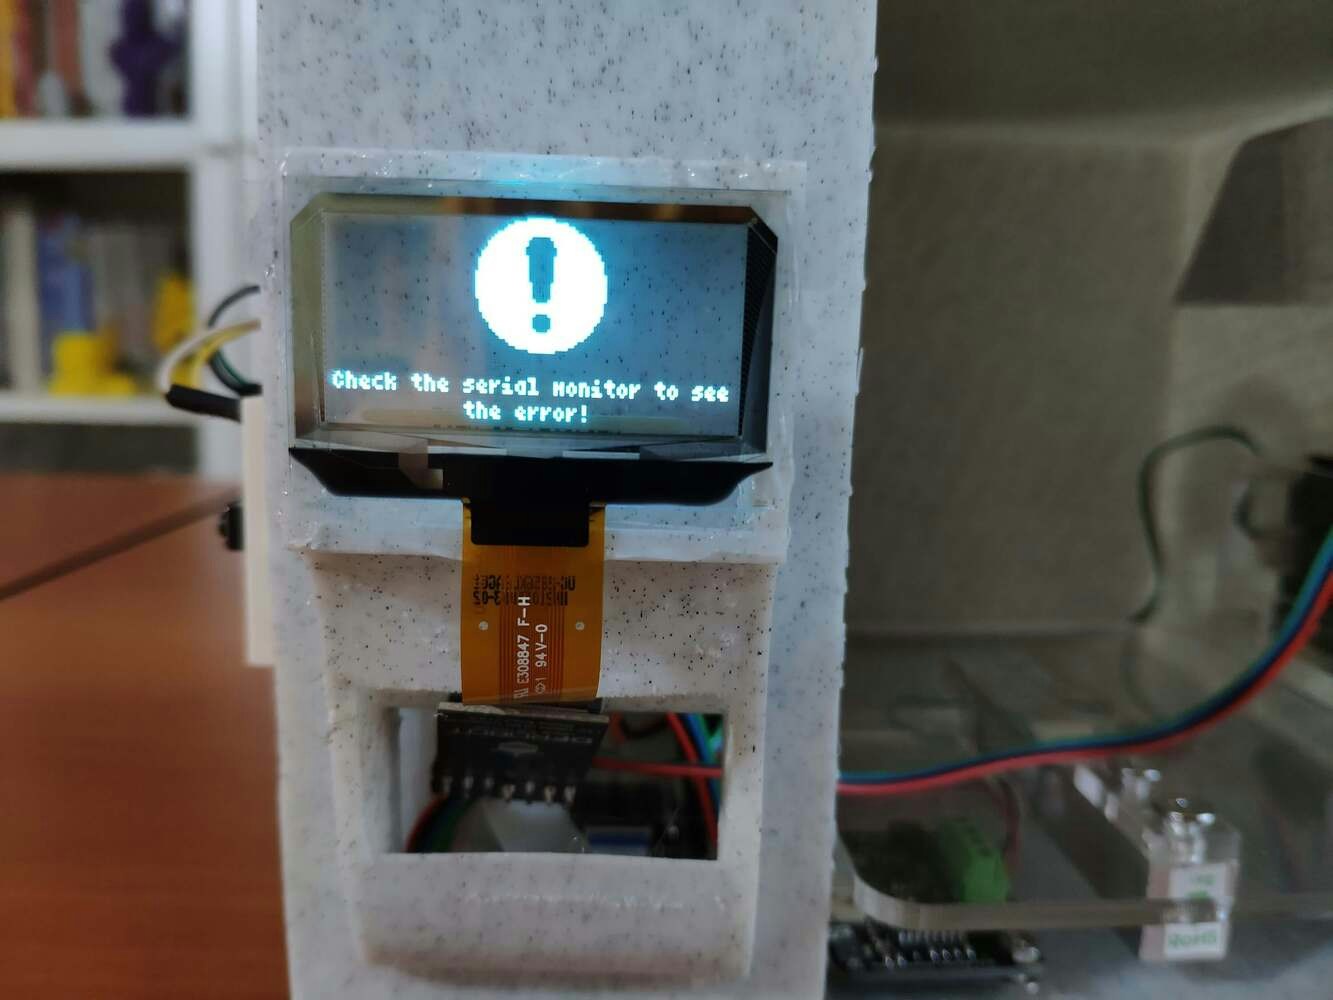
 ☢:bento: Also, the device prints notifications and sensor measurements on the serial monitor for debugging.

 As far as my experiments go, the device operates impeccably while collecting measurements and transmitting data packets to a given web application :)
## Step 5.2: Creating samples from data records with the web application
After logging ionizing radiation, weight, and visible light (color) measurements in the MySQL database from a motley collection of foods, exposed to sun rays as a natural source of radiation for estimated periods, I elicited my data set with eminent validity.
📌Foods:
* Pasta
* Corn kernel
* Herb
* Apple
* Wheat
* Animal (livestock) feed
As far as my experiments go, the device operates impeccably while collecting measurements and transmitting data packets to a given web application :)
## Step 5.2: Creating samples from data records with the web application
After logging ionizing radiation, weight, and visible light (color) measurements in the MySQL database from a motley collection of foods, exposed to sun rays as a natural source of radiation for estimated periods, I elicited my data set with eminent validity.
📌Foods:
* Pasta
* Corn kernel
* Herb
* Apple
* Wheat
* Animal (livestock) feed
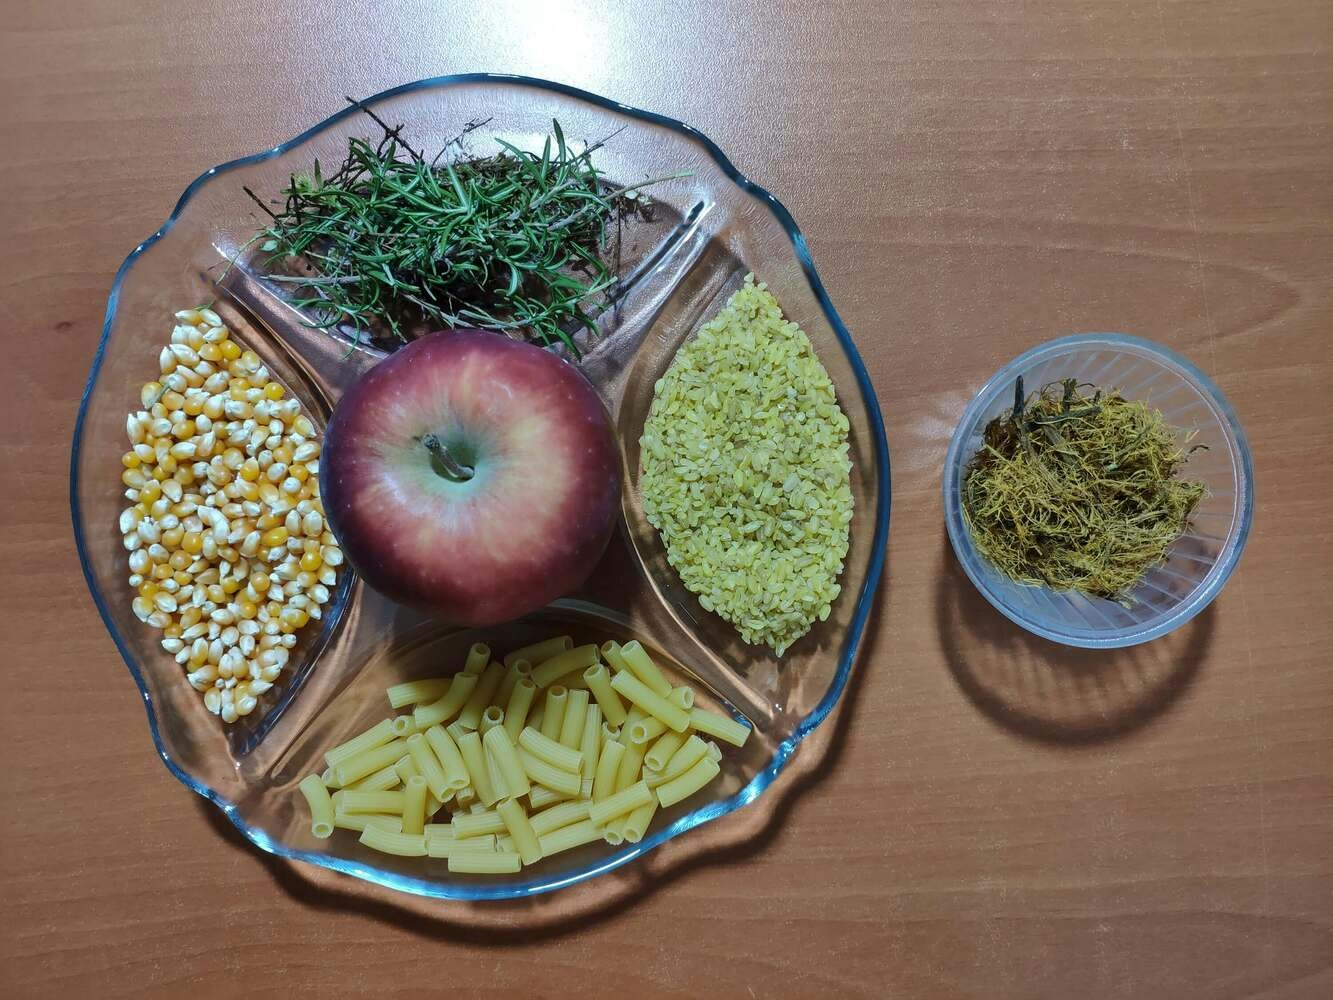
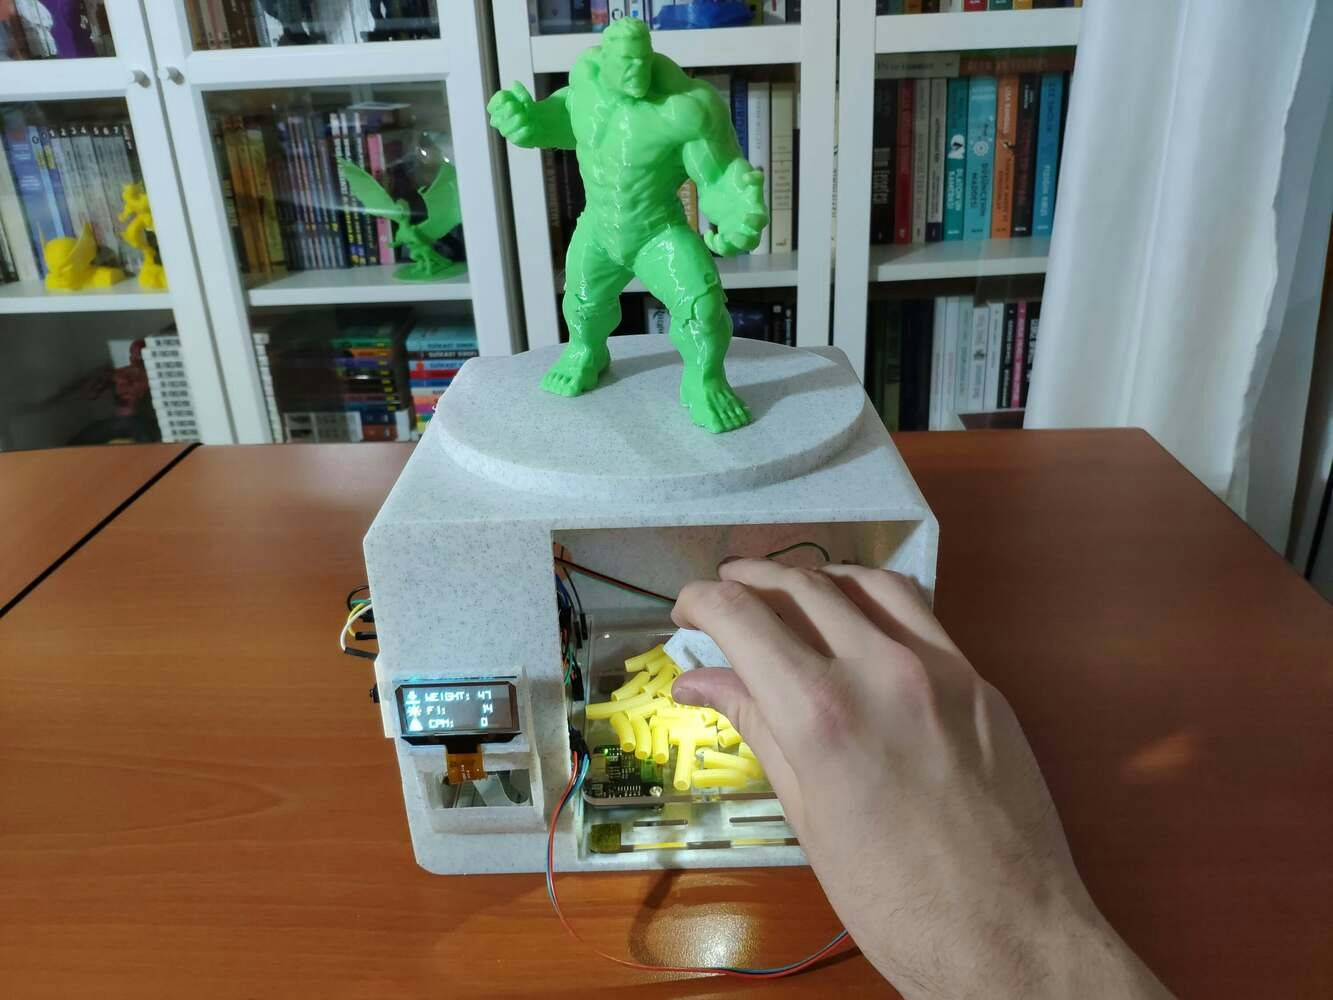
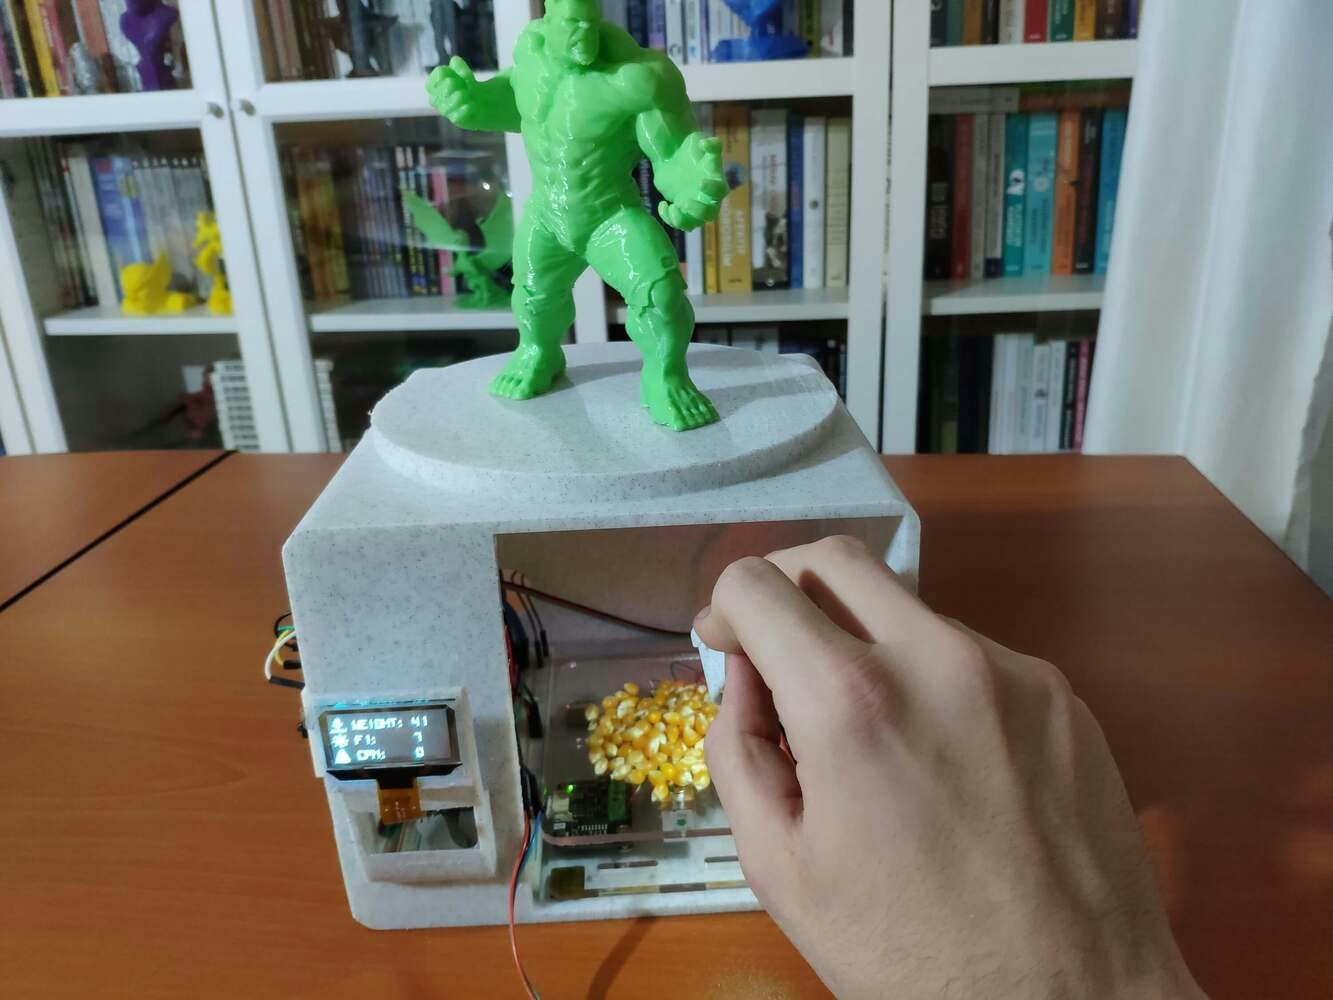
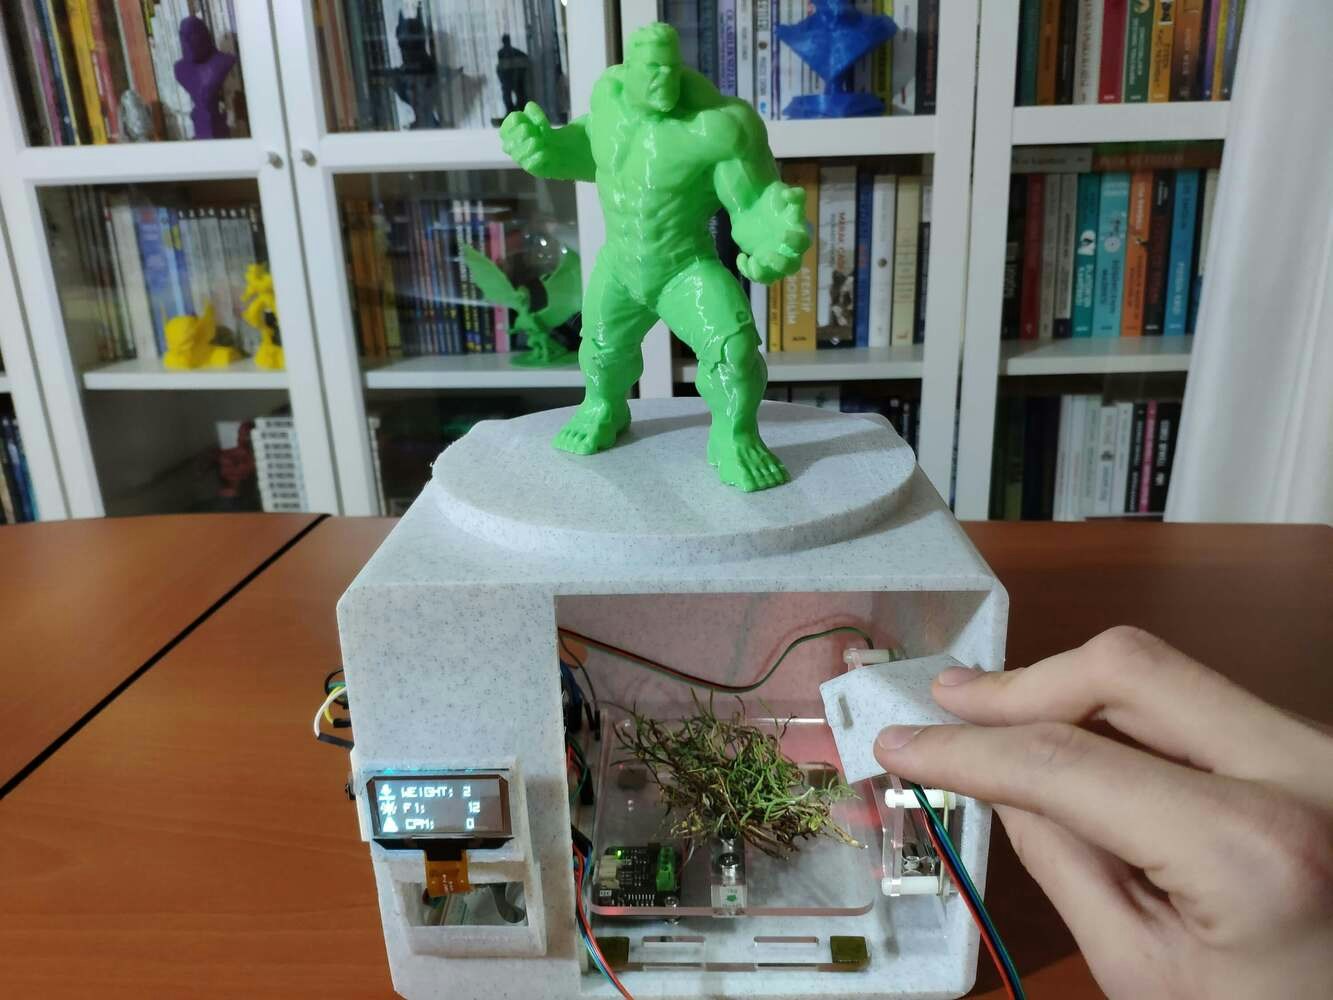
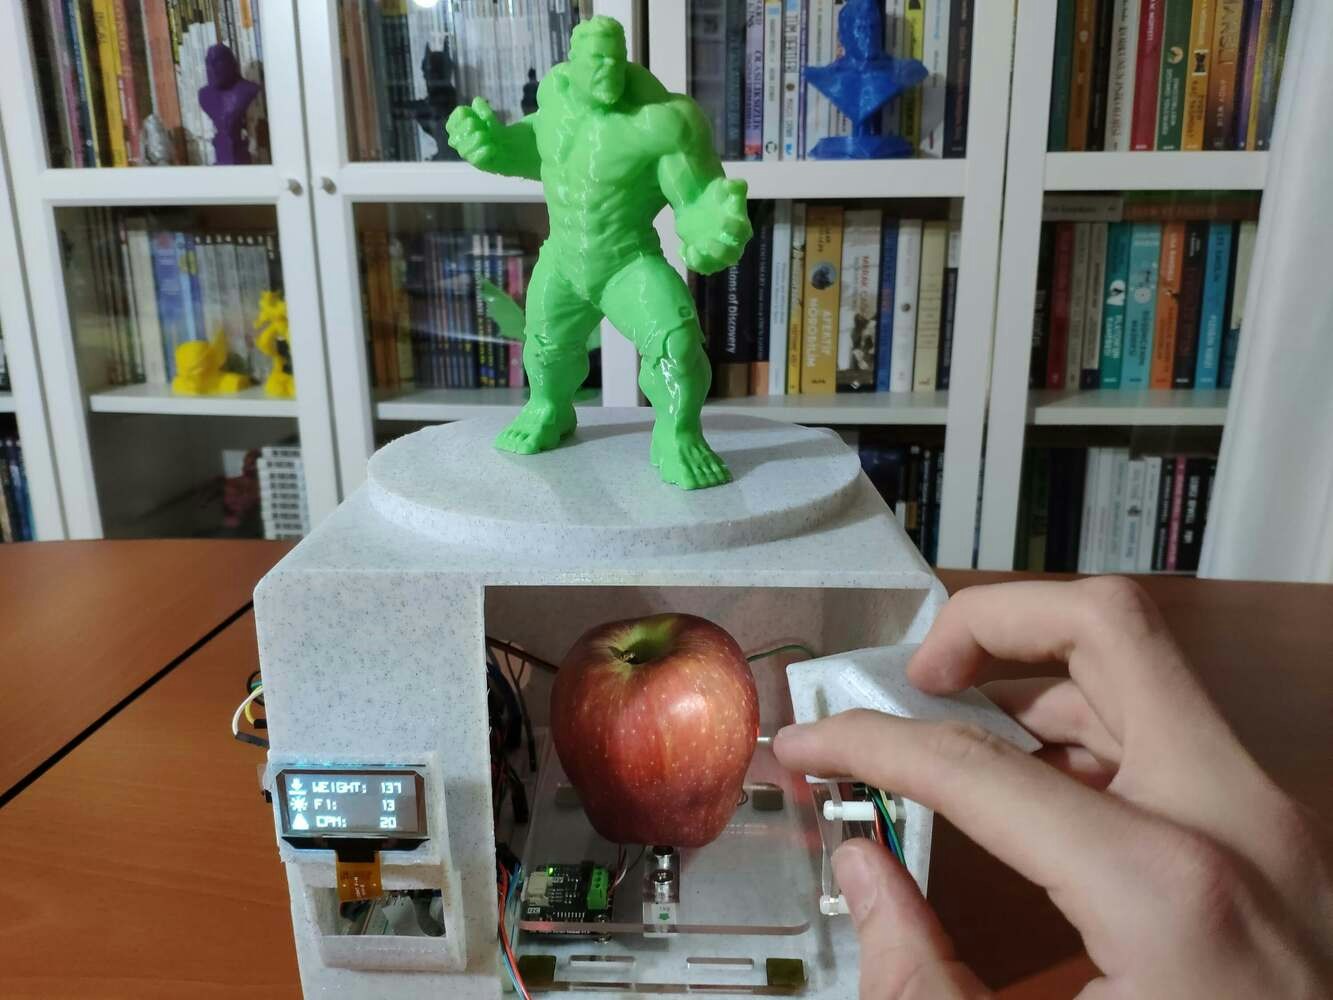
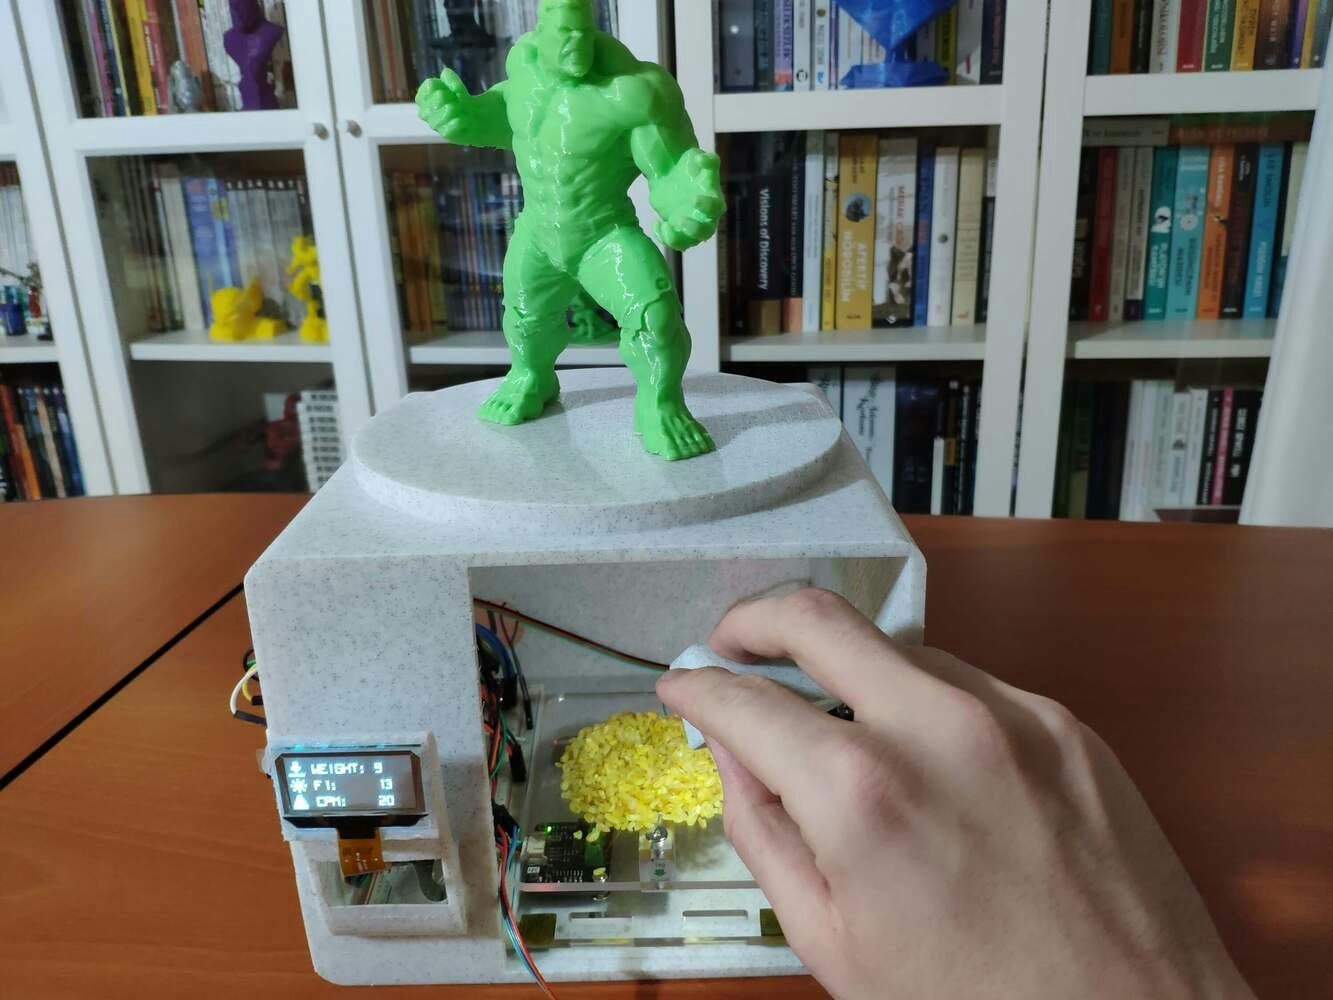
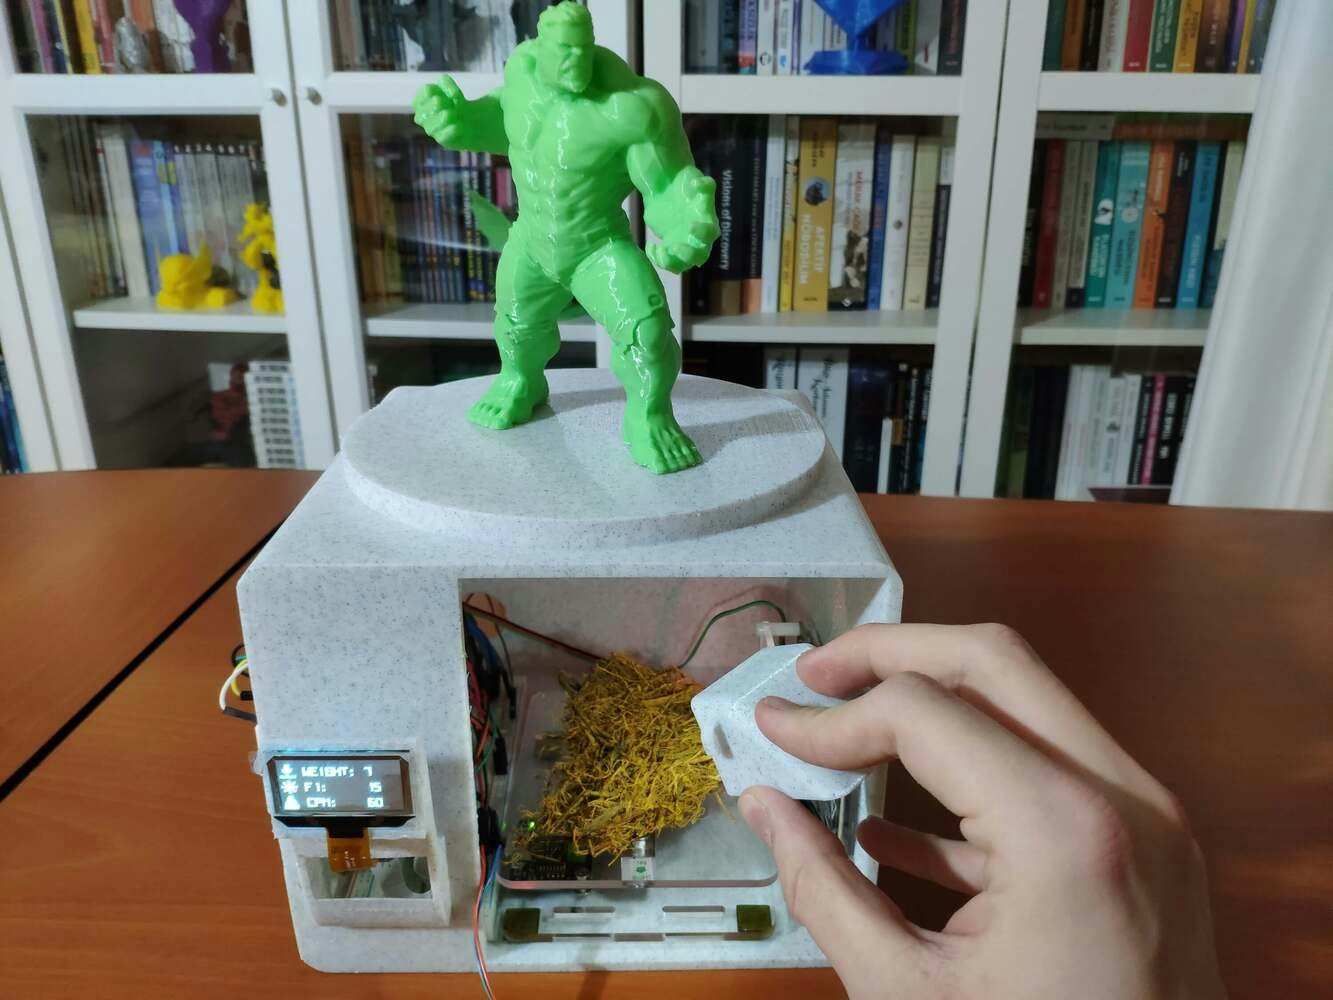 As explained in Step 2, I generated a CSV file (sample) for each data record in the MySQL database by utilizing the web application.
☢:bento: The web application shows the total number of data records for classes (labels) in the database.
As explained in Step 2, I generated a CSV file (sample) for each data record in the MySQL database by utilizing the web application.
☢:bento: The web application shows the total number of data records for classes (labels) in the database.
 ☢:bento: If the user clicks the *Create Samples* button, the web application scales data items and generates a CSV file (sample) for each data record, depending on the selected data type (training or testing).


 ☢:bento: If the user clicks the *Download* button, the web application downloads all generated CSV files (samples) in the ZIP file format.
📌 Training samples:
☢:bento: If the user clicks the *Download* button, the web application downloads all generated CSV files (samples) in the ZIP file format.
📌 Training samples:

 📌 Testing samples:

 ## Step 6: Building a neural network model with Edge Impulse
When I completed collating my food irradiation dose data set and assigning labels, I had started to work on my artificial neural network model (ANN) to make predictions on food irradiation dose levels (classes) based on ionizing radiation, weight, and visible light (color) measurements.
Since Edge Impulse supports almost every microcontroller and development board due to its model deployment options, I decided to utilize Edge Impulse to build my artificial neural network model. Also, Edge Impulse makes scaling embedded ML applications easier and faster for edge devices such as Beetle ESP32-C3.
Even though Edge Impulse supports CSV files to upload samples, the data type should be time series to upload all data records in a single file. Therefore, I needed to follow the steps below to format my data set so as to train my model accurately:
* Data Scaling (Normalizing)
* Data Preprocessing
As explained in the previous steps, I utilized the web application to scale (normalize) and preprocess data records to create CSV files (samples) for Edge Impulse.
Since the assigned classes are stored under the *class* data field in the MySQL database, I preprocessed my data set effortlessly to obtain labels for each data record while generating samples:
* 0: Regulated
* 1: Unsafe
* 2: Hazardous
Plausibly, Edge Impulse allows building predictive models optimized in size and accuracy automatically and deploying the trained model as an Arduino library. Therefore, after scaling (normalizing) and preprocessing my data set to create samples, I was able to build an accurate neural network model to forecast food irradiation dose levels and run it on Beetle ESP32-C3 effortlessly.
You can inspect [my neural network model on Edge Impulse](https://studio.edgeimpulse.com/public/109647/latest) as a public project.
## Step 6.1: Uploading samples to Edge Impulse
After generating training and testing samples successfully, I uploaded them to my project on Edge Impulse.
:hash: First of all, sign up for [Edge Impulse](https://www.edgeimpulse.com/) and create a new project.
## Step 6: Building a neural network model with Edge Impulse
When I completed collating my food irradiation dose data set and assigning labels, I had started to work on my artificial neural network model (ANN) to make predictions on food irradiation dose levels (classes) based on ionizing radiation, weight, and visible light (color) measurements.
Since Edge Impulse supports almost every microcontroller and development board due to its model deployment options, I decided to utilize Edge Impulse to build my artificial neural network model. Also, Edge Impulse makes scaling embedded ML applications easier and faster for edge devices such as Beetle ESP32-C3.
Even though Edge Impulse supports CSV files to upload samples, the data type should be time series to upload all data records in a single file. Therefore, I needed to follow the steps below to format my data set so as to train my model accurately:
* Data Scaling (Normalizing)
* Data Preprocessing
As explained in the previous steps, I utilized the web application to scale (normalize) and preprocess data records to create CSV files (samples) for Edge Impulse.
Since the assigned classes are stored under the *class* data field in the MySQL database, I preprocessed my data set effortlessly to obtain labels for each data record while generating samples:
* 0: Regulated
* 1: Unsafe
* 2: Hazardous
Plausibly, Edge Impulse allows building predictive models optimized in size and accuracy automatically and deploying the trained model as an Arduino library. Therefore, after scaling (normalizing) and preprocessing my data set to create samples, I was able to build an accurate neural network model to forecast food irradiation dose levels and run it on Beetle ESP32-C3 effortlessly.
You can inspect [my neural network model on Edge Impulse](https://studio.edgeimpulse.com/public/109647/latest) as a public project.
## Step 6.1: Uploading samples to Edge Impulse
After generating training and testing samples successfully, I uploaded them to my project on Edge Impulse.
:hash: First of all, sign up for [Edge Impulse](https://www.edgeimpulse.com/) and create a new project.
 :hash: Navigate to the *Data acquisition* page and click the *Upload existing data* button.
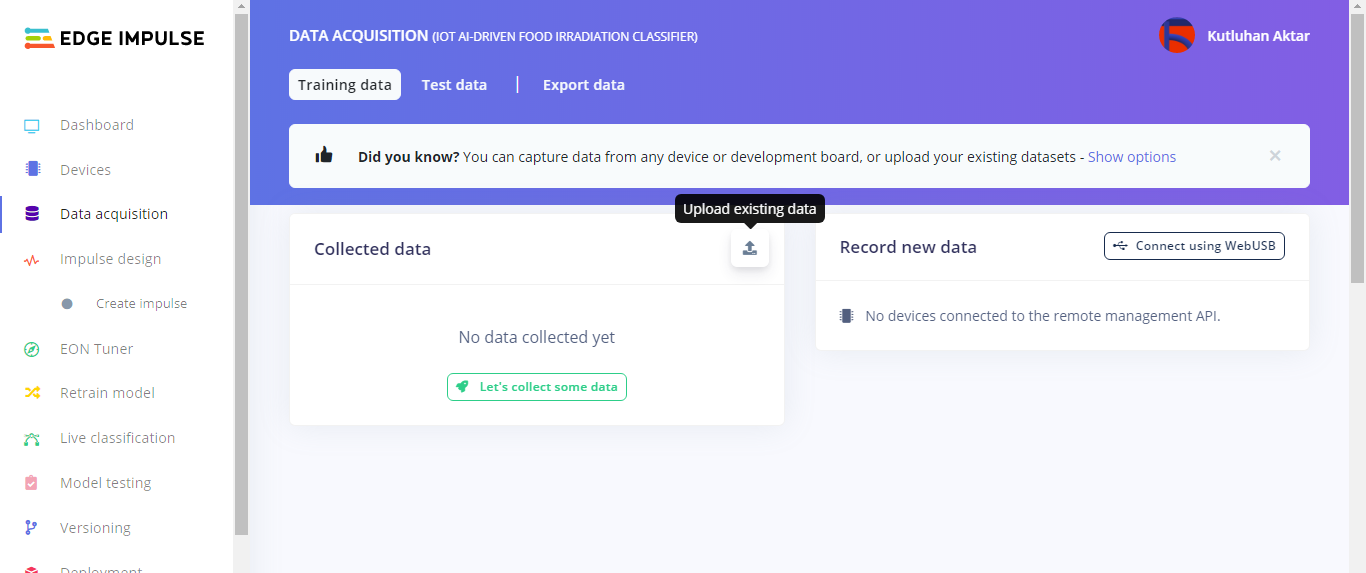
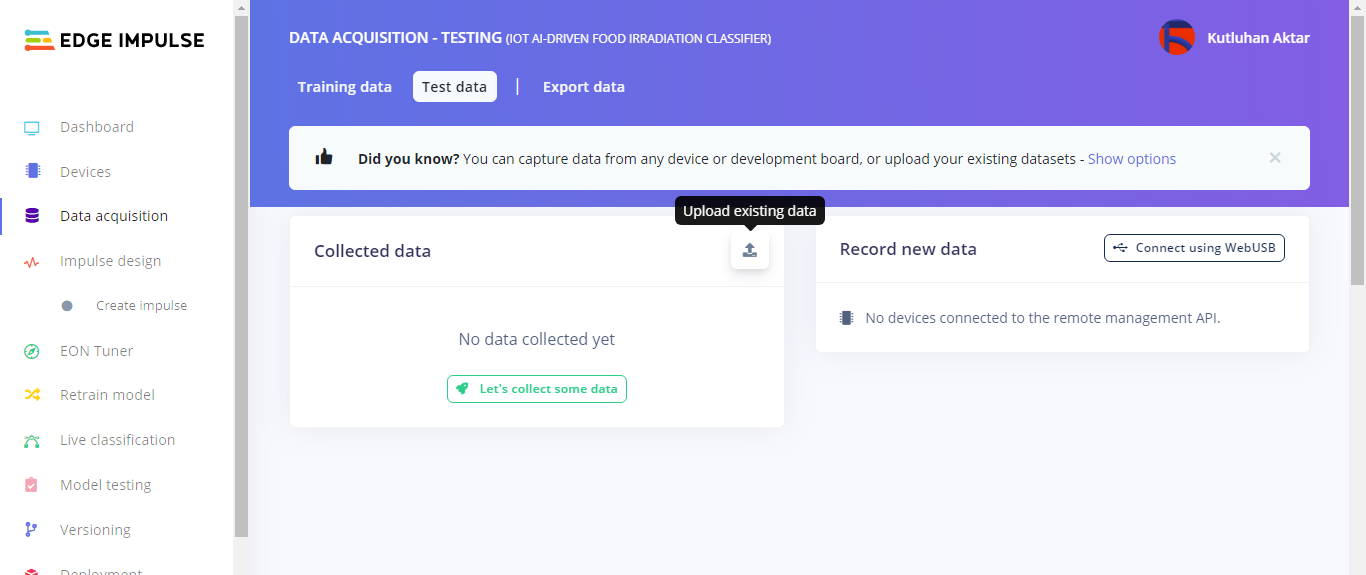 :hash: Then, choose the data category (training or testing) and select *Infer from filename* under *Label* to deduce labels from file names automatically.
:hash: Finally, select files and click the *Begin upload* button.
:hash: Then, choose the data category (training or testing) and select *Infer from filename* under *Label* to deduce labels from file names automatically.
:hash: Finally, select files and click the *Begin upload* button.


 ## Step 6.2: Training the model on food irradiation dose levels
After uploading my training and testing samples successfully, I designed an impulse and trained it on food irradiation dose levels (classes).
An impulse is a custom neural network model in Edge Impulse. I created my impulse by employing the *Raw Data* block and the *Classification* learning block.
The *Raw Data* block generate windows from data samples without any specific signal processing.
The *Classification* learning block represents a Keras neural network model. Also, it lets the user change the model settings, architecture, and layers.
:hash: Go to the *Create impulse* page. Then, select the *Raw Data* block and the *Classification* learning block. Finally, click *Save Impulse*.
## Step 6.2: Training the model on food irradiation dose levels
After uploading my training and testing samples successfully, I designed an impulse and trained it on food irradiation dose levels (classes).
An impulse is a custom neural network model in Edge Impulse. I created my impulse by employing the *Raw Data* block and the *Classification* learning block.
The *Raw Data* block generate windows from data samples without any specific signal processing.
The *Classification* learning block represents a Keras neural network model. Also, it lets the user change the model settings, architecture, and layers.
:hash: Go to the *Create impulse* page. Then, select the *Raw Data* block and the *Classification* learning block. Finally, click *Save Impulse*.
 :hash: Before generating features for the model, go to the *Raw data* page and click *Save parameters*.
 :hash: After saving parameters, click *Generate features* to apply the *Raw Data* block to training samples.

 :hash: Finally, navigate to the *NN Classifier* page and click *Start training*.

 According to my experiments with my neural network model, I modified classification model settings, architecture, and layers to build a neural network model with high accuracy and validity:
📌 Neural network settings:
* Number of training cycles ➡ 50
* Learning level ➡ 0.0006
* Validation set size ➡ 10
📌 Extra layers:
* Dense layer (64 neurons)
* Dense layer (32 neurons)
After generating features and training my model with training samples, Edge Impulse evaluated the precision score (accuracy) as *100%*.
The precision score is approximately *100%* due to the volume and variety of training samples. In technical terms, the model overfits the training data set. Therefore, I am still collecting data to improve my training data set.
According to my experiments with my neural network model, I modified classification model settings, architecture, and layers to build a neural network model with high accuracy and validity:
📌 Neural network settings:
* Number of training cycles ➡ 50
* Learning level ➡ 0.0006
* Validation set size ➡ 10
📌 Extra layers:
* Dense layer (64 neurons)
* Dense layer (32 neurons)
After generating features and training my model with training samples, Edge Impulse evaluated the precision score (accuracy) as *100%*.
The precision score is approximately *100%* due to the volume and variety of training samples. In technical terms, the model overfits the training data set. Therefore, I am still collecting data to improve my training data set.

 ## Step 6.3: Evaluating the model accuracy and deploying the model
After building and training my neural network model, I tested its accuracy and validity by utilizing testing samples.
The evaluated accuracy of the model is *96.30%*.
:hash: To validate the trained model, go to the *Model testing* page and click *Classify all*.
## Step 6.3: Evaluating the model accuracy and deploying the model
After building and training my neural network model, I tested its accuracy and validity by utilizing testing samples.
The evaluated accuracy of the model is *96.30%*.
:hash: To validate the trained model, go to the *Model testing* page and click *Classify all*.


 After validating my neural network model, I deployed it as a fully optimized and customizable Arduino library.
:hash: To deploy the validated model as an Arduino library, navigate to the *Deployment* page and select *Arduino library*.
:hash: Then, choose the *Quantized (int8)* optimization option to get the best performance possible while running the deployed model.
:hash: Finally, click *Build* to download the model as an Arduino library.
After validating my neural network model, I deployed it as a fully optimized and customizable Arduino library.
:hash: To deploy the validated model as an Arduino library, navigate to the *Deployment* page and select *Arduino library*.
:hash: Then, choose the *Quantized (int8)* optimization option to get the best performance possible while running the deployed model.
:hash: Finally, click *Build* to download the model as an Arduino library.


 ## Step 7: Setting up the Edge Impulse model on Beetle ESP32-C3
After building, training, and deploying my model as an Arduino library on Edge Impulse, I needed to upload and run the Arduino library on Beetle ESP32-C3 directly so as to create an easy-to-use and capable device operating with minimal latency and power consumption.
Since Edge Impulse optimizes and formats signal processing, configuration, and learning blocks into a single package while deploying models as Arduino libraries, I was able to import my model effortlessly to run inferences.
:hash: After downloading the model as an Arduino library in the ZIP file format, go to *Sketch > Include Library > Add .ZIP Library...*
:hash: Then, include the *IoT\_AI-driven\_Food\_Irradiation\_Classifier\_inferencing.h* file to import the Edge Impulse neural network model.
```
#include <IoT_AI-driven_Food_Irradiation_Classifier_inferencing.h>
```
After importing my model successfully to the Arduino IDE, I employed the control button (B) attached to Beetle ESP32-C3 to run inferences so as to predict food irradiation dose levels:
* Press ➡ Run Inference
You can download the *IoT\_food\_irradiation\_run\_model.ino* file to try and inspect the code for running Edge Impulse neural network models on Beetle ESP32-C3.
You can inspect the corresponding functions and settings in Step 5.
:star: Include the required libraries.
```
#include <DFRobot_Geiger.h>
#include <DFRobot_HX711_I2C.h>
#include <U8g2lib.h>
#include <SPI.h>
#include "DFRobot_AS7341.h"
// Include the Edge Impulse model converted to an Arduino library:
#include <IoT_AI-driven_Food_Irradiation_Classifier_inferencing.h>
```
:star: Define the required parameters to run an inference with the Edge Impulse model. :star: Define the features array (buffer) to classify one frame of data.
```
#define FREQUENCY_HZ EI_CLASSIFIER_FREQUENCY
#define INTERVAL_MS (1000 / (FREQUENCY_HZ + 1))
// Define the features array to classify one frame of data.
float features[EI_CLASSIFIER_DSP_INPUT_FRAME_SIZE];
size_t feature_ix = 0;
```
:star: Define the threshold value (0.60) for the model outputs (predictions).
:star: Define the food irradiation dose class names:
* Regulated
* Unsafe
* Hazardous
```
float threshold = 0.60;
// Define the food irradiation dose (class) names:
String classes[] = {"Hazardous", "Regulated", "Unsafe"};
```
:star: Define monochrome graphics.
:star: Create an array including icons for each food irradiation dose class.
```
static const unsigned char *class_icons[] U8X8_PROGMEM = {hazardous_bits, regulated_bits, unsafe_bits};
```
:star: In the *run\_inference\_to\_make\_predictions* function:
:star: Scale (normalize) the collected data depending on the given model and copy the scaled data items to the features array (buffer).
:star: If required, multiply the scaled data items while copying them to the features array (buffer).
:star: Display the progress of copying data to the features buffer on the serial monitor.
:star: If the features buffer is full, create a signal object from the features buffer (frame).
:star: Then, run the classifier.
:star: Print the inference timings on the serial monitor.
:star: Read the prediction (detection) result for each food irradiation dose class (label).
:star: Print the prediction results on the serial monitor.
:star: Obtain the detection result greater than the given threshold (0.60). It represents the most accurate label (food irradiation dose class) predicted by the model.
:star: Print the detected anomalies on the serial monitor, if any.
:star: Finally, clear the features buffer (frame).
```
void run_inference_to_make_predictions(int multiply){
// Scale (normalize) data items depending on the given model:
float scaled_weight = weight / 10;
float scaled_F1 = data1.ADF1 / 100;
float scaled_F2 = data1.ADF2 / 100;
float scaled_F3 = data1.ADF3 / 100;
float scaled_F4 = data1.ADF4 / 100;
float scaled_F5 = data2.ADF5 / 100;
float scaled_F6 = data2.ADF6 / 100;
float scaled_F7 = data2.ADF7 / 100;
float scaled_F8 = data2.ADF8 / 100;
float scaled_CPM = geiger.getCPM() / 100;
float scaled_nSv = geiger.getnSvh() / 100;
float scaled_uSv = geiger.getuSvh();
// Copy the scaled data items to the features buffer.
// If required, multiply the scaled data items while copying them to the features buffer.
for(int i=0; i<multiply; i++){
features[feature_ix++] = scaled_weight;
features[feature_ix++] = scaled_F1;
features[feature_ix++] = scaled_F2;
features[feature_ix++] = scaled_F3;
features[feature_ix++] = scaled_F4;
features[feature_ix++] = scaled_F5;
features[feature_ix++] = scaled_F6;
features[feature_ix++] = scaled_F7;
features[feature_ix++] = scaled_F8;
features[feature_ix++] = scaled_CPM;
features[feature_ix++] = scaled_nSv;
features[feature_ix++] = scaled_uSv;
}
// Display the progress of copying data to the features buffer.
Serial.print("\nFeatures Buffer Progress: "); Serial.print(feature_ix); Serial.print(" / "); Serial.println(EI_CLASSIFIER_DSP_INPUT_FRAME_SIZE);
// Run inference:
if(feature_ix == EI_CLASSIFIER_DSP_INPUT_FRAME_SIZE){
ei_impulse_result_t result;
// Create a signal object from the features buffer (frame).
signal_t signal;
numpy::signal_from_buffer(features, EI_CLASSIFIER_DSP_INPUT_FRAME_SIZE, &signal);
// Run the classifier:
EI_IMPULSE_ERROR res = run_classifier(&signal, &result, false);
ei_printf("\nrun_classifier returned: %d\n", res);
if(res != 0) return;
// Print the inference timings on the serial monitor.
ei_printf("Predictions (DSP: %d ms., Classification: %d ms., Anomaly: %d ms.): \n",
result.timing.dsp, result.timing.classification, result.timing.anomaly);
// Obtain the prediction results for each label (class).
for(size_t ix = 0; ix < EI_CLASSIFIER_LABEL_COUNT; ix++){
// Print the prediction results on the serial monitor.
ei_printf("%s:\t%.5f\n", result.classification[ix].label, result.classification[ix].value);
// Get the predicted label (class).
if(result.classification[ix].value >= threshold) predicted_class = ix;
}
Serial.print("\nPredicted Class: "); Serial.println(predicted_class);
// Detect anomalies, if any:
#if EI_CLASSIFIER_HAS_ANOMALY == 1
ei_printf("Anomaly : \t%.3f\n", result.anomaly);
#endif
// Clear the features buffer (frame):
feature_ix = 0;
}
}
```
:star: If the control button (B) is pressed, start running inference with the Edge Impulse model to predict the food irradiation dose level.
:star: Wait until the Edge Impulse model predicts a food irradiation dose level (label) successfully.
:star: Then, display the prediction (detection) result (class) on the SSD1309 OLED transparent screen with its assigned monochrome icon.
:star: Clear the predicted label (class).
:star: Finally, stop the running inference and return to the home screen.
```
if(!digitalRead(button_B)){
model_activation = true;
u8g2.firstPage();
do{
u8g2.setFont(u8g2_font_open_iconic_all_8x_t);
u8g2.drawGlyph(/* x=*/32, /* y=*/0, /* encoding=*/233);
}while(u8g2.nextPage());
}
while(model_activation){
get_Weight();
get_Visual_Light();
activate_Geiger_counter();
// Run inference:
run_inference_to_make_predictions(1);
// If the Edge Impulse model predicted a label (class) successfully:
if(predicted_class != -1){
// Display the predicted class:
String c = "Class: " + classes[predicted_class];
int str_x = c.length() * 4;
u8g2.firstPage();
do{
//u8g2.setBitmapMode(true /* transparent*/);
u8g2.drawXBMP( /* x=*/(u8g2.getDisplayWidth()-50)/2 , /* y=*/0 , /* width=*/50 , /* height=*/50 , class_icons[predicted_class]);
u8g2.setFont(u8g2_font_4x6_tr);
u8g2.drawStr((u8g2.getDisplayWidth()-str_x)/2, 55, c.c_str());
}while(u8g2.nextPage());
// Clear the predicted class (label).
predicted_class = -1;
// Stop the running inference and return to the home screen.
model_activation = false;
}
}
```
## Step 7: Setting up the Edge Impulse model on Beetle ESP32-C3
After building, training, and deploying my model as an Arduino library on Edge Impulse, I needed to upload and run the Arduino library on Beetle ESP32-C3 directly so as to create an easy-to-use and capable device operating with minimal latency and power consumption.
Since Edge Impulse optimizes and formats signal processing, configuration, and learning blocks into a single package while deploying models as Arduino libraries, I was able to import my model effortlessly to run inferences.
:hash: After downloading the model as an Arduino library in the ZIP file format, go to *Sketch > Include Library > Add .ZIP Library...*
:hash: Then, include the *IoT\_AI-driven\_Food\_Irradiation\_Classifier\_inferencing.h* file to import the Edge Impulse neural network model.
```
#include <IoT_AI-driven_Food_Irradiation_Classifier_inferencing.h>
```
After importing my model successfully to the Arduino IDE, I employed the control button (B) attached to Beetle ESP32-C3 to run inferences so as to predict food irradiation dose levels:
* Press ➡ Run Inference
You can download the *IoT\_food\_irradiation\_run\_model.ino* file to try and inspect the code for running Edge Impulse neural network models on Beetle ESP32-C3.
You can inspect the corresponding functions and settings in Step 5.
:star: Include the required libraries.
```
#include <DFRobot_Geiger.h>
#include <DFRobot_HX711_I2C.h>
#include <U8g2lib.h>
#include <SPI.h>
#include "DFRobot_AS7341.h"
// Include the Edge Impulse model converted to an Arduino library:
#include <IoT_AI-driven_Food_Irradiation_Classifier_inferencing.h>
```
:star: Define the required parameters to run an inference with the Edge Impulse model. :star: Define the features array (buffer) to classify one frame of data.
```
#define FREQUENCY_HZ EI_CLASSIFIER_FREQUENCY
#define INTERVAL_MS (1000 / (FREQUENCY_HZ + 1))
// Define the features array to classify one frame of data.
float features[EI_CLASSIFIER_DSP_INPUT_FRAME_SIZE];
size_t feature_ix = 0;
```
:star: Define the threshold value (0.60) for the model outputs (predictions).
:star: Define the food irradiation dose class names:
* Regulated
* Unsafe
* Hazardous
```
float threshold = 0.60;
// Define the food irradiation dose (class) names:
String classes[] = {"Hazardous", "Regulated", "Unsafe"};
```
:star: Define monochrome graphics.
:star: Create an array including icons for each food irradiation dose class.
```
static const unsigned char *class_icons[] U8X8_PROGMEM = {hazardous_bits, regulated_bits, unsafe_bits};
```
:star: In the *run\_inference\_to\_make\_predictions* function:
:star: Scale (normalize) the collected data depending on the given model and copy the scaled data items to the features array (buffer).
:star: If required, multiply the scaled data items while copying them to the features array (buffer).
:star: Display the progress of copying data to the features buffer on the serial monitor.
:star: If the features buffer is full, create a signal object from the features buffer (frame).
:star: Then, run the classifier.
:star: Print the inference timings on the serial monitor.
:star: Read the prediction (detection) result for each food irradiation dose class (label).
:star: Print the prediction results on the serial monitor.
:star: Obtain the detection result greater than the given threshold (0.60). It represents the most accurate label (food irradiation dose class) predicted by the model.
:star: Print the detected anomalies on the serial monitor, if any.
:star: Finally, clear the features buffer (frame).
```
void run_inference_to_make_predictions(int multiply){
// Scale (normalize) data items depending on the given model:
float scaled_weight = weight / 10;
float scaled_F1 = data1.ADF1 / 100;
float scaled_F2 = data1.ADF2 / 100;
float scaled_F3 = data1.ADF3 / 100;
float scaled_F4 = data1.ADF4 / 100;
float scaled_F5 = data2.ADF5 / 100;
float scaled_F6 = data2.ADF6 / 100;
float scaled_F7 = data2.ADF7 / 100;
float scaled_F8 = data2.ADF8 / 100;
float scaled_CPM = geiger.getCPM() / 100;
float scaled_nSv = geiger.getnSvh() / 100;
float scaled_uSv = geiger.getuSvh();
// Copy the scaled data items to the features buffer.
// If required, multiply the scaled data items while copying them to the features buffer.
for(int i=0; i<multiply; i++){
features[feature_ix++] = scaled_weight;
features[feature_ix++] = scaled_F1;
features[feature_ix++] = scaled_F2;
features[feature_ix++] = scaled_F3;
features[feature_ix++] = scaled_F4;
features[feature_ix++] = scaled_F5;
features[feature_ix++] = scaled_F6;
features[feature_ix++] = scaled_F7;
features[feature_ix++] = scaled_F8;
features[feature_ix++] = scaled_CPM;
features[feature_ix++] = scaled_nSv;
features[feature_ix++] = scaled_uSv;
}
// Display the progress of copying data to the features buffer.
Serial.print("\nFeatures Buffer Progress: "); Serial.print(feature_ix); Serial.print(" / "); Serial.println(EI_CLASSIFIER_DSP_INPUT_FRAME_SIZE);
// Run inference:
if(feature_ix == EI_CLASSIFIER_DSP_INPUT_FRAME_SIZE){
ei_impulse_result_t result;
// Create a signal object from the features buffer (frame).
signal_t signal;
numpy::signal_from_buffer(features, EI_CLASSIFIER_DSP_INPUT_FRAME_SIZE, &signal);
// Run the classifier:
EI_IMPULSE_ERROR res = run_classifier(&signal, &result, false);
ei_printf("\nrun_classifier returned: %d\n", res);
if(res != 0) return;
// Print the inference timings on the serial monitor.
ei_printf("Predictions (DSP: %d ms., Classification: %d ms., Anomaly: %d ms.): \n",
result.timing.dsp, result.timing.classification, result.timing.anomaly);
// Obtain the prediction results for each label (class).
for(size_t ix = 0; ix < EI_CLASSIFIER_LABEL_COUNT; ix++){
// Print the prediction results on the serial monitor.
ei_printf("%s:\t%.5f\n", result.classification[ix].label, result.classification[ix].value);
// Get the predicted label (class).
if(result.classification[ix].value >= threshold) predicted_class = ix;
}
Serial.print("\nPredicted Class: "); Serial.println(predicted_class);
// Detect anomalies, if any:
#if EI_CLASSIFIER_HAS_ANOMALY == 1
ei_printf("Anomaly : \t%.3f\n", result.anomaly);
#endif
// Clear the features buffer (frame):
feature_ix = 0;
}
}
```
:star: If the control button (B) is pressed, start running inference with the Edge Impulse model to predict the food irradiation dose level.
:star: Wait until the Edge Impulse model predicts a food irradiation dose level (label) successfully.
:star: Then, display the prediction (detection) result (class) on the SSD1309 OLED transparent screen with its assigned monochrome icon.
:star: Clear the predicted label (class).
:star: Finally, stop the running inference and return to the home screen.
```
if(!digitalRead(button_B)){
model_activation = true;
u8g2.firstPage();
do{
u8g2.setFont(u8g2_font_open_iconic_all_8x_t);
u8g2.drawGlyph(/* x=*/32, /* y=*/0, /* encoding=*/233);
}while(u8g2.nextPage());
}
while(model_activation){
get_Weight();
get_Visual_Light();
activate_Geiger_counter();
// Run inference:
run_inference_to_make_predictions(1);
// If the Edge Impulse model predicted a label (class) successfully:
if(predicted_class != -1){
// Display the predicted class:
String c = "Class: " + classes[predicted_class];
int str_x = c.length() * 4;
u8g2.firstPage();
do{
//u8g2.setBitmapMode(true /* transparent*/);
u8g2.drawXBMP( /* x=*/(u8g2.getDisplayWidth()-50)/2 , /* y=*/0 , /* width=*/50 , /* height=*/50 , class_icons[predicted_class]);
u8g2.setFont(u8g2_font_4x6_tr);
u8g2.drawStr((u8g2.getDisplayWidth()-str_x)/2, 55, c.c_str());
}while(u8g2.nextPage());
// Clear the predicted class (label).
predicted_class = -1;
// Stop the running inference and return to the home screen.
model_activation = false;
}
}
```


 ## Step 8: Running the model on Beetle ESP32-C3 to make predictions on food irradiation doses
When the features array (buffer) is full with data items, my Edge Impulse neural network model predicts possibilities of labels (food irradiation dose classes) for the given features buffer as an array of 3 numbers. They represent the model's *"confidence"* that the given features buffer corresponds to each of the three different food irradiation dose levels (classes) based on ionizing radiation, weight, and visible light (color) measurements \[0 - 2], as shown in Step 6:
* 0: Regulated
* 1: Unsafe
* 2: Hazardous
After executing the *IoT\_food\_irradiation\_run\_model.ino* file on Beetle ESP32-C3:
☢:bento: The device displays a modicum of the collected data on the SSD1309 OLED transparent screen.
* WEIGHT (g)
* F1 (405 - 425 nm)
* CPM (Counts per Minute)
## Step 8: Running the model on Beetle ESP32-C3 to make predictions on food irradiation doses
When the features array (buffer) is full with data items, my Edge Impulse neural network model predicts possibilities of labels (food irradiation dose classes) for the given features buffer as an array of 3 numbers. They represent the model's *"confidence"* that the given features buffer corresponds to each of the three different food irradiation dose levels (classes) based on ionizing radiation, weight, and visible light (color) measurements \[0 - 2], as shown in Step 6:
* 0: Regulated
* 1: Unsafe
* 2: Hazardous
After executing the *IoT\_food\_irradiation\_run\_model.ino* file on Beetle ESP32-C3:
☢:bento: The device displays a modicum of the collected data on the SSD1309 OLED transparent screen.
* WEIGHT (g)
* F1 (405 - 425 nm)
* CPM (Counts per Minute)
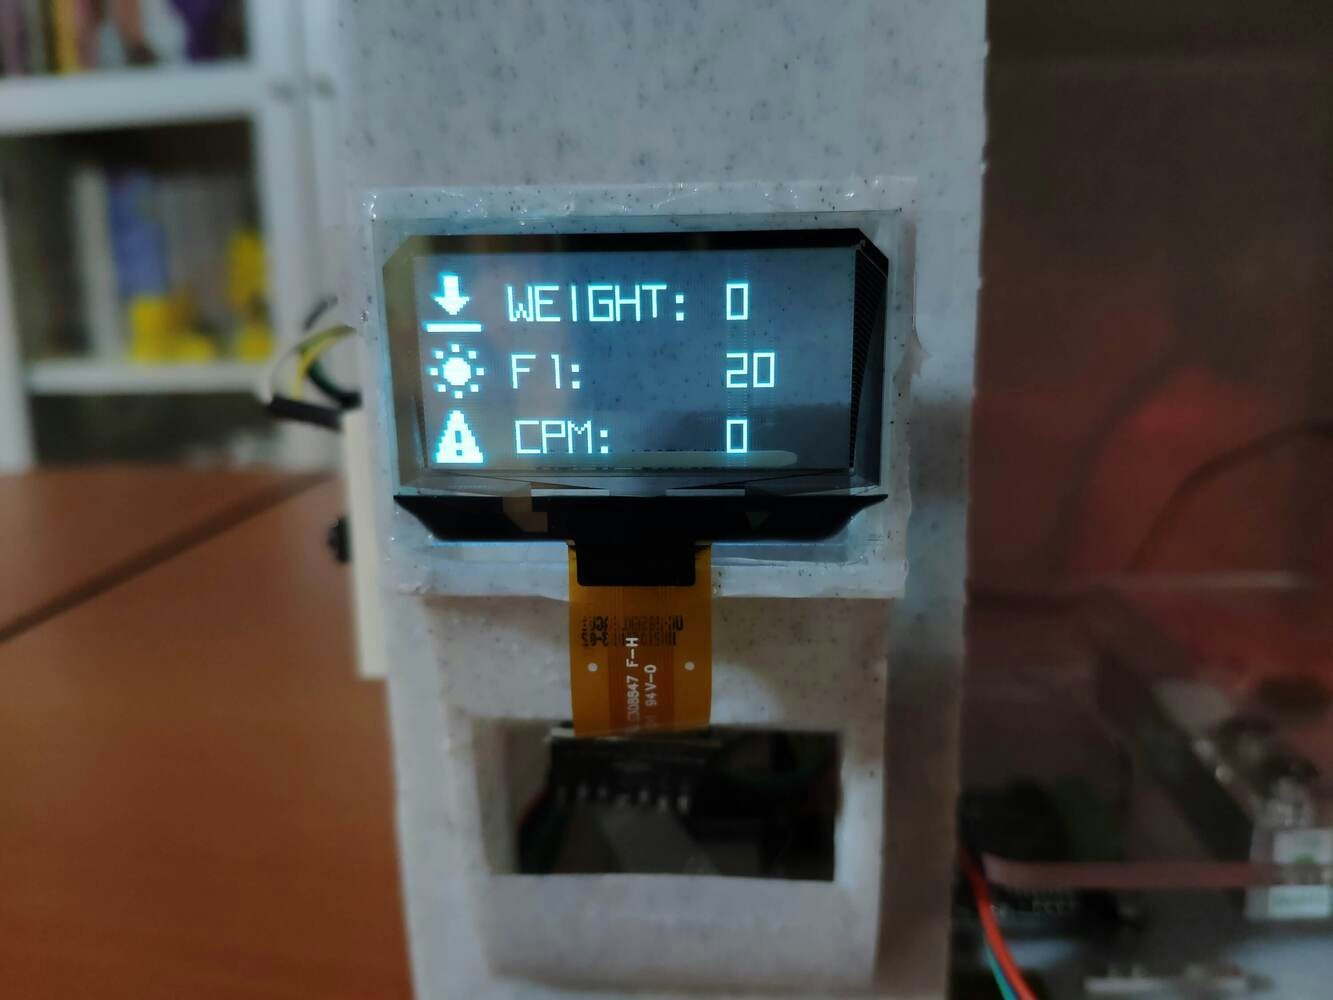 ☢:bento: If the control button (B) is pressed, the device runs an inference with the Edge Impulse model by filling the features buffer with the recently collected ionizing radiation, weight, and visible light (color) measurements.
☢:bento: When the device starts filling the features buffer with data items, it shows:
☢:bento: If the control button (B) is pressed, the device runs an inference with the Edge Impulse model by filling the features buffer with the recently collected ionizing radiation, weight, and visible light (color) measurements.
☢:bento: When the device starts filling the features buffer with data items, it shows:
 ☢:bento: Then, the device displays the detection result, which represents the most accurate label (food irradiation dose class) predicted by the model.
☢:bento: Each food irradiation dose level (class) has a unique monochrome icon to be shown on the SSD1309 OLED transparent screen when being predicted (detected) by the model:
* Regulated
* Unsafe
* Hazardous
☢:bento: Then, the device displays the detection result, which represents the most accurate label (food irradiation dose class) predicted by the model.
☢:bento: Each food irradiation dose level (class) has a unique monochrome icon to be shown on the SSD1309 OLED transparent screen when being predicted (detected) by the model:
* Regulated
* Unsafe
* Hazardous
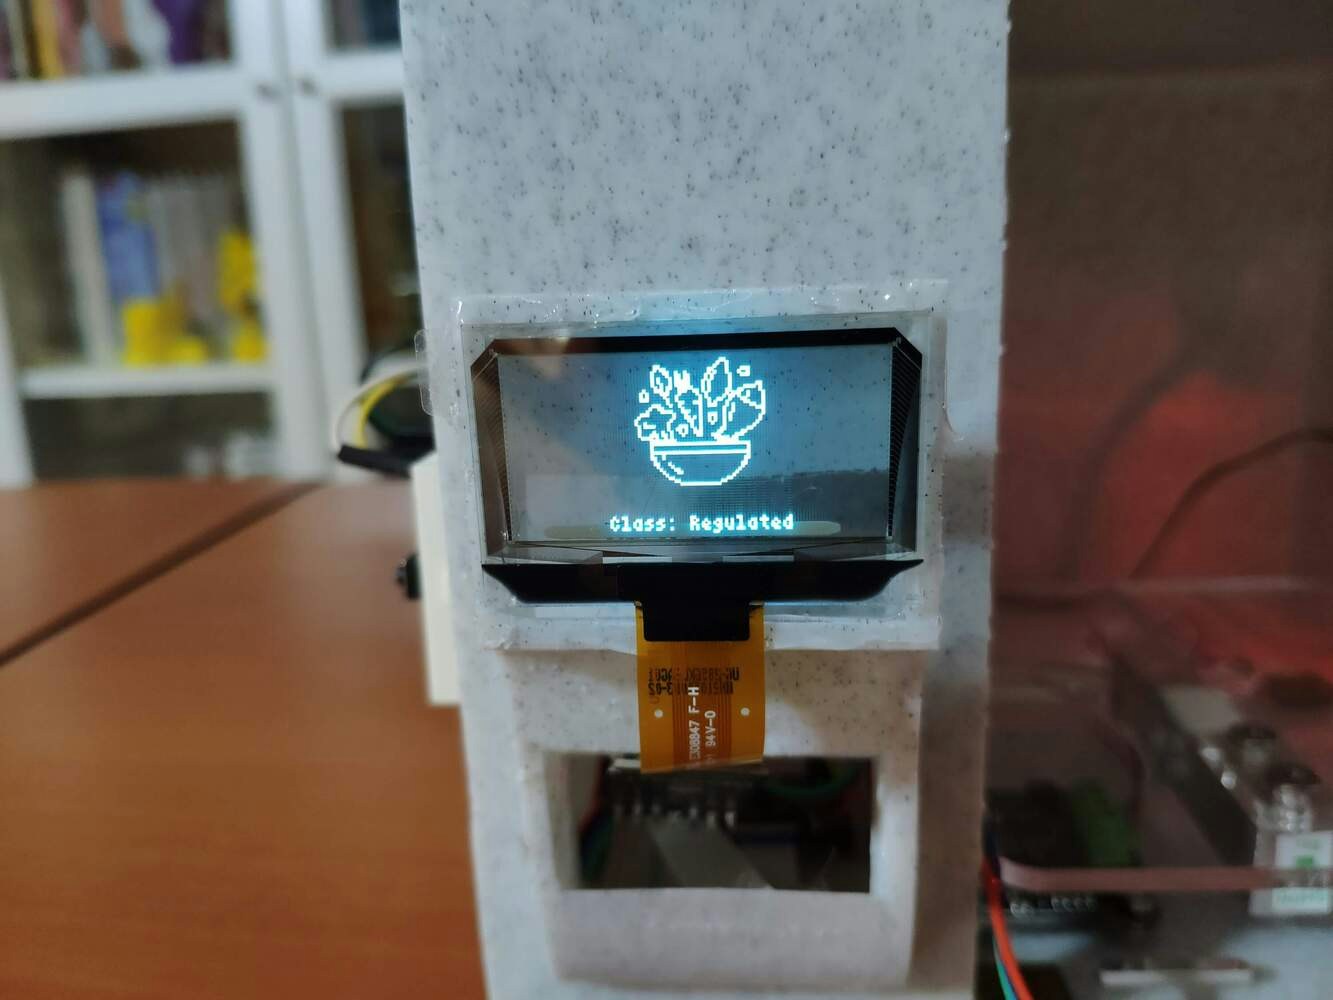
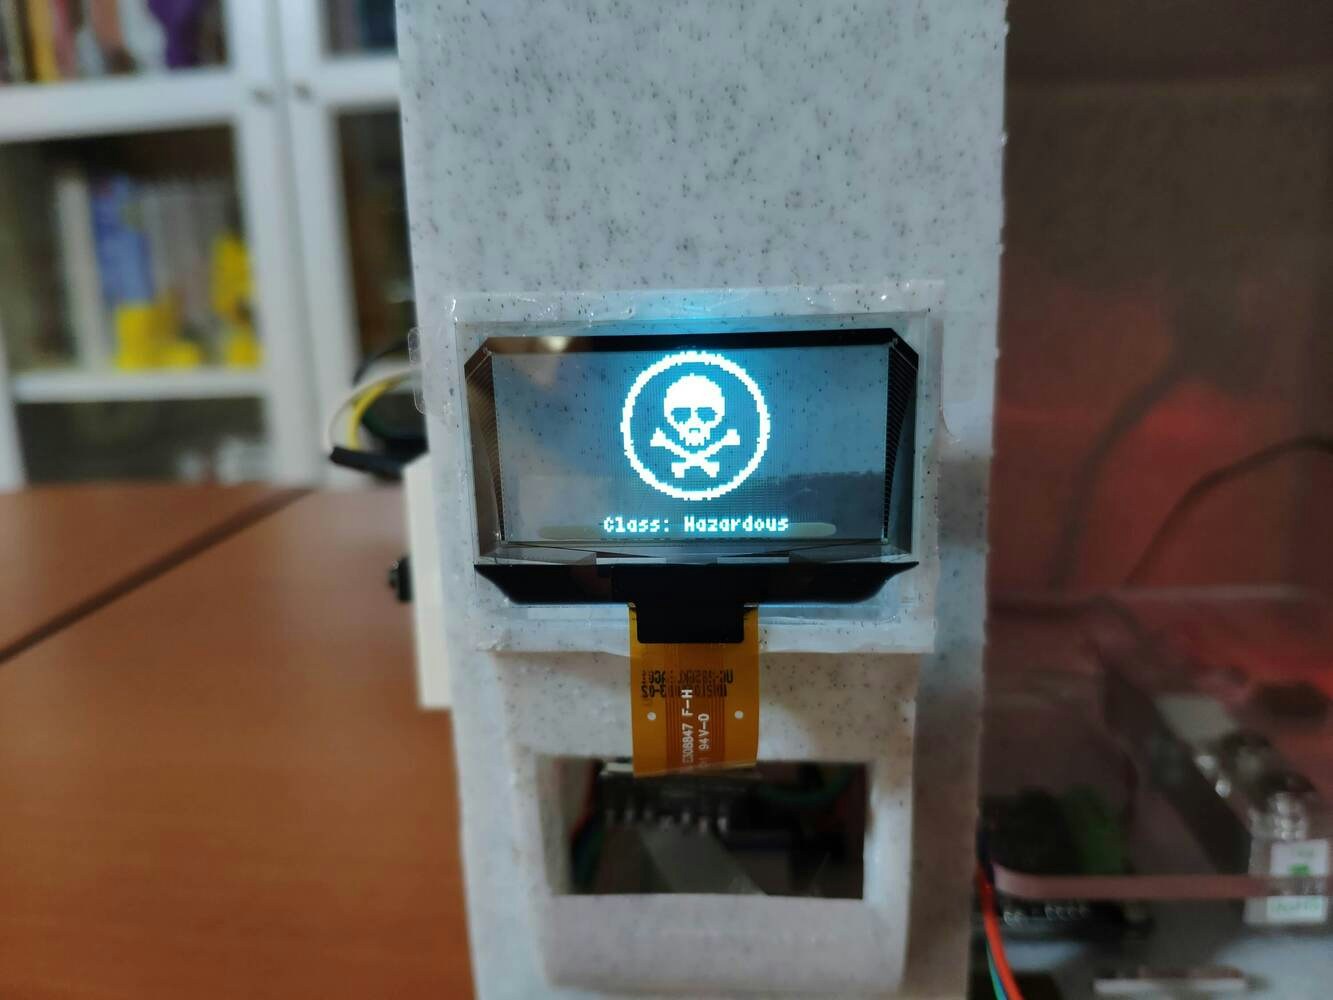 ☢:bento: Also, the device prints notifications and sensor measurements on the serial monitor for debugging.

 As far as my experiments go, the device predicts food irradiation dose levels (classes) accurately by employing the collected measurements :)
## Videos and Conclusion
[Data Collection | IoT AI-driven Food Irradiation Dose Detector w/ Edge Impulse](https://www.youtube.com/embed/CEl3ukSI1EA)
[Experimenting with the model | IoT AI-driven Food Irradiation Dose Detector w/ Edge Impulse](https://www.youtube.com/embed/LAanlabmYJA)
After completing all steps above and experimenting, I have employed the device to predict and detect food irradiation dose levels of various foods and food packaging so as to check whether they conform to health and safety standards regarding food irradiation.
## Further Discussions
By applying neural network models trained on ionizing radiation, weight, and visible light (color) measurements in detecting food irradiation dose levels, we can achieve to\[^3]:
☢:bento: prevent changes to the packaging that might affect integrity as a barrier to microbial contamination,
☢:bento: avert producing radiolysis products that could migrate into food, affecting odor, taste, and possibly the safety of the food,
☢:bento: preclude inadvertent radiation effects on polymers in food packaging due to competing crosslinking or chain scission reactions.
As far as my experiments go, the device predicts food irradiation dose levels (classes) accurately by employing the collected measurements :)
## Videos and Conclusion
[Data Collection | IoT AI-driven Food Irradiation Dose Detector w/ Edge Impulse](https://www.youtube.com/embed/CEl3ukSI1EA)
[Experimenting with the model | IoT AI-driven Food Irradiation Dose Detector w/ Edge Impulse](https://www.youtube.com/embed/LAanlabmYJA)
After completing all steps above and experimenting, I have employed the device to predict and detect food irradiation dose levels of various foods and food packaging so as to check whether they conform to health and safety standards regarding food irradiation.
## Further Discussions
By applying neural network models trained on ionizing radiation, weight, and visible light (color) measurements in detecting food irradiation dose levels, we can achieve to\[^3]:
☢:bento: prevent changes to the packaging that might affect integrity as a barrier to microbial contamination,
☢:bento: avert producing radiolysis products that could migrate into food, affecting odor, taste, and possibly the safety of the food,
☢:bento: preclude inadvertent radiation effects on polymers in food packaging due to competing crosslinking or chain scission reactions.
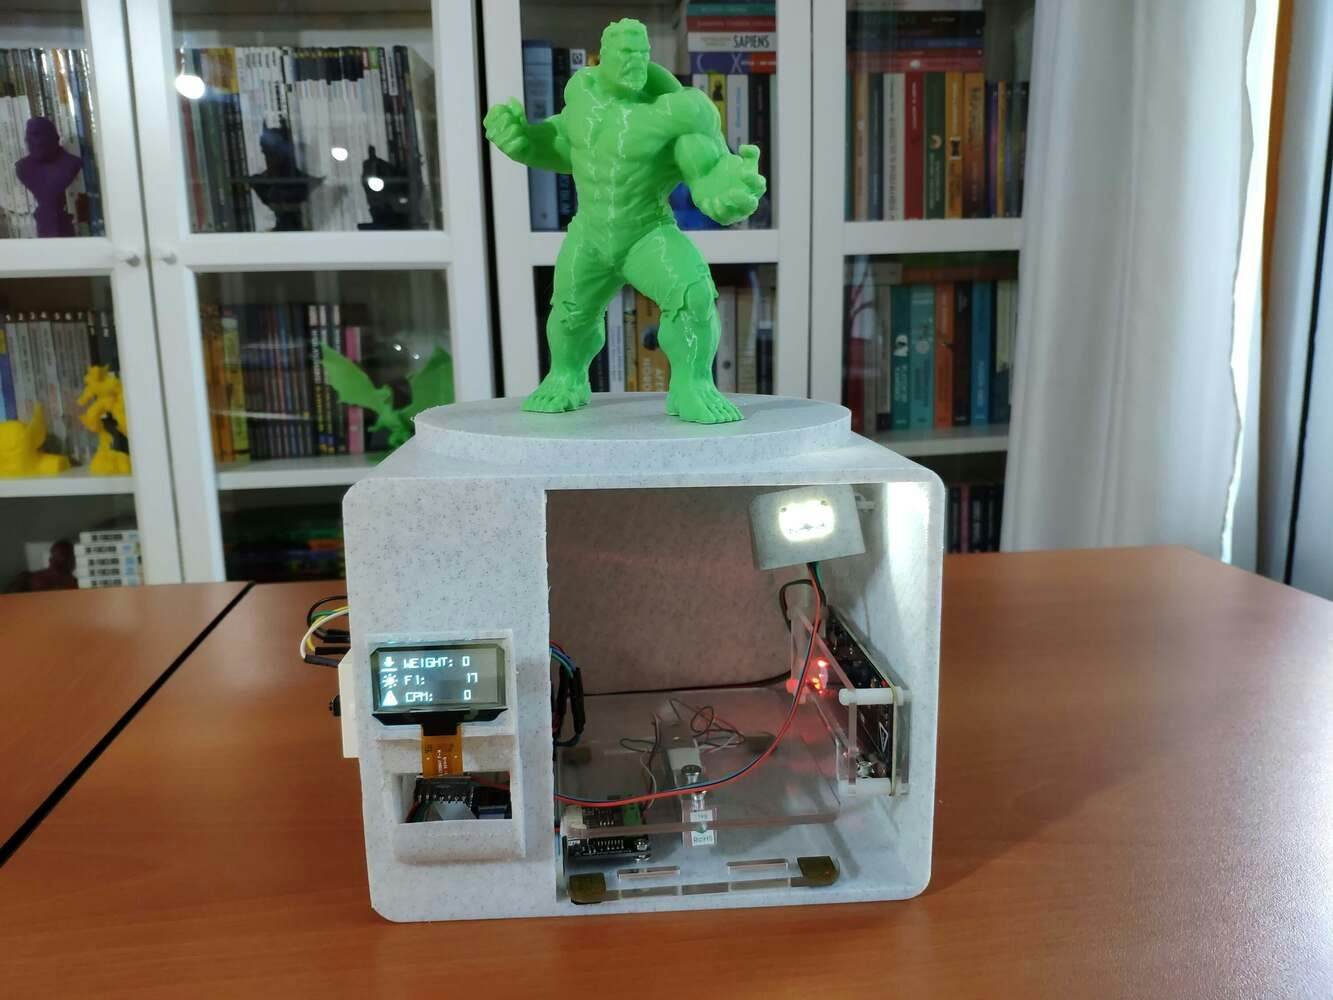 ## References
\[^1] Vanee Komolprasert. "CHAPTER 6: PACKAGING FOR FOODS TREATED BY IONIZING RADIATION." *Packaging for Nonthermal Processing of Food*. Blackwell Publishing, First edition, 2007. 87 - 88.
\[^2] Ana Paula Dionísio, Renata Takassugui Gomes, and Marília Oetterer. *Ionizing Radiation Effects on Food Vitamins – A Review*. Braz. Arch. Biol. Technol. v.52 n.5: pp. 1267-1278, Sept/Oct 2009
\[^3] Kim M. Morehouse and Vanee Komolprasert. *Overview of Irradiation of Food and Packaging*. ACS Symposium Series 875, Irradiation of Food and Packaging, 2004, Chapter 1, Pages 1-11. *[https://www.fda.gov/food/irradiation-food-packaging/overview-irradiation-food-and-packaging](https://www.fda.gov/food/irradiation-food-packaging/overview-irradiation-food-and-packaging)*.
## References
\[^1] Vanee Komolprasert. "CHAPTER 6: PACKAGING FOR FOODS TREATED BY IONIZING RADIATION." *Packaging for Nonthermal Processing of Food*. Blackwell Publishing, First edition, 2007. 87 - 88.
\[^2] Ana Paula Dionísio, Renata Takassugui Gomes, and Marília Oetterer. *Ionizing Radiation Effects on Food Vitamins – A Review*. Braz. Arch. Biol. Technol. v.52 n.5: pp. 1267-1278, Sept/Oct 2009
\[^3] Kim M. Morehouse and Vanee Komolprasert. *Overview of Irradiation of Food and Packaging*. ACS Symposium Series 875, Irradiation of Food and Packaging, 2004, Chapter 1, Pages 1-11. *[https://www.fda.gov/food/irradiation-food-packaging/overview-irradiation-food-and-packaging](https://www.fda.gov/food/irradiation-food-packaging/overview-irradiation-food-and-packaging)*.