> ## Documentation Index
> Fetch the complete documentation index at: https://docs.edgeimpulse.com/llms.txt
> Use this file to discover all available pages before exploring further.
# Anomaly Detection with the Rubik Pi 3 and n8n
> Detect visual anomalies on a Rubik Pi 3 with Edge Impulse and report results through an n8n workflow.
Created By: Roni Bandini
Public Project Link: [https://studio.edgeimpulse.com/public/374008/live](https://studio.edgeimpulse.com/public/374008/live)
GitHub Repo: [https://github.com/ronibandini/rubikpi3-anomaly-detection](https://github.com/ronibandini/rubikpi3-anomaly-detection)
***
## Introduction
The goal of this project is to perform computer vision quality inspection using Edge Impulse on a [Rubik Pi 3](https://rubikpi.ai), leveraging an n8n workflow under the hood to aggregate data and send reports by email.
 ## What is the Rubik Pi 3?
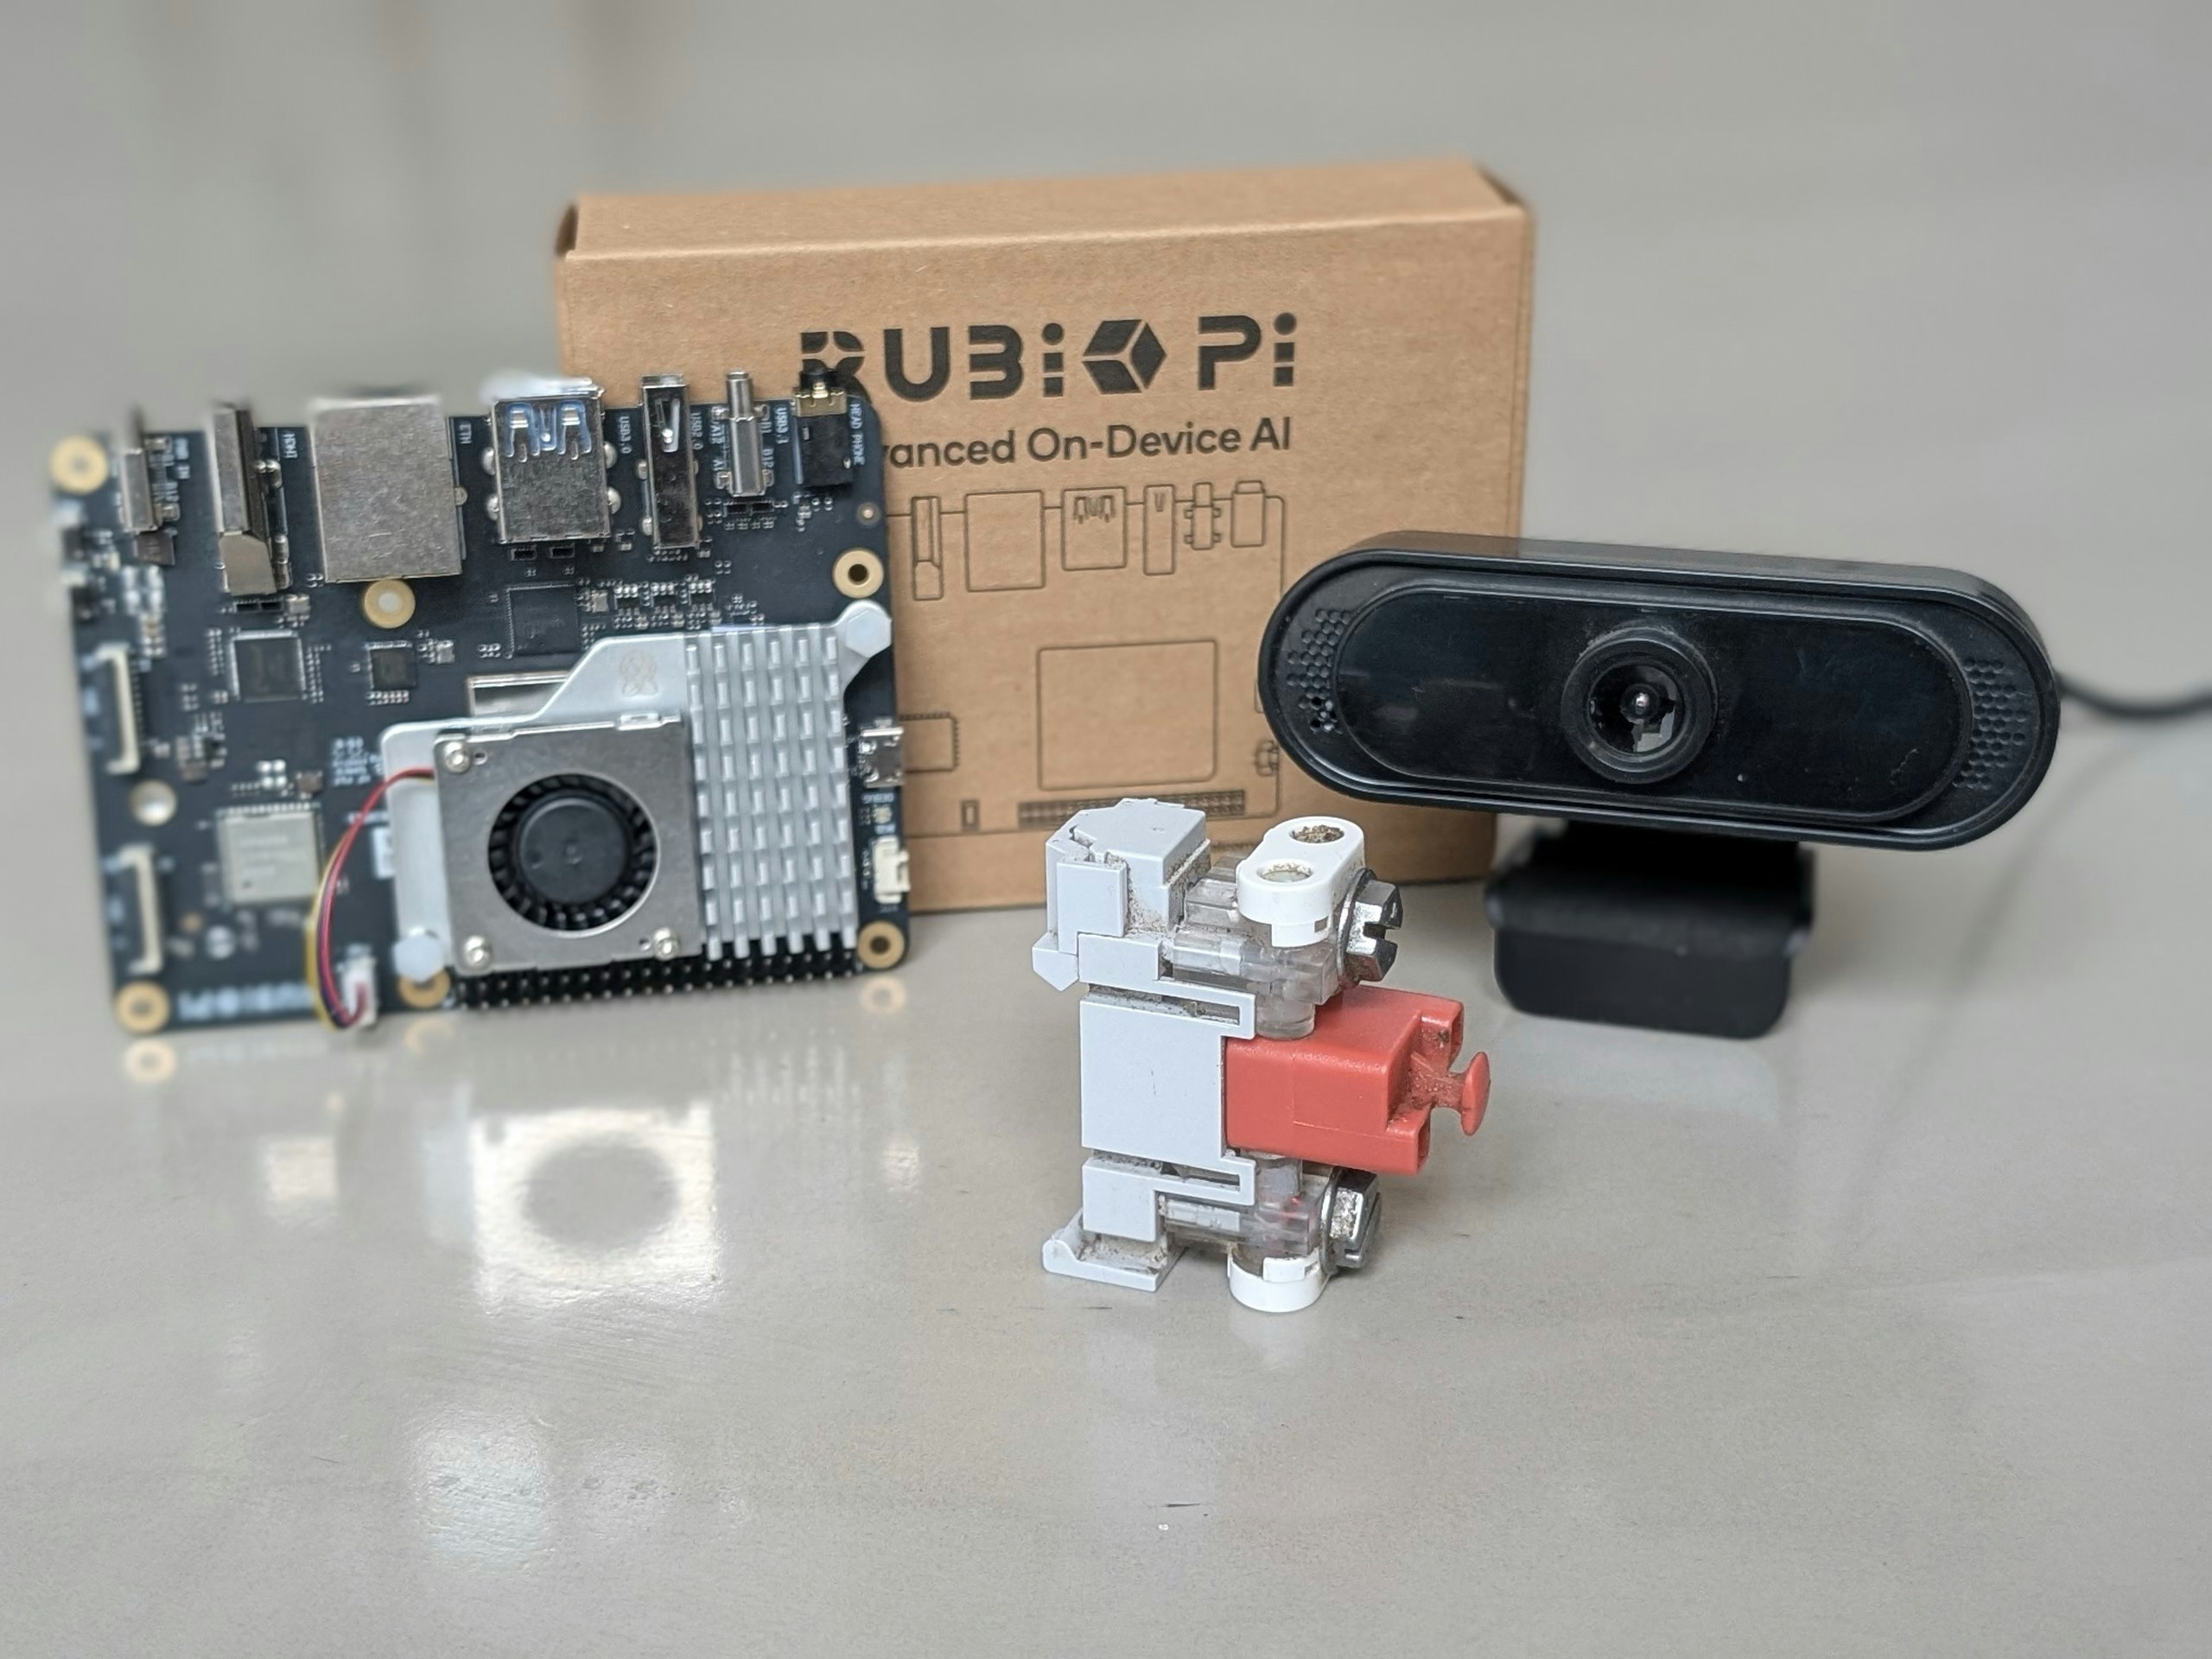
The Rubik Pi 3 is a powerful, lightweight development board built around the Qualcomm Dragonwing™ QCS6490 platform. It is notable for being the first Raspberry Pi-style board designed on a Qualcomm AI platform for developers, bringing high-performance edge AI capabilities to a developer-friendly form factor.Key Specifications:
* Platform: Dragonwing QCS6490
* Dimensions: 100 mm x 75 mm (a compact, desktop size)
* AI Performance: Offers up to 12 TOPS (Tera Operations Per Second) of AI computing power via the integrated Hexagon NPU.
* GPU: Adreno 643
* RAM: 8 GB LPDDR4x
* Storage: 128 GB UFS 2.2 (This is a more specific and faster storage standard than a typical eMMC or SD card slot found on many SBCs).
The Rubik Pi 3 supports multiple operating systems, including Qualcomm Linux, Android, and Ubuntu/Debian, making it highly versatile for various AI, IoT, and industrial applications.
## What is n8n?
[n8n](https://n8n.io) is a popular automation and workflow platform that allows you to easily connect APIs, services, and devices. It enables you to design automated workflows, aggregate data, and trigger actions such as sending reports, all without heavy coding.
## Parts Required
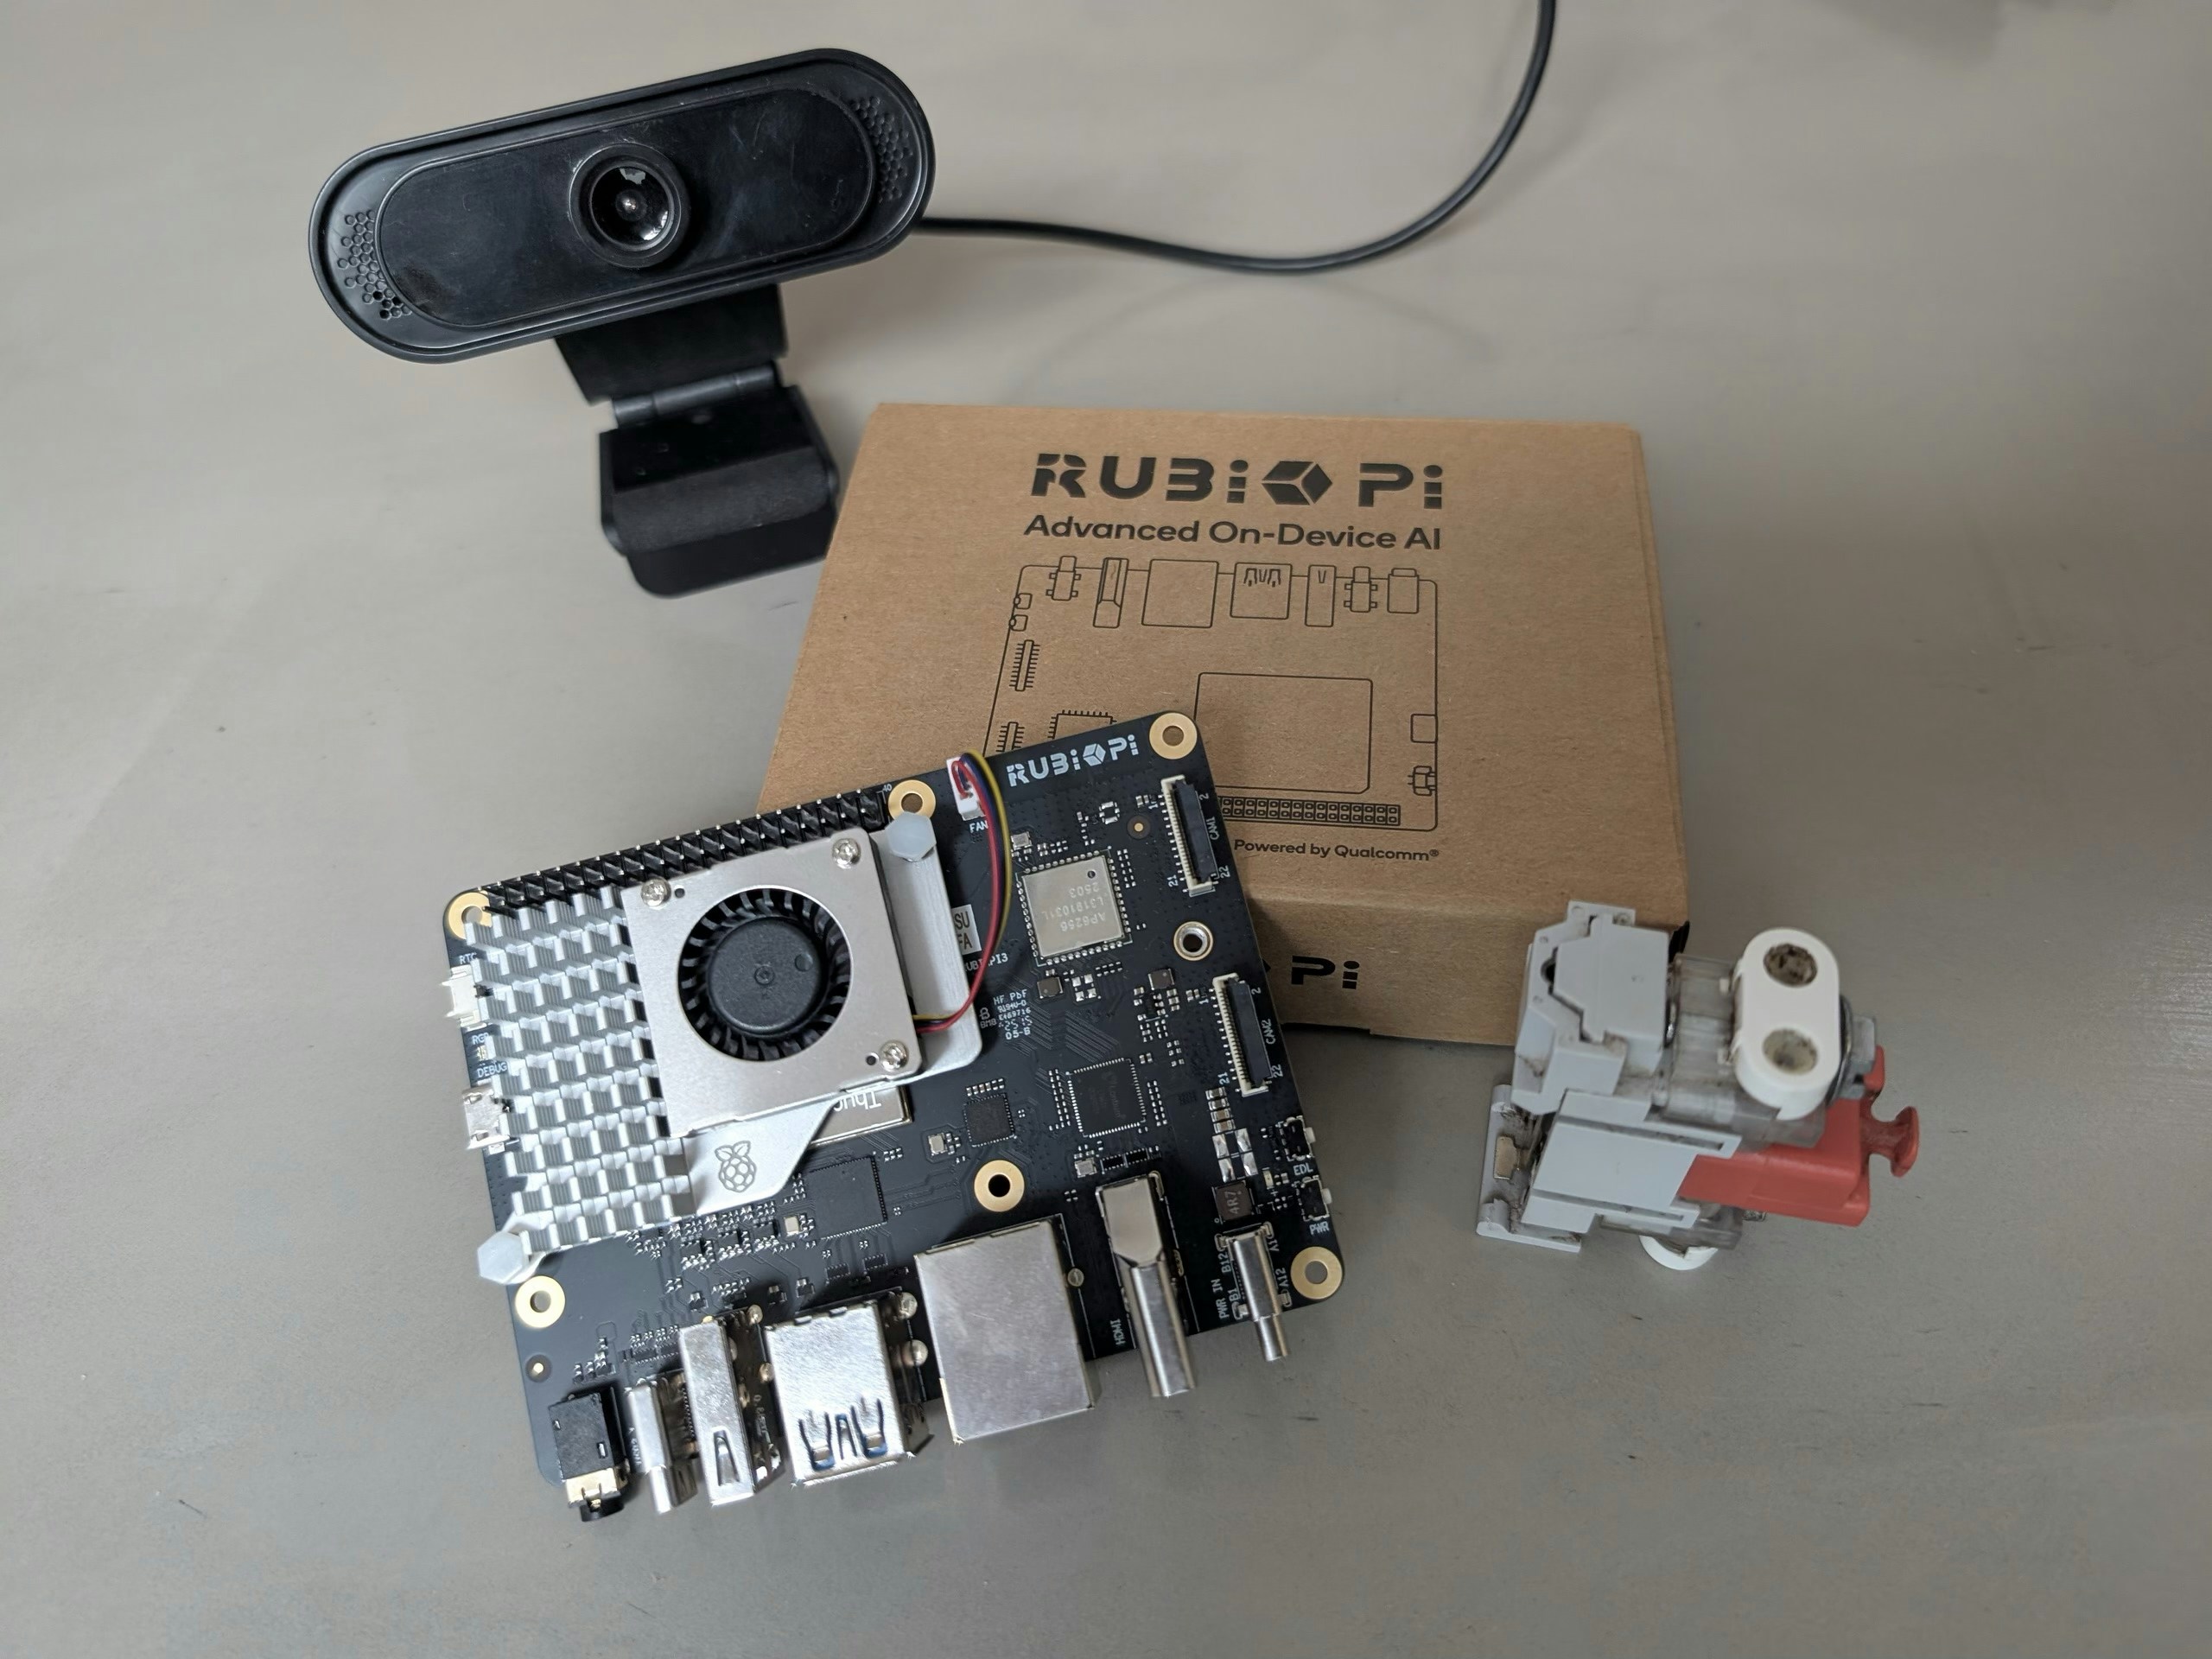
* [Thundercomm Rubik Pi 3](https://www.thundercomm.com/product/rubik-pi)
* Active Cooler
* Power Supply: Power Delivery over Type-C, 12V 3A
* USB Webcam
## Hardware Setup
1. Plug in the power supply, USB camera, and Ethernet cable to the Rubik Pi.
2. Connect the other end of the Ethernet cable to your router.
3. Press the power button and wait for the Rubik Pi to boot.
4. Log in to your router's admin interface to see the IP assigned to the Rubik Pi, or attach a keyboard, mouse, and monitor.
5. SSH into the Rubik Pi, or login directly on the console:
user: `ubuntu`
pass: `ubuntu`
> Note: This tutorial assumes your Rubik Pi is running Canonical Ubuntu. For Qualcomm Linux, `root / rubikpi` may be valid credentials.
## Software Setup
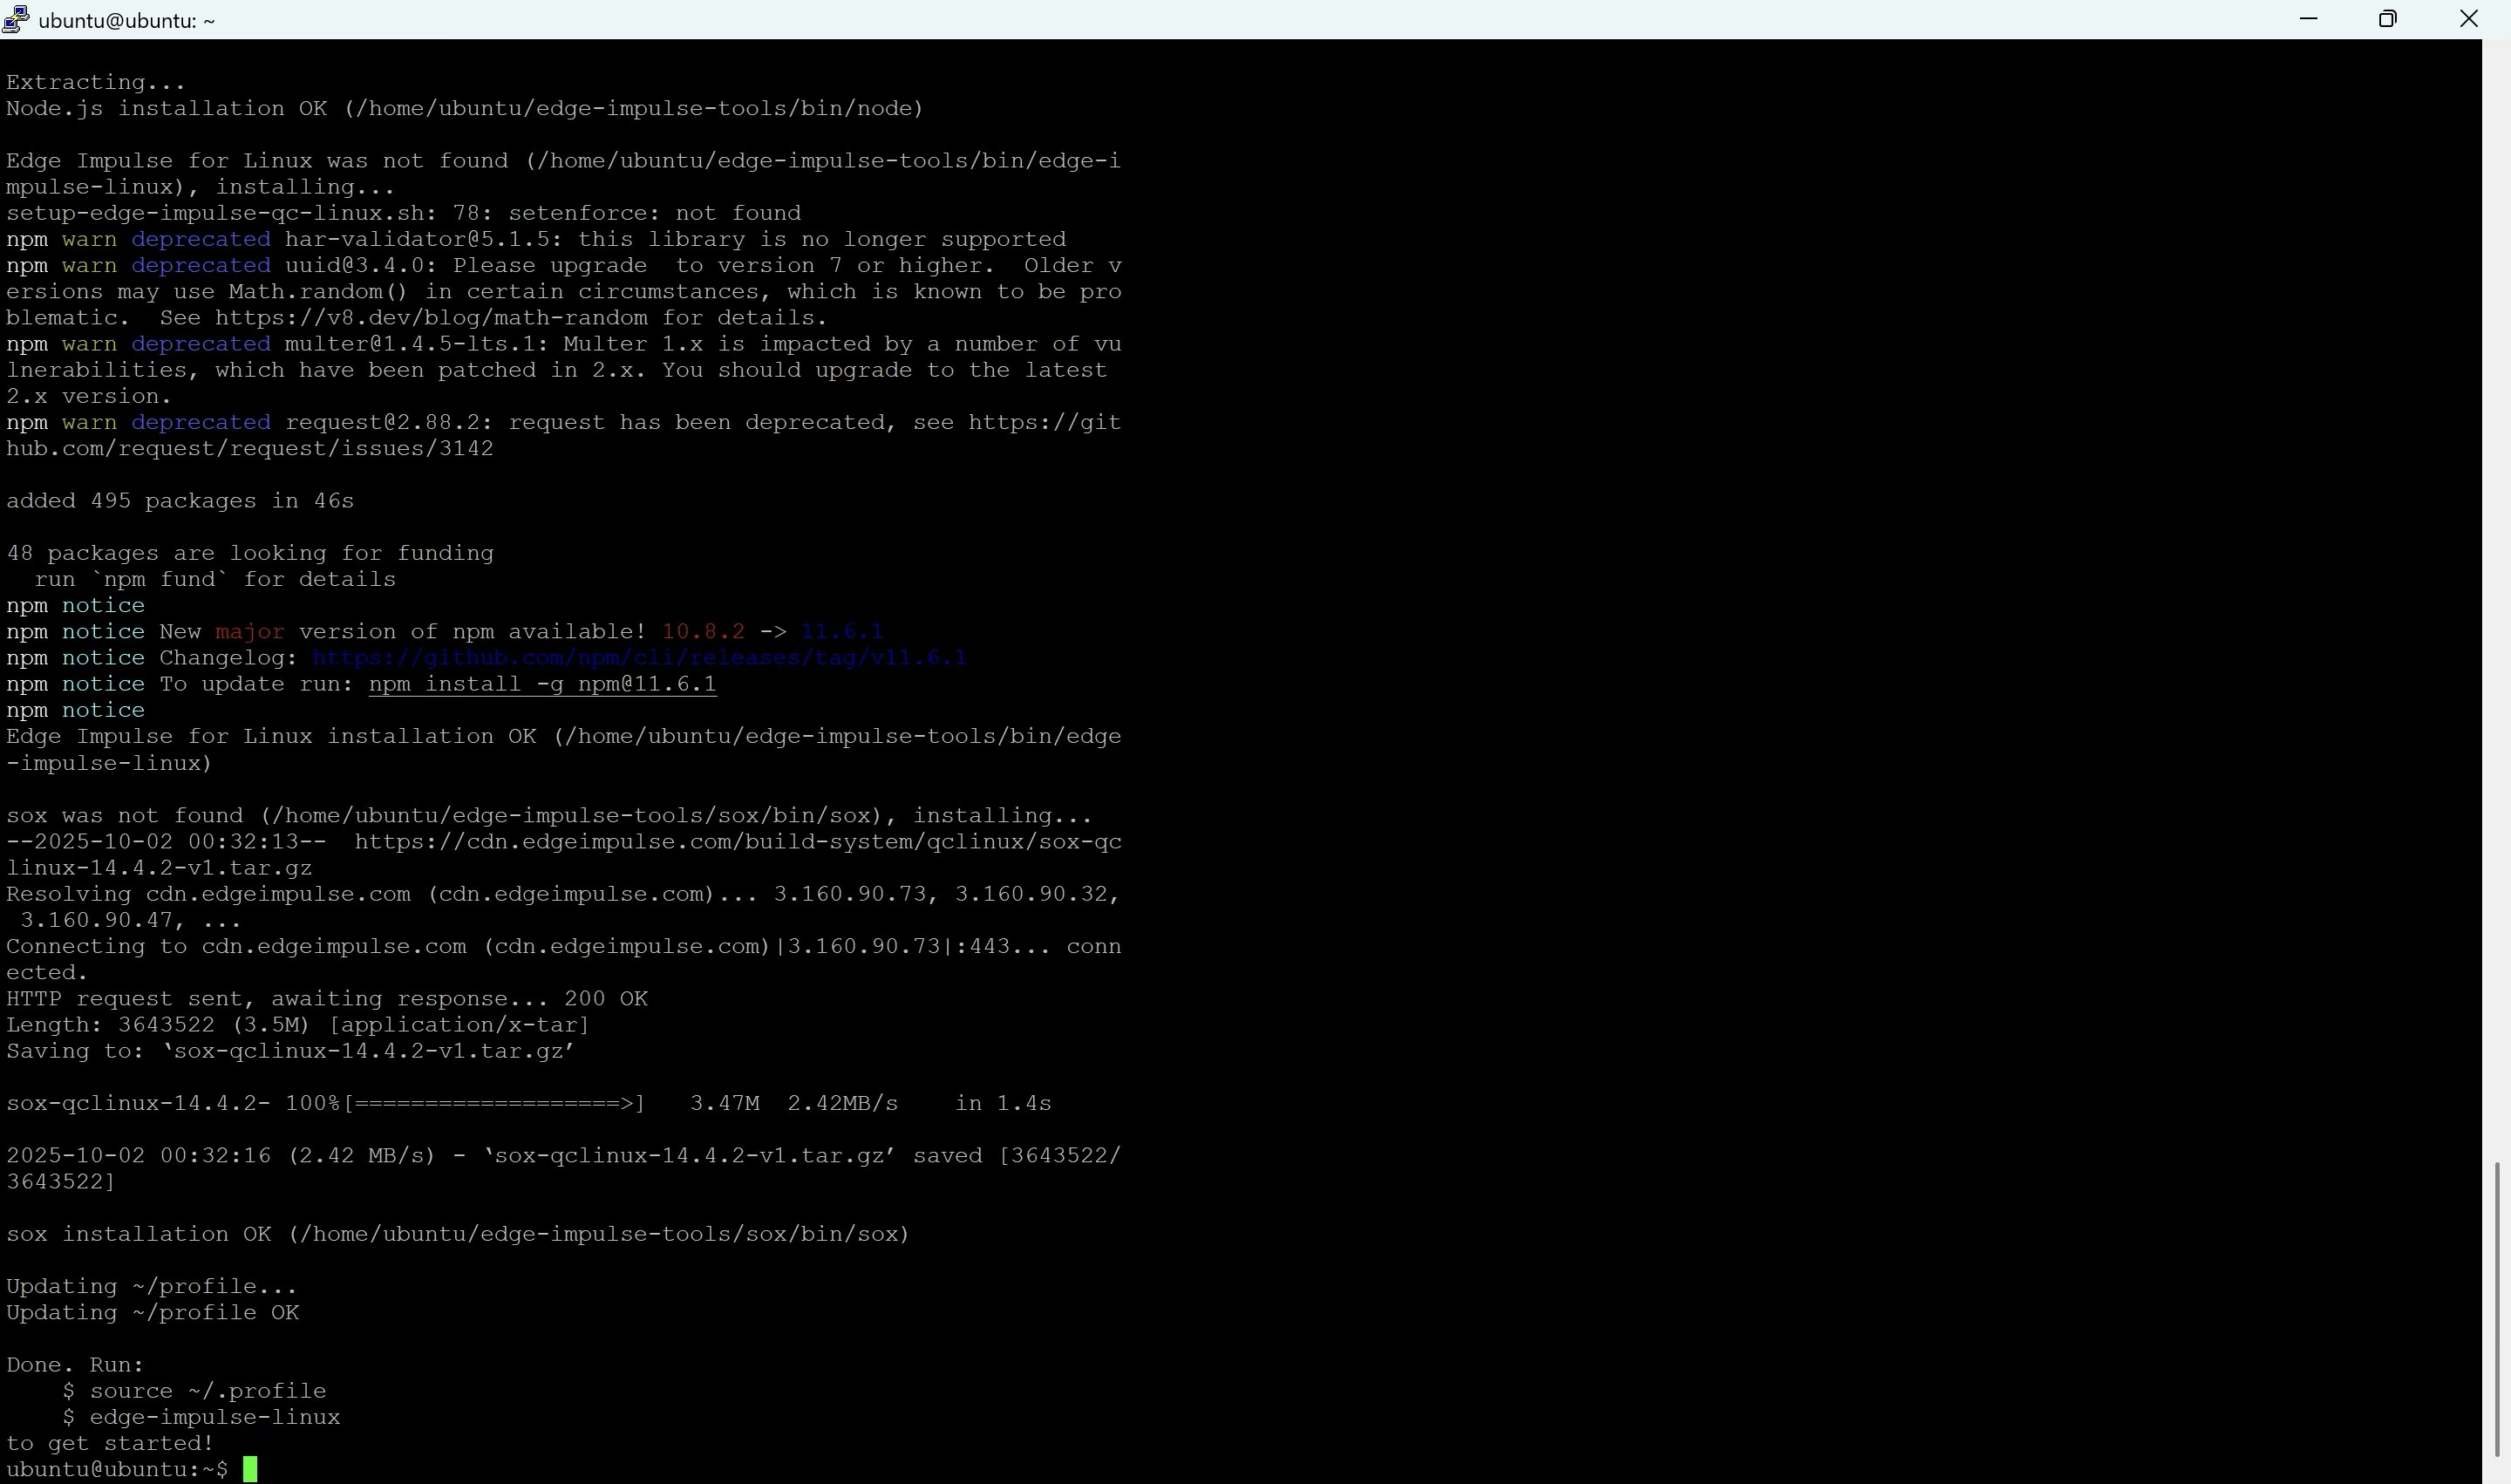
Run the following commands:
```bash theme={"system"}
sudo apt update
wget https://cdn.edgeimpulse.com/firmware/linux/setup-edge-impulse-qc-linux.sh
sudo apt install selinux-utils
source ~/.profile
chmod +x setup-edge-impulse-qc-linux.sh
./setup-edge-impulse-qc-linux.sh
```
## What is the Rubik Pi 3?
The Rubik Pi 3 is a powerful, lightweight development board built around the Qualcomm Dragonwing™ QCS6490 platform. It is notable for being the first Raspberry Pi-style board designed on a Qualcomm AI platform for developers, bringing high-performance edge AI capabilities to a developer-friendly form factor.Key Specifications:
* Platform: Dragonwing QCS6490
* Dimensions: 100 mm x 75 mm (a compact, desktop size)
* AI Performance: Offers up to 12 TOPS (Tera Operations Per Second) of AI computing power via the integrated Hexagon NPU.
* GPU: Adreno 643
* RAM: 8 GB LPDDR4x
* Storage: 128 GB UFS 2.2 (This is a more specific and faster storage standard than a typical eMMC or SD card slot found on many SBCs).
The Rubik Pi 3 supports multiple operating systems, including Qualcomm Linux, Android, and Ubuntu/Debian, making it highly versatile for various AI, IoT, and industrial applications.
## What is n8n?
[n8n](https://n8n.io) is a popular automation and workflow platform that allows you to easily connect APIs, services, and devices. It enables you to design automated workflows, aggregate data, and trigger actions such as sending reports, all without heavy coding.
## Parts Required
* [Thundercomm Rubik Pi 3](https://www.thundercomm.com/product/rubik-pi)
* Active Cooler
* Power Supply: Power Delivery over Type-C, 12V 3A
* USB Webcam
## Hardware Setup
1. Plug in the power supply, USB camera, and Ethernet cable to the Rubik Pi.
2. Connect the other end of the Ethernet cable to your router.
3. Press the power button and wait for the Rubik Pi to boot.
4. Log in to your router's admin interface to see the IP assigned to the Rubik Pi, or attach a keyboard, mouse, and monitor.
5. SSH into the Rubik Pi, or login directly on the console:
user: `ubuntu`
pass: `ubuntu`
> Note: This tutorial assumes your Rubik Pi is running Canonical Ubuntu. For Qualcomm Linux, `root / rubikpi` may be valid credentials.
## Software Setup
Run the following commands:
```bash theme={"system"}
sudo apt update
wget https://cdn.edgeimpulse.com/firmware/linux/setup-edge-impulse-qc-linux.sh
sudo apt install selinux-utils
source ~/.profile
chmod +x setup-edge-impulse-qc-linux.sh
./setup-edge-impulse-qc-linux.sh
```
 ## Anomaly Detection Project
You can create a visual anomaly project from scratch – see [this project as an example of how to build an anomaly detection project](https://docs.edgeimpulse.com/projects/expert-network/fomo-ad-ti-tda4vm) in Edge Impulse - or clone this project, which was trained using an electric component [https://studio.edgeimpulse.com/studio/374008/acquisition/training?page=1](https://studio.edgeimpulse.com/studio/374008/acquisition/training?page=1)
On the Rubik Pi 3, login with your Edge Impulse credentials and select the project by simply launching the runner:
```bash theme={"system"}
edge-impulse-linux-runner
```
The default JSON output from the Edge Impulse Linux runner should look like:
```bash theme={"system"}
visual anomalies 1ms. [
{"height":19,"label":"anomaly","value":57.811683654785156,"width":19,"x":0,"y":0},
{"height":19,"label":"anomaly","value":69.89027404785156,"width":19,"x":19,"y":0},
```
## n8n
1. Create a free account at [https://app.n8n.cloud/register](https://app.n8n.cloud/register)
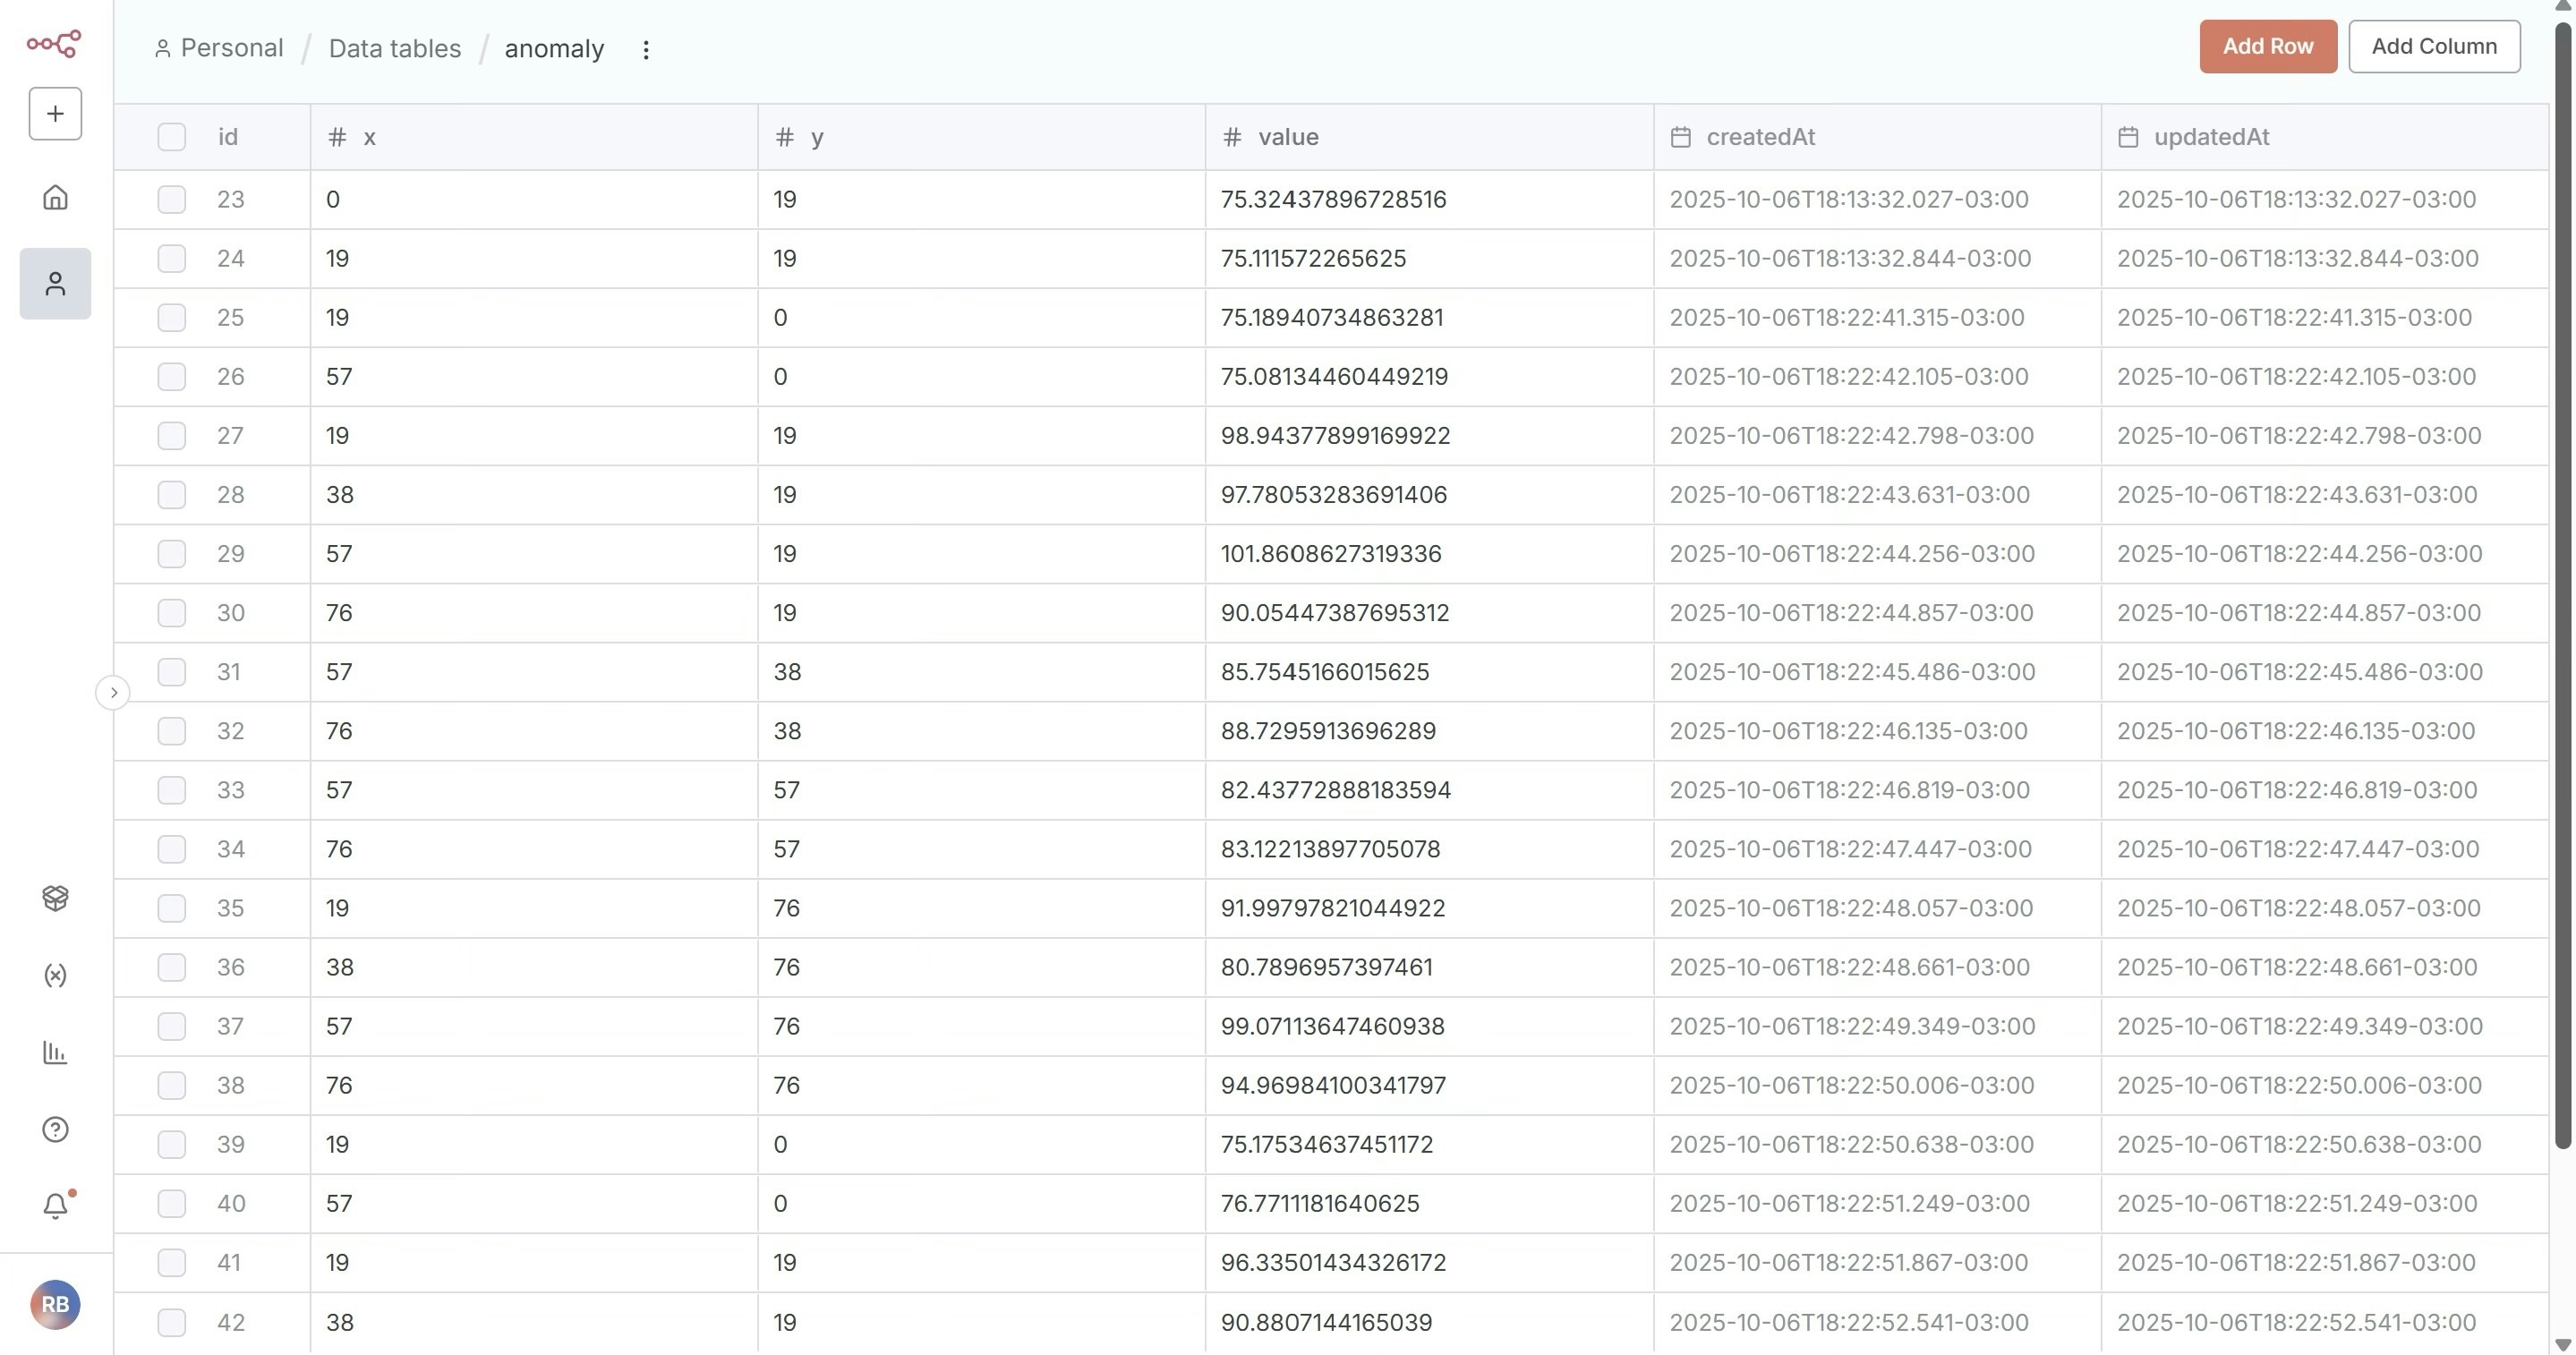
2. Create a Data table with x, y and value fields
3. Import this n8n template: [https://github.com/ronibandini/rubikpi3-anomaly-detection/blob/main/EI%20with%20Rubik%20Pi%203%20upload.json](https://github.com/ronibandini/rubikpi3-anomaly-detection/blob/main/EI%20with%20Rubik%20Pi%203%20upload.json)
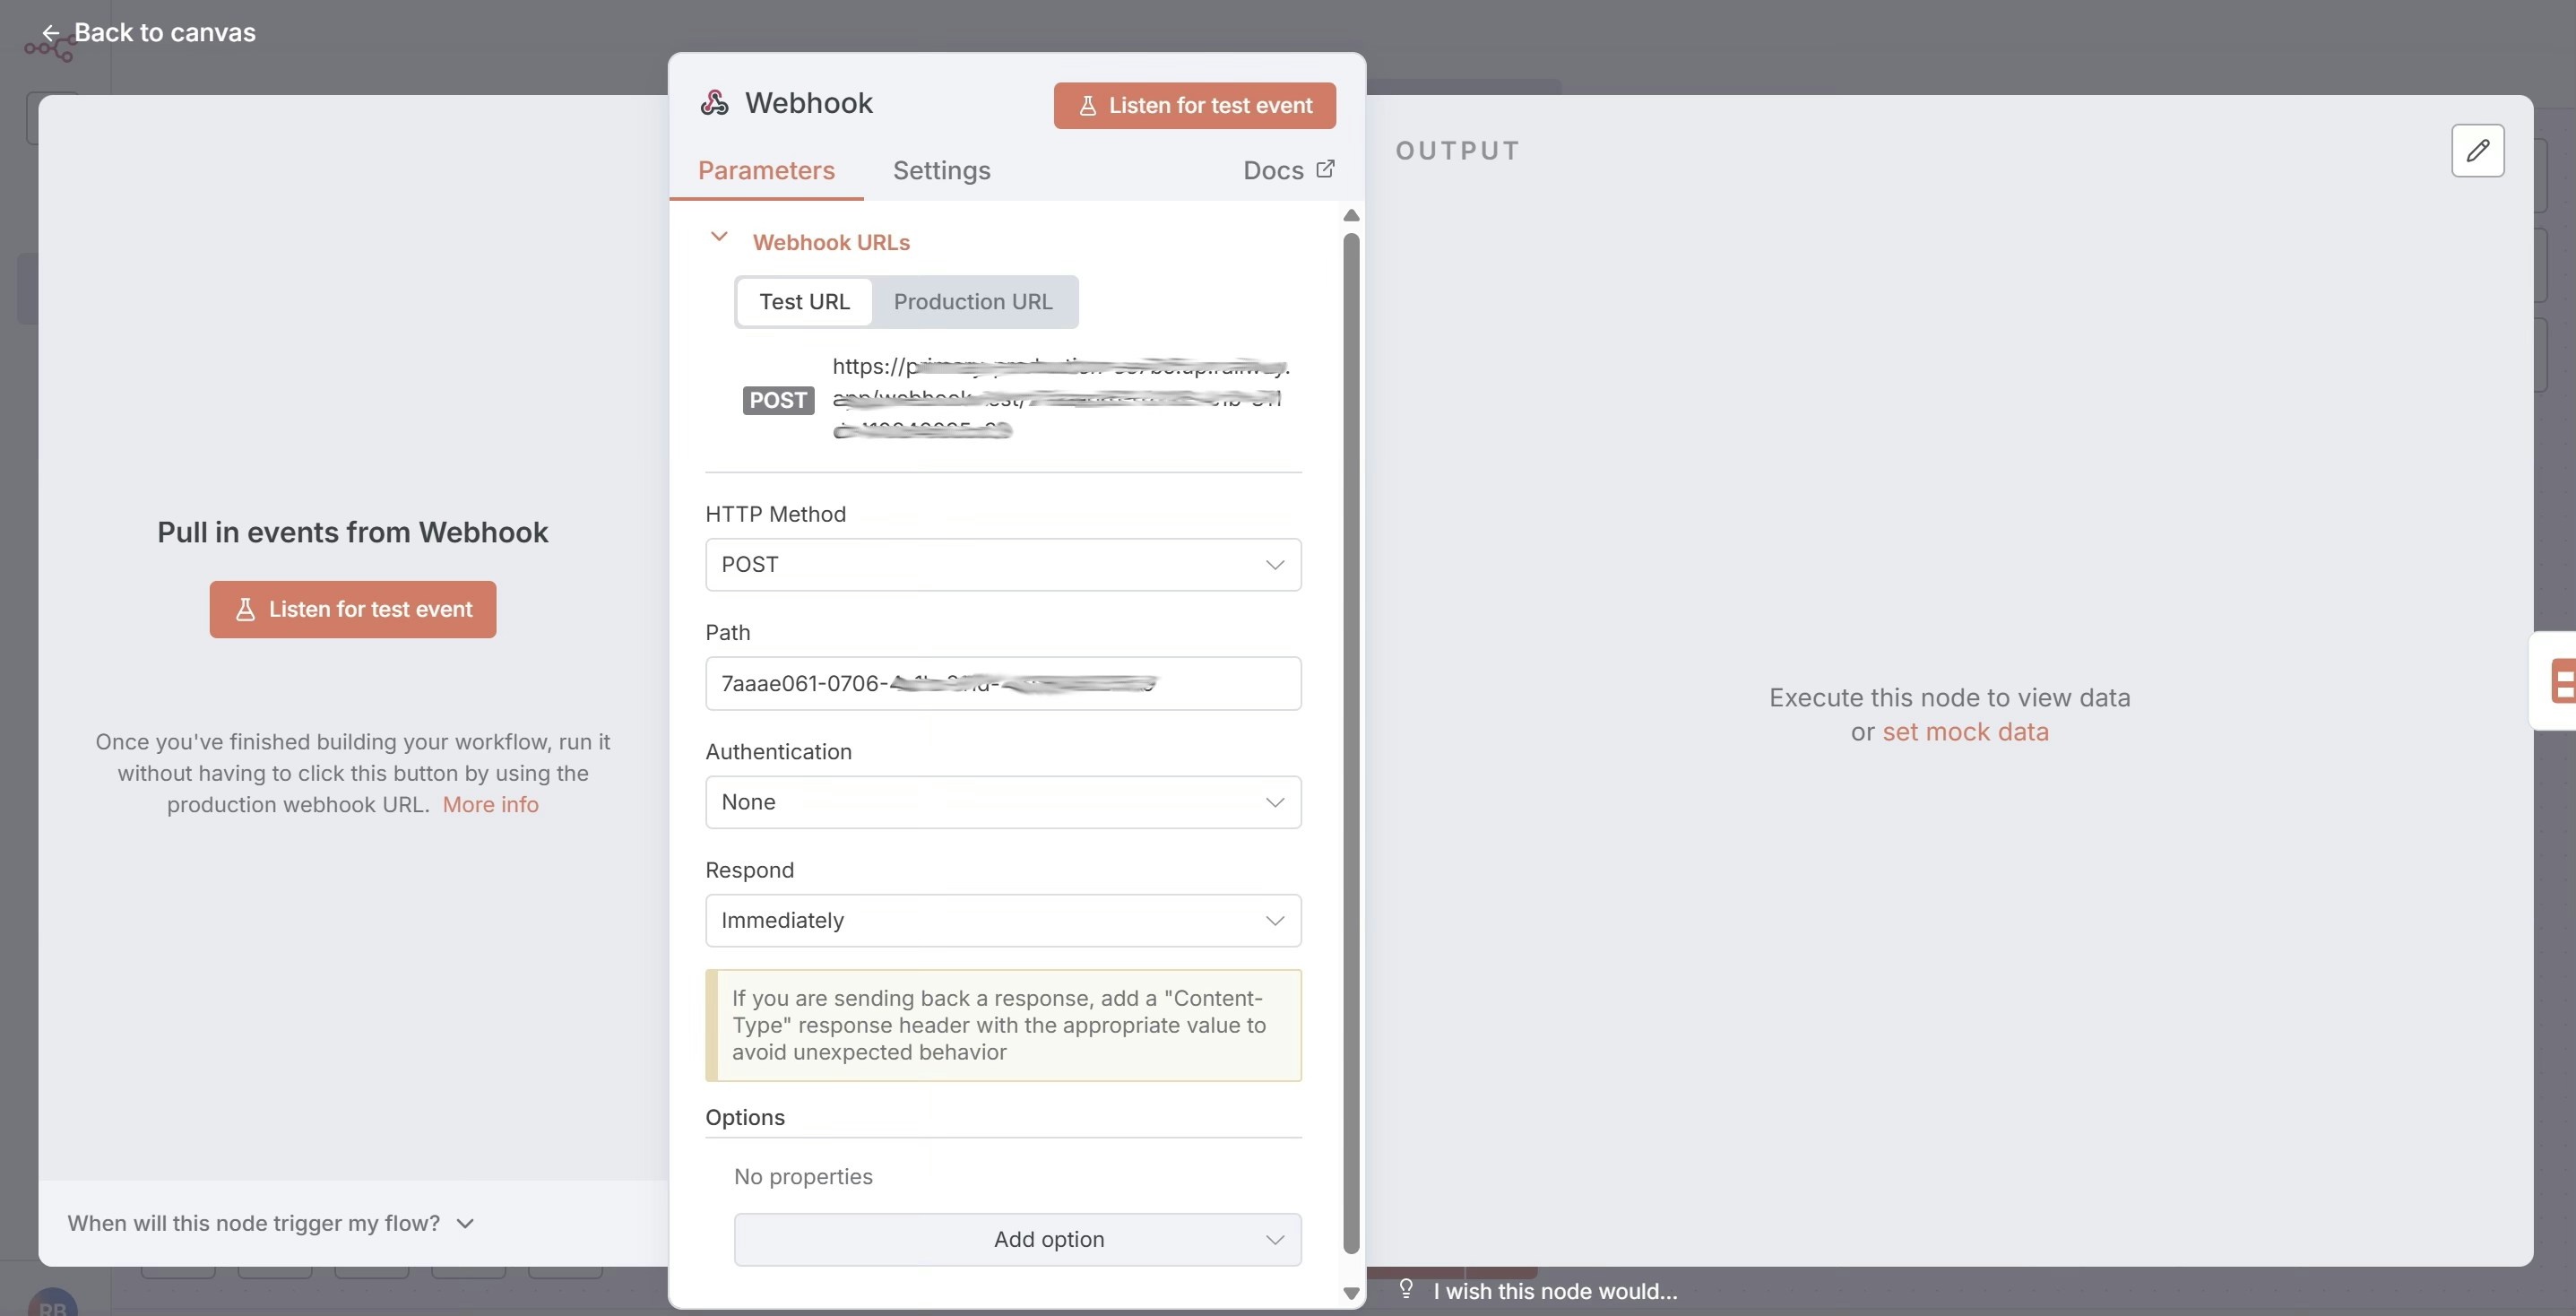
4. Click in the `webhook` node to obtain the production URL
5. Download [https://github.com/ronibandini/rubikpi3-anomaly-detection/blob/main/runner.py](https://github.com/ronibandini/rubikpi3-anomaly-detection/blob/main/runner.py) on the Rubik Pi 3, and edit the `webhook` and the `threshold` variables in the file to match your values.
6. Run `python3 runner.py` on the Rubik Pi 3.
## Anomaly Detection Project
You can create a visual anomaly project from scratch – see [this project as an example of how to build an anomaly detection project](https://docs.edgeimpulse.com/projects/expert-network/fomo-ad-ti-tda4vm) in Edge Impulse - or clone this project, which was trained using an electric component [https://studio.edgeimpulse.com/studio/374008/acquisition/training?page=1](https://studio.edgeimpulse.com/studio/374008/acquisition/training?page=1)
On the Rubik Pi 3, login with your Edge Impulse credentials and select the project by simply launching the runner:
```bash theme={"system"}
edge-impulse-linux-runner
```
The default JSON output from the Edge Impulse Linux runner should look like:
```bash theme={"system"}
visual anomalies 1ms. [
{"height":19,"label":"anomaly","value":57.811683654785156,"width":19,"x":0,"y":0},
{"height":19,"label":"anomaly","value":69.89027404785156,"width":19,"x":19,"y":0},
```
## n8n
1. Create a free account at [https://app.n8n.cloud/register](https://app.n8n.cloud/register)
2. Create a Data table with x, y and value fields
3. Import this n8n template: [https://github.com/ronibandini/rubikpi3-anomaly-detection/blob/main/EI%20with%20Rubik%20Pi%203%20upload.json](https://github.com/ronibandini/rubikpi3-anomaly-detection/blob/main/EI%20with%20Rubik%20Pi%203%20upload.json)
4. Click in the `webhook` node to obtain the production URL
5. Download [https://github.com/ronibandini/rubikpi3-anomaly-detection/blob/main/runner.py](https://github.com/ronibandini/rubikpi3-anomaly-detection/blob/main/runner.py) on the Rubik Pi 3, and edit the `webhook` and the `threshold` variables in the file to match your values.
6. Run `python3 runner.py` on the Rubik Pi 3.
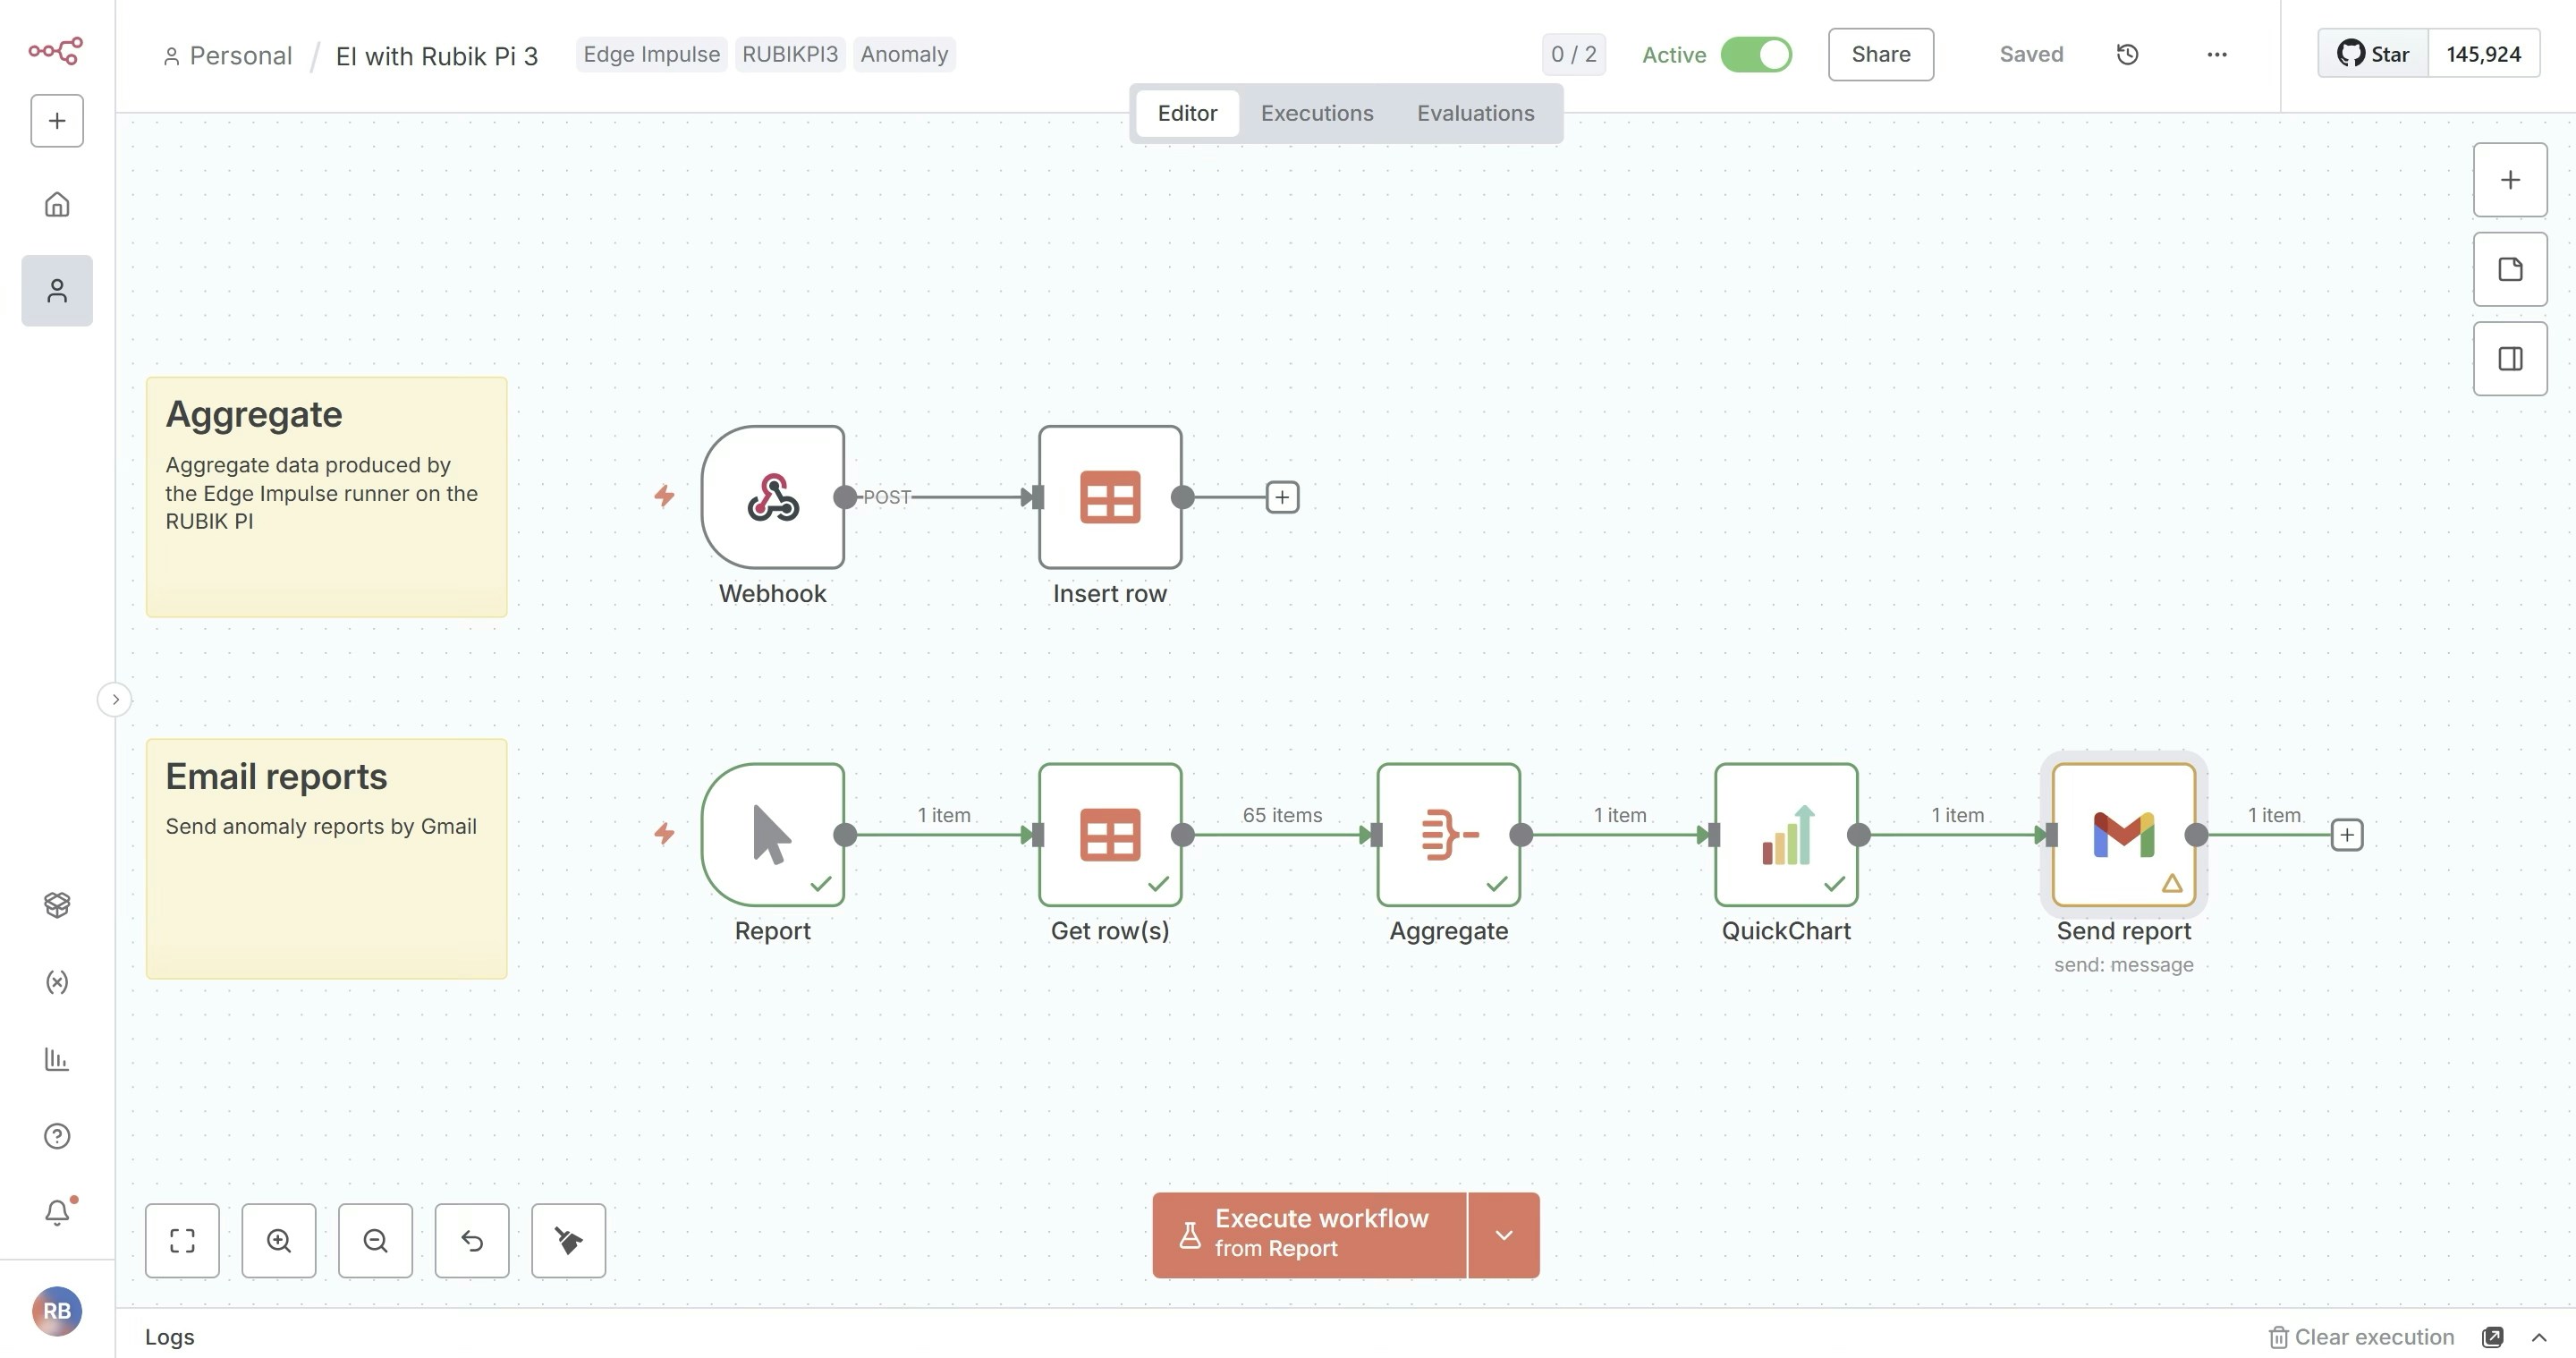
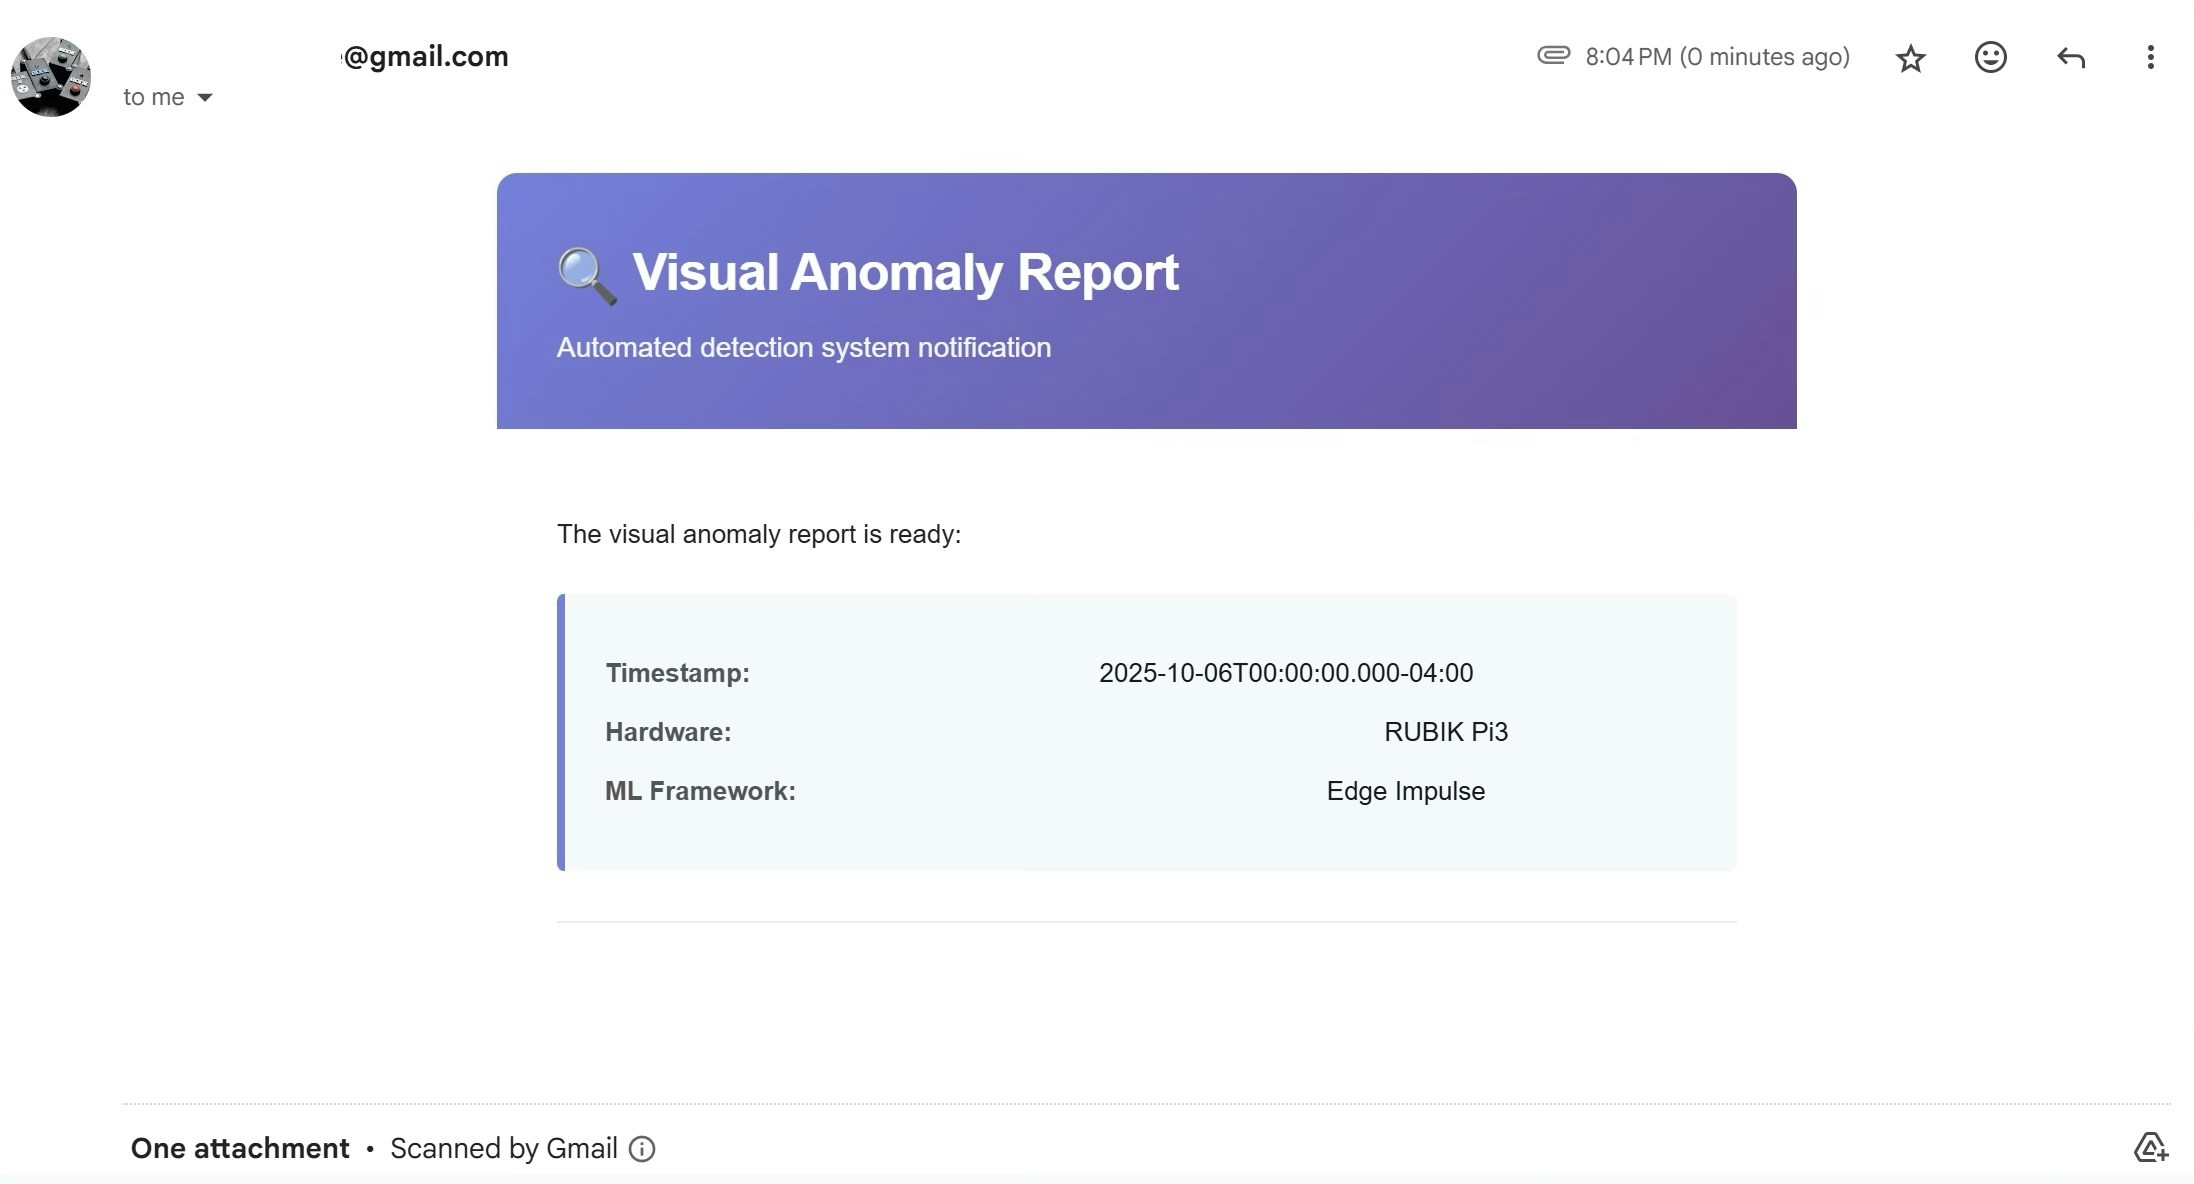
 Place objects in front of the camera. Whenever an anomaly score surpasses the threshold, a new record is added to the n8n table.You can click ‘Generate Graph’ at any time to have the anomaly chart sent to your email address.
 ## Conclusion
This project demonstrates how simple it is to use the Rubik Pi 3 with Edge Impulse anomaly detection models, combined with automation generated by n8n for easy workflow creation. With out-of-the box Ubuntu support, the Edge Impulse Linux Runner can be installed, model creation is handled in the Studio like other Edge Impulse projects, and then anomaly detection reporting is handled by n8n through their user-friendly interface.
## Conclusion
This project demonstrates how simple it is to use the Rubik Pi 3 with Edge Impulse anomaly detection models, combined with automation generated by n8n for easy workflow creation. With out-of-the box Ubuntu support, the Edge Impulse Linux Runner can be installed, model creation is handled in the Studio like other Edge Impulse projects, and then anomaly detection reporting is handled by n8n through their user-friendly interface.
 ## Files and Links
[https://github.com/ronibandini/rubikpi3-anomaly-detection](https://github.com/ronibandini/rubikpi3-anomaly-detection)
[https://studio.edgeimpulse.com/studio/374008/devices](https://studio.edgeimpulse.com/studio/374008/devices)
## Files and Links
[https://github.com/ronibandini/rubikpi3-anomaly-detection](https://github.com/ronibandini/rubikpi3-anomaly-detection)
[https://studio.edgeimpulse.com/studio/374008/devices](https://studio.edgeimpulse.com/studio/374008/devices)