> ## Documentation Index
> Fetch the complete documentation index at: https://docs.edgeimpulse.com/llms.txt
> Use this file to discover all available pages before exploring further.
# Seeed SenseCAP A1101
> Update SenseCAP A1101 firmware, connect the camera to Edge Impulse, and deploy vision models.
[Seeed SenseCAP A1101](https://www.seeedstudio.com/SenseCAP-A1101-LoRaWAN-Vision-AI-Sensor-p-5367.html) - LoraWAN Vision AI Sensor is an image recognition AI sensor designed for developers. SenseCAP A1101 - LoRaWAN Vision AI Sensor combines TinyML AI technology and LoRaWAN long-range transmission to enable a low-power, high-performance AI device solution for both indoor and outdoor use.
This sensor features Himax high-performance, low-power AI vision solution which supports the Google LiteRT (previously Tensorflow Lite) framework and multiple TinyML AI platforms.
 It is fully supported by Edge Impulse which means you will be able to sample raw data from the camera, build models, and deploy trained machine learning models to the module directly from the studio without any programming required. SenseCAP - Vision AI Module is available for purchase directly from [Seeed Studio Bazaar](https://www.seeedstudio.com/SenseCAP-A1101-LoRaWAN-Vision-AI-Sensor-p-5367.html).
### Installing dependencies
To set A1101 up in Edge Impulse, you will need to install the following software:
1. [Edge Impulse CLI](/tools/clis/edge-impulse-cli/installation).
2. On Linux:
* GNU Screen: install for example via sudo apt install screen.
3. Download the latest [Bouffalo Lab Dev Cube-All-Platform](https://dev.bouffalolab.com/download)
**Problems installing the Edge Impulse CLI?**
See the [Installation and troubleshooting](/tools/clis/edge-impulse-cli/installation) guide.
### Connecting to Edge Impulse
With all the software in place, it's time to connect the A1101 to Edge Impulse.
#### 1. Update BL702 chip firmware
BL702 is the USB-UART chip which enables the communication between the PC and the Himax chip. You need to update this firmware in order for the Edge Impulse firmware to work properly.
1. [Get the latest bootloader firmware](https://github.com/Seeed-Studio/Seeed_Arduino_GroveAI/releases) (**tinyuf2-sensecap\_vision\_ai\_X.X.X.bin.**)
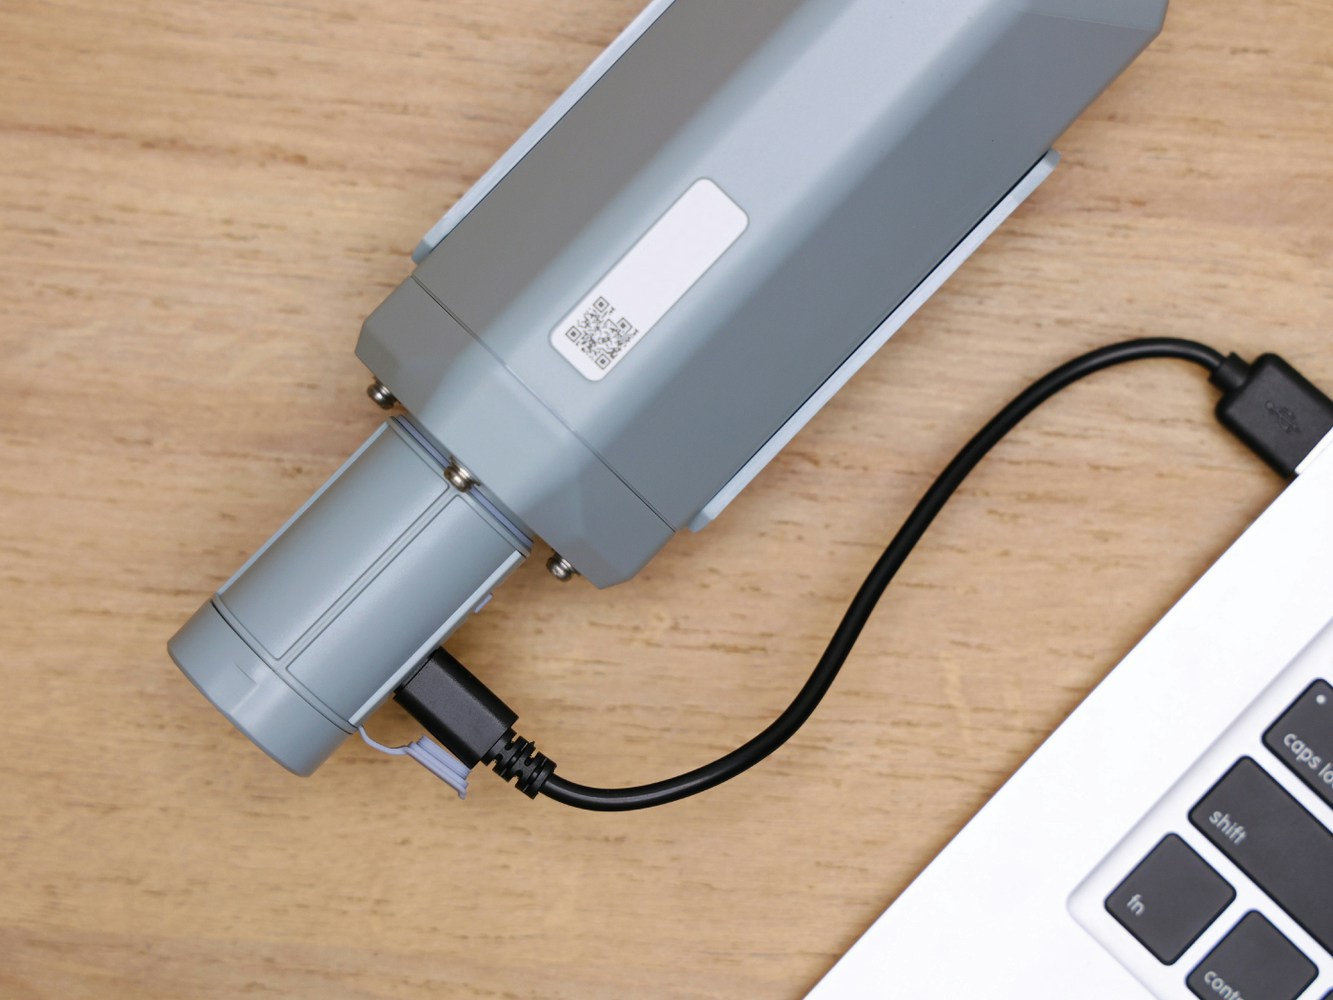
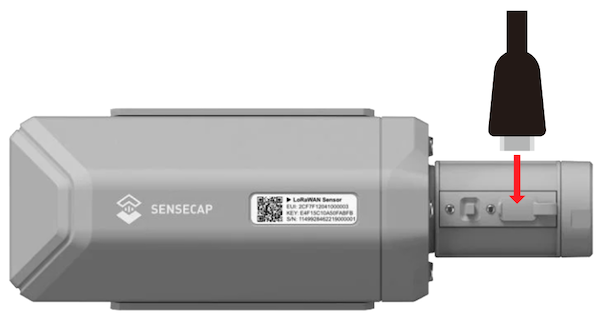
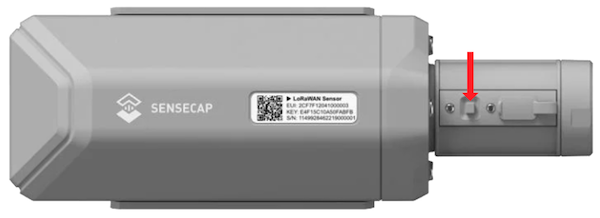
2. Connect the A1101 to the PC via a USB Type-C cable while holding down the **Boot** button on the A1101.
It is fully supported by Edge Impulse which means you will be able to sample raw data from the camera, build models, and deploy trained machine learning models to the module directly from the studio without any programming required. SenseCAP - Vision AI Module is available for purchase directly from [Seeed Studio Bazaar](https://www.seeedstudio.com/SenseCAP-A1101-LoRaWAN-Vision-AI-Sensor-p-5367.html).
### Installing dependencies
To set A1101 up in Edge Impulse, you will need to install the following software:
1. [Edge Impulse CLI](/tools/clis/edge-impulse-cli/installation).
2. On Linux:
* GNU Screen: install for example via sudo apt install screen.
3. Download the latest [Bouffalo Lab Dev Cube-All-Platform](https://dev.bouffalolab.com/download)
**Problems installing the Edge Impulse CLI?**
See the [Installation and troubleshooting](/tools/clis/edge-impulse-cli/installation) guide.
### Connecting to Edge Impulse
With all the software in place, it's time to connect the A1101 to Edge Impulse.
#### 1. Update BL702 chip firmware
BL702 is the USB-UART chip which enables the communication between the PC and the Himax chip. You need to update this firmware in order for the Edge Impulse firmware to work properly.
1. [Get the latest bootloader firmware](https://github.com/Seeed-Studio/Seeed_Arduino_GroveAI/releases) (**tinyuf2-sensecap\_vision\_ai\_X.X.X.bin.**)
2. Connect the A1101 to the PC via a USB Type-C cable while holding down the **Boot** button on the A1101.
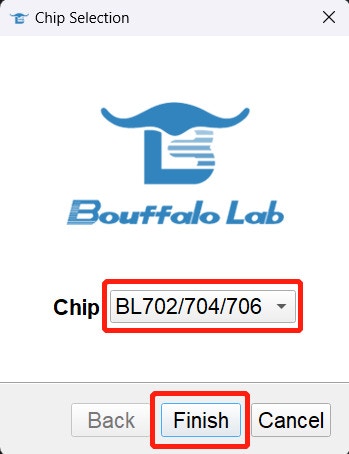
 3. Open previously installed Bouffalo Lab Dev Cube software, select **BL702/704/706**, and then click **Finish**
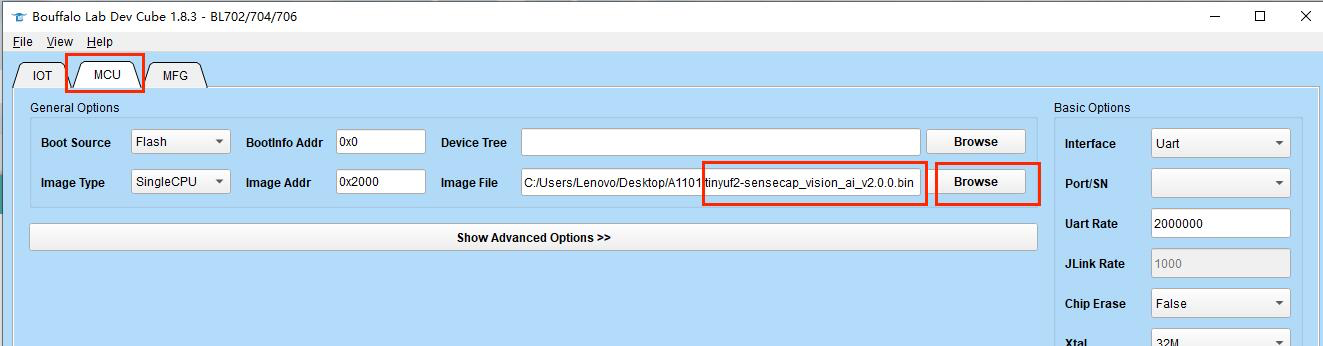
 4. Go to the **MCU** tab. Under **Image file**, click **Browse** and select the firmware you just downloaded.
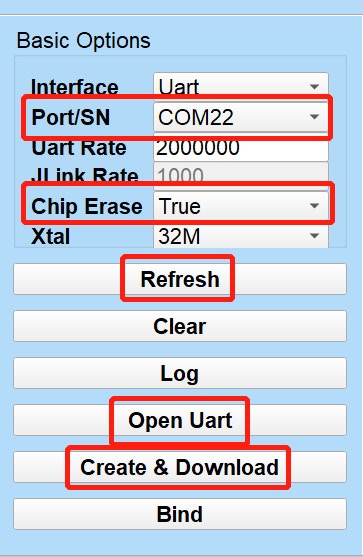
 5. Click **Refresh**, choose the **Port** related to the connected A1101, set **Chip Erase** to **True**, click **Open UART**, click **Create & Download** and wait for the process to be completed .
 You will see the output as **All Success** if it went well.
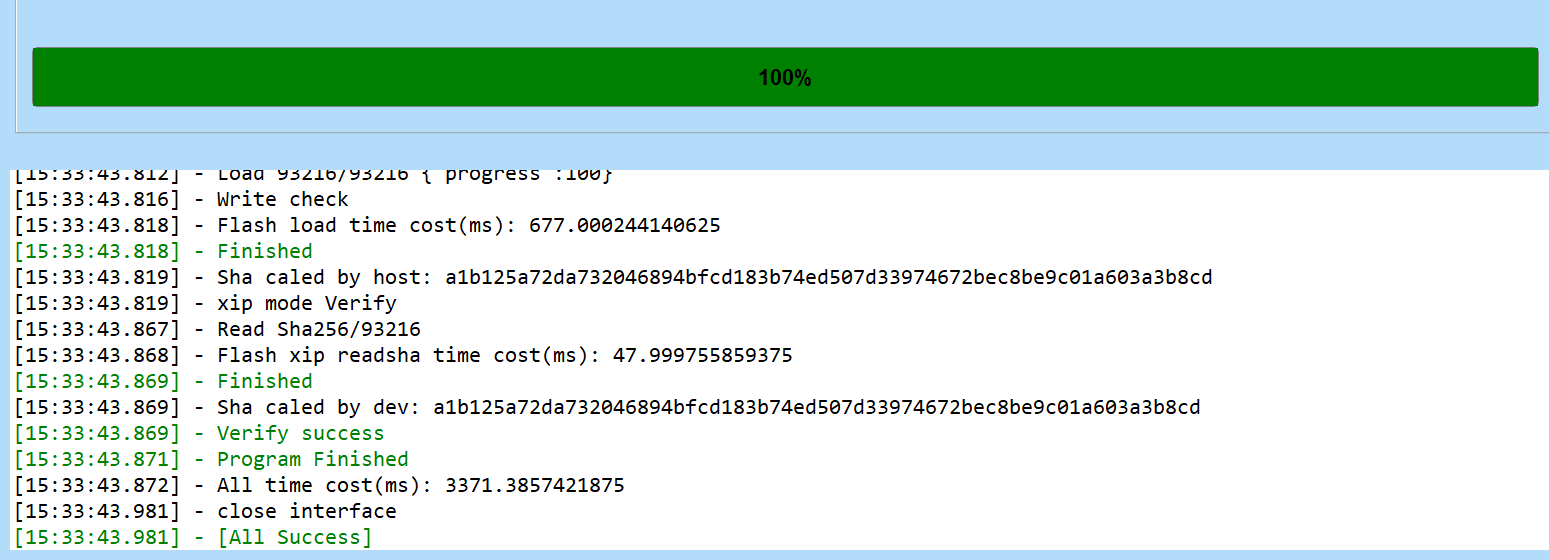 If the flashing throws an error, click **Create & Download** multiple times until you see the **All Success** message.
#### 2. Update Edge Impulse firmware
A1101 does not come with the right Edge Impulse firmware yet. To update the firmware:
1. Download the latest [Edge Impulse firmware](https://cdn.edgeimpulse.com/firmware/seeed-sensecap-a1101.zip) and extract it to obtain **firmware.uf2** file
2. Connect the A1101 again to the PC via USB Type-C cable and double-click the **Boot** button on the A1101 to enter **mass storage mode**
3. After this you will see a new storage drive shown on your file explorer as **SENSECAP**. Drag and drop the **firmware.uf2** file to **SENSECAP** drive
If the flashing throws an error, click **Create & Download** multiple times until you see the **All Success** message.
#### 2. Update Edge Impulse firmware
A1101 does not come with the right Edge Impulse firmware yet. To update the firmware:
1. Download the latest [Edge Impulse firmware](https://cdn.edgeimpulse.com/firmware/seeed-sensecap-a1101.zip) and extract it to obtain **firmware.uf2** file
2. Connect the A1101 again to the PC via USB Type-C cable and double-click the **Boot** button on the A1101 to enter **mass storage mode**
3. After this you will see a new storage drive shown on your file explorer as **SENSECAP**. Drag and drop the **firmware.uf2** file to **SENSECAP** drive
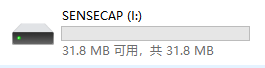 Once the copying is finished **SENSECAP** drive will disappear. This is how we can check whether the copying is successful or not.
#### 3. Setting keys
From a command prompt or terminal, run:
```
edge-impulse-daemon
```
This will start a wizard which will ask you to log in, and choose an Edge Impulse project. If you want to switch projects run the command with `--clean`.
Alternatively, recent versions of Google Chrome and Microsoft Edge can collect data directly from your A1101, without the need for the Edge Impulse CLI. See [this blog post](https://edgeimpulse.com/blog/collect-sensor-data-straight-from-your-web-browser) for more information.
#### 4. Verifying that the device is connected
That's all! Your device is now connected to Edge Impulse. To verify this, go to [your Edge Impulse project](https://studio.edgeimpulse.com/studio/profile/projects), and click **Devices**. The device will be listed here.
Once the copying is finished **SENSECAP** drive will disappear. This is how we can check whether the copying is successful or not.
#### 3. Setting keys
From a command prompt or terminal, run:
```
edge-impulse-daemon
```
This will start a wizard which will ask you to log in, and choose an Edge Impulse project. If you want to switch projects run the command with `--clean`.
Alternatively, recent versions of Google Chrome and Microsoft Edge can collect data directly from your A1101, without the need for the Edge Impulse CLI. See [this blog post](https://edgeimpulse.com/blog/collect-sensor-data-straight-from-your-web-browser) for more information.
#### 4. Verifying that the device is connected
That's all! Your device is now connected to Edge Impulse. To verify this, go to [your Edge Impulse project](https://studio.edgeimpulse.com/studio/profile/projects), and click **Devices**. The device will be listed here.
 Device connected to Edge Impulse correctly!
### Next steps: building a machine learning model
With everything set up, you can now build and run your first machine learning model with these tutorials:
* [object detection](/tutorials/end-to-end/object-detection-bounding-boxes)..
* [Object detection with centroids (FOMO)](/tutorials/end-to-end/object-detection-centroids).
Looking to connect different sensors? The [Data forwarder](/tools/clis/edge-impulse-cli/data-forwarder) lets you easily send data from any sensor into Edge Impulse.
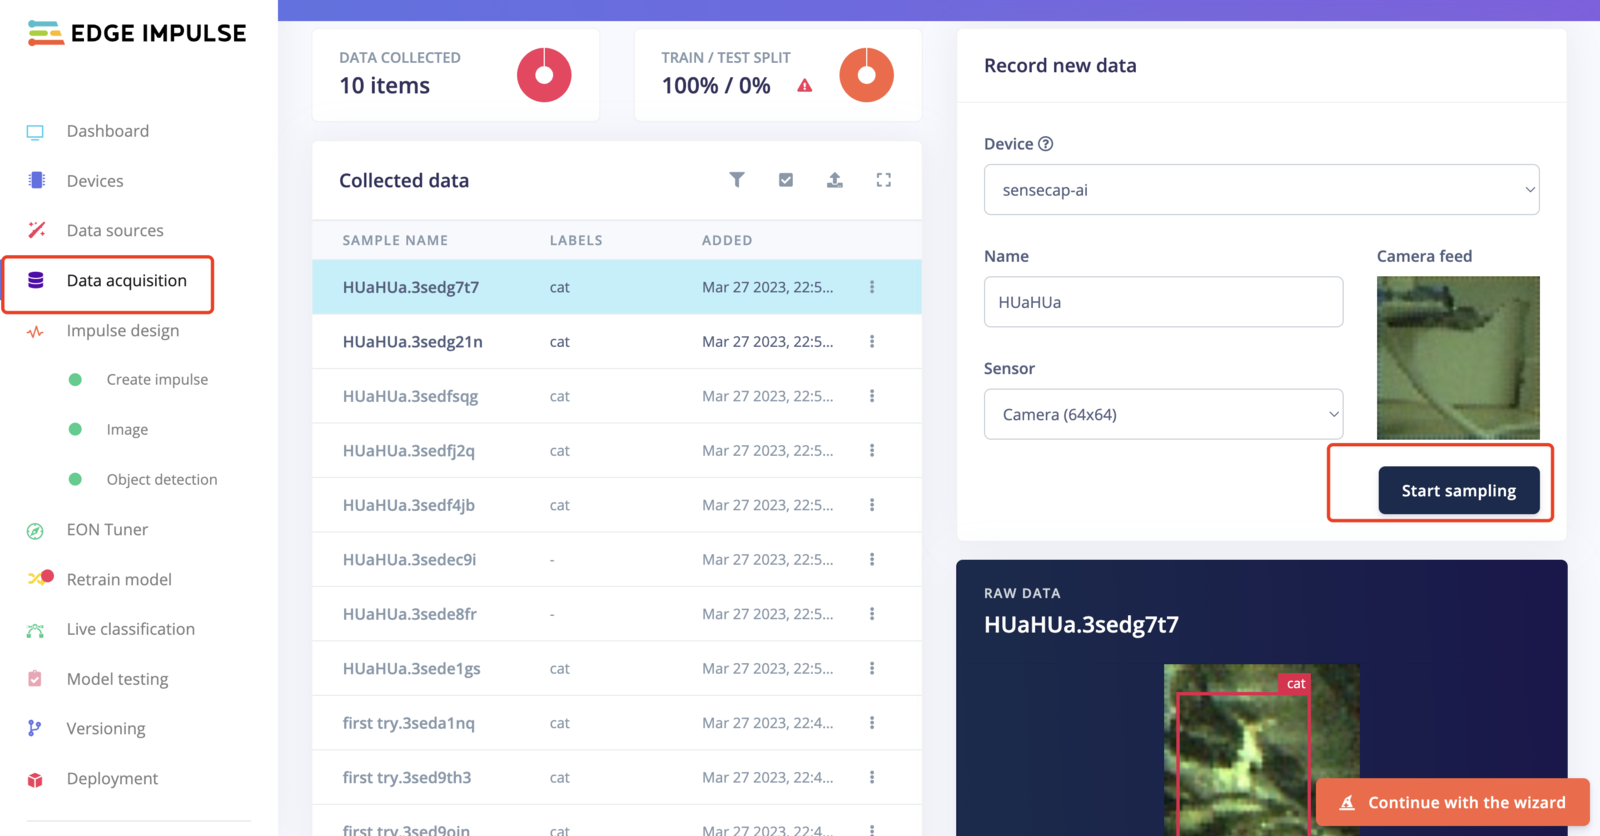
#### Collecting data from Seeed SenseCAP A1101
Frames from the onboard camera can be directly captured from the studio:
Device connected to Edge Impulse correctly!
### Next steps: building a machine learning model
With everything set up, you can now build and run your first machine learning model with these tutorials:
* [object detection](/tutorials/end-to-end/object-detection-bounding-boxes)..
* [Object detection with centroids (FOMO)](/tutorials/end-to-end/object-detection-centroids).
Looking to connect different sensors? The [Data forwarder](/tools/clis/edge-impulse-cli/data-forwarder) lets you easily send data from any sensor into Edge Impulse.
#### Collecting data from Seeed SenseCAP A1101
Frames from the onboard camera can be directly captured from the studio:
 Finally, once a model is trained, it can be easily deployed to the A1101 – Vision AI Module to start inferencing!
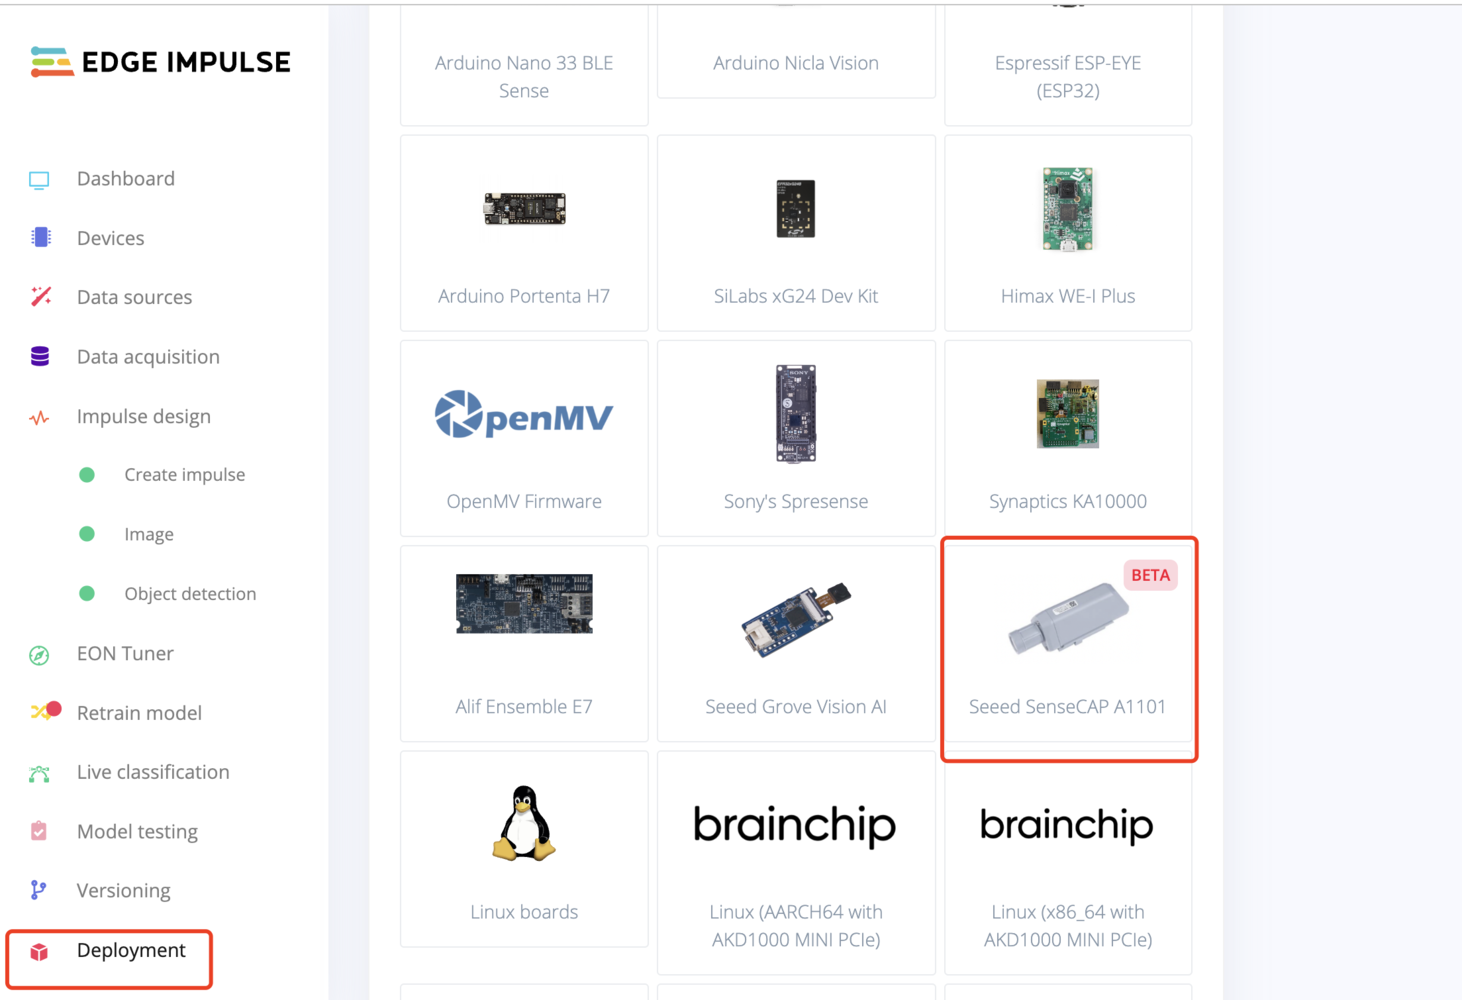 ### Deploying back to device
After building the machine learning model and downloading the Edge Impulse firmware from Edge Impulse Studio, deploy the model uf2 to SenseCAP - Vision AI by following **steps 1 and 2** under [Update Edge Impulse firmware](/hardware/devices/seeed-sensecap-a1101#2-update-edge-impulse-firmware).
Drag and drop the **firmware.uf2** file from EDGE IMPULSE to **SENSECAP** drive.
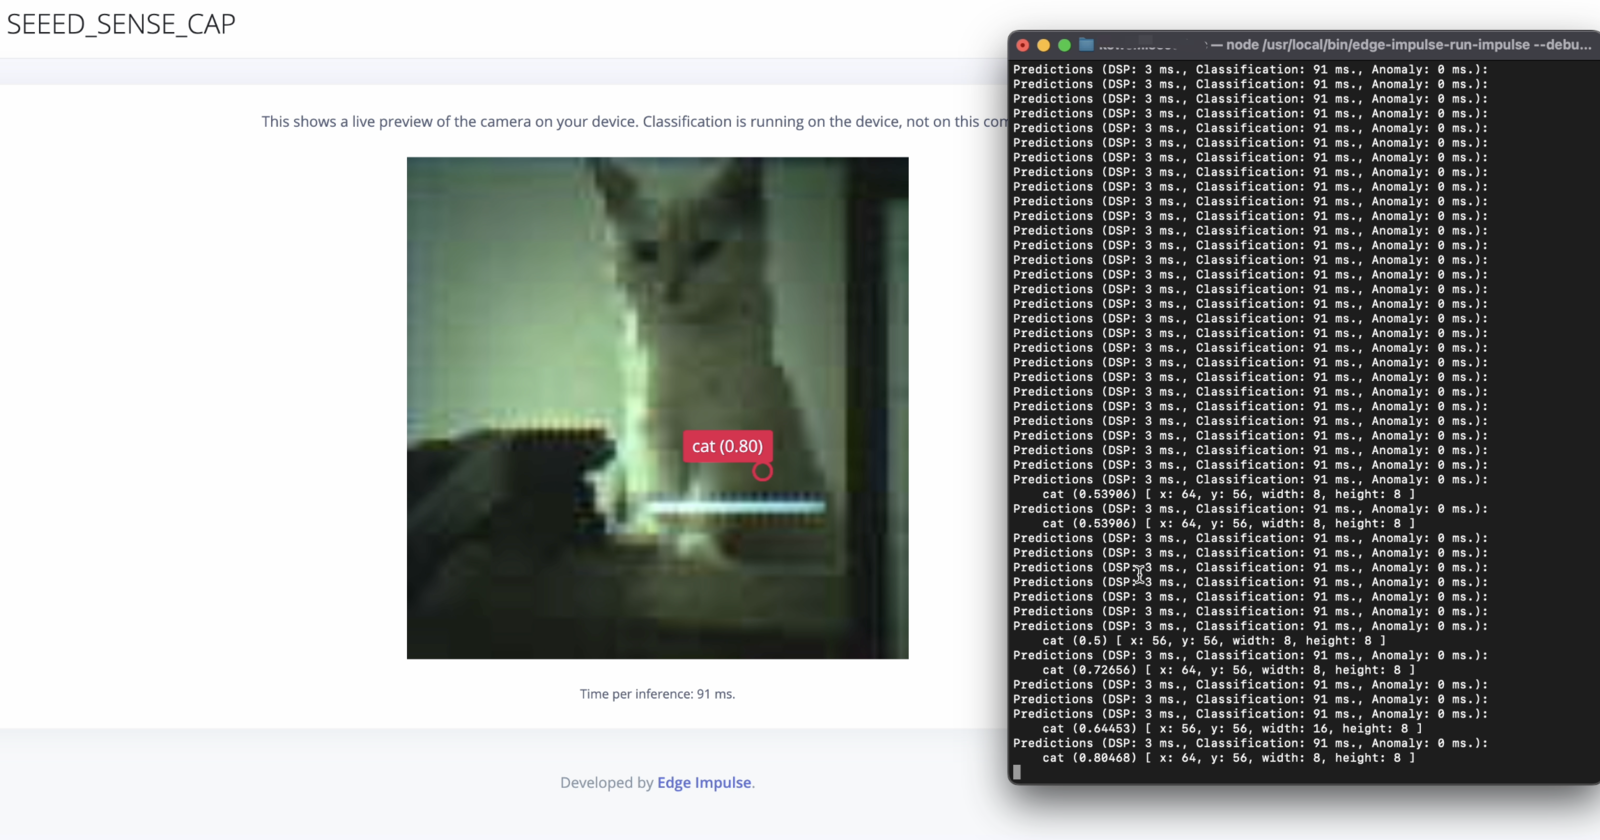
When you run this on your local interface:
```
edge-impulse-daemon --debug
```
it will ask you to click a URL, then you will see a live preview of the camera on your device.
### Deploying back to device
After building the machine learning model and downloading the Edge Impulse firmware from Edge Impulse Studio, deploy the model uf2 to SenseCAP - Vision AI by following **steps 1 and 2** under [Update Edge Impulse firmware](/hardware/devices/seeed-sensecap-a1101#2-update-edge-impulse-firmware).
Drag and drop the **firmware.uf2** file from EDGE IMPULSE to **SENSECAP** drive.
When you run this on your local interface:
```
edge-impulse-daemon --debug
```
it will ask you to click a URL, then you will see a live preview of the camera on your device.
 #### Compile Edge Impulse firmware from source
If you want to compile the Edge Impulse firmware from the source code, you can visit [this GitHub repo](https://github.com/edgeimpulse/firmware-seeed-grove-vision-ai) and follow the instructions included in the README.
The model used for the official firmware can be found in this [public project](https://studio.edgeimpulse.com/public/87291/latest).
### Connect to the LoraWAN® Network
In addition to connecting directly to a computer to view real-time detection data, you can also transmit these data through LoraWAN® and finally upload them to the [SenseCAP cloud platform](https://sensecap.seeed.cc/) or a third-party cloud platform. On the SenseCAP cloud platform, you can view the data in a cycle and display it graphically through your mobile phone or computer. The SenseCAP cloud platform and SenseCAP Mate App use the same account system.
Since our focus here is on describing the model training process, we won't go into the details of the cloud platform data display. But if you're interested, you can always visit the SenseCAP cloud platform to try adding devices and viewing data. It's a great way to get a better understanding of the platform's capabilities!
#### Compile Edge Impulse firmware from source
If you want to compile the Edge Impulse firmware from the source code, you can visit [this GitHub repo](https://github.com/edgeimpulse/firmware-seeed-grove-vision-ai) and follow the instructions included in the README.
The model used for the official firmware can be found in this [public project](https://studio.edgeimpulse.com/public/87291/latest).
### Connect to the LoraWAN® Network
In addition to connecting directly to a computer to view real-time detection data, you can also transmit these data through LoraWAN® and finally upload them to the [SenseCAP cloud platform](https://sensecap.seeed.cc/) or a third-party cloud platform. On the SenseCAP cloud platform, you can view the data in a cycle and display it graphically through your mobile phone or computer. The SenseCAP cloud platform and SenseCAP Mate App use the same account system.
Since our focus here is on describing the model training process, we won't go into the details of the cloud platform data display. But if you're interested, you can always visit the SenseCAP cloud platform to try adding devices and viewing data. It's a great way to get a better understanding of the platform's capabilities!
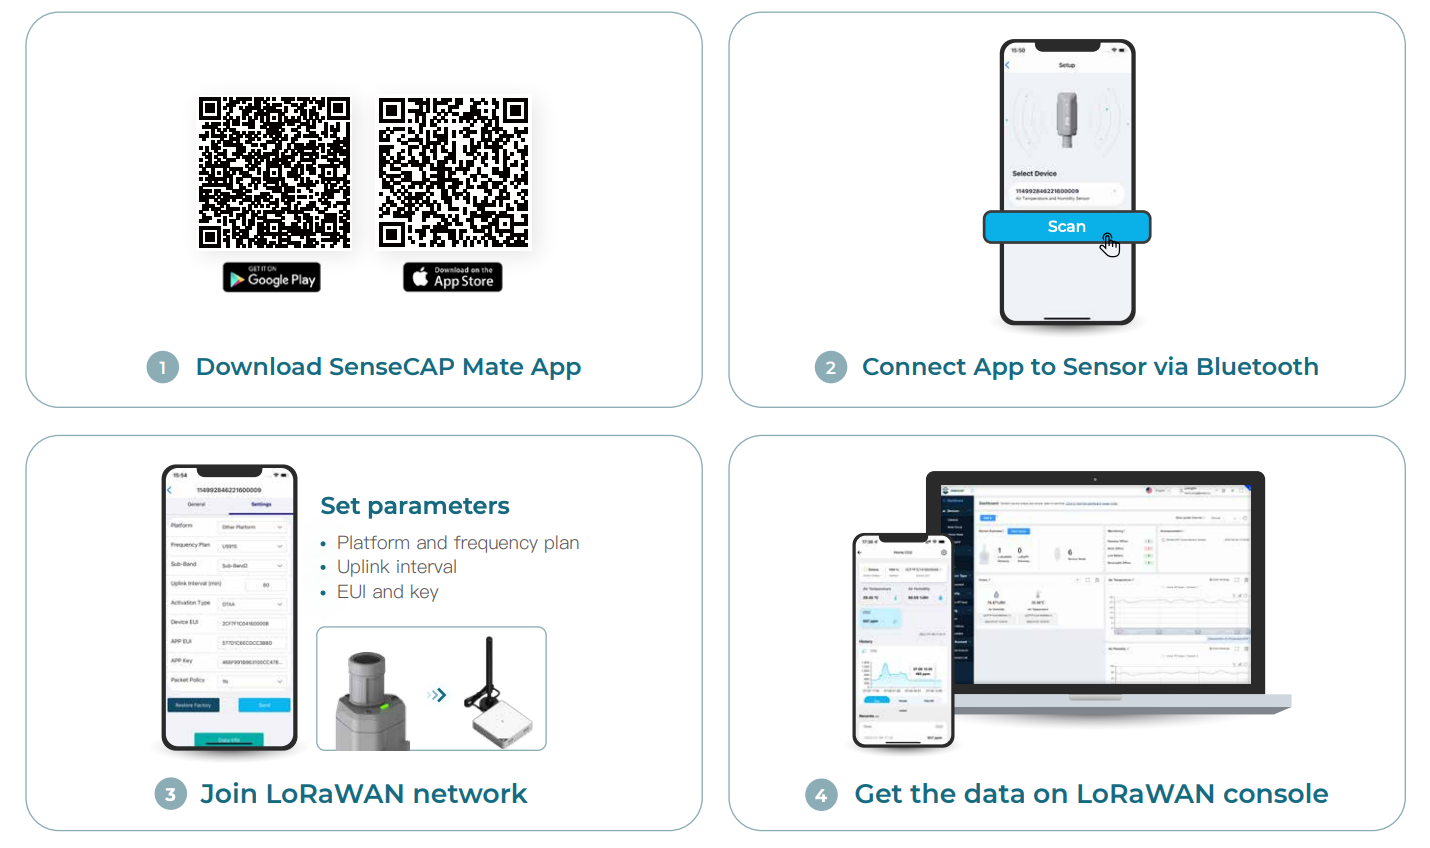 You can get more information on [how to use SenseCAP A1101 here](https://wiki.seeedstudio.com/Train-Deploy-AI-Model-A1101).
#### How to Select a LoRaWAN Gateway
LoRaWAN® network coverage is required when using sensors, there are two options.
You can get more information on [how to use SenseCAP A1101 here](https://wiki.seeedstudio.com/Train-Deploy-AI-Model-A1101).
#### How to Select a LoRaWAN Gateway
LoRaWAN® network coverage is required when using sensors, there are two options.
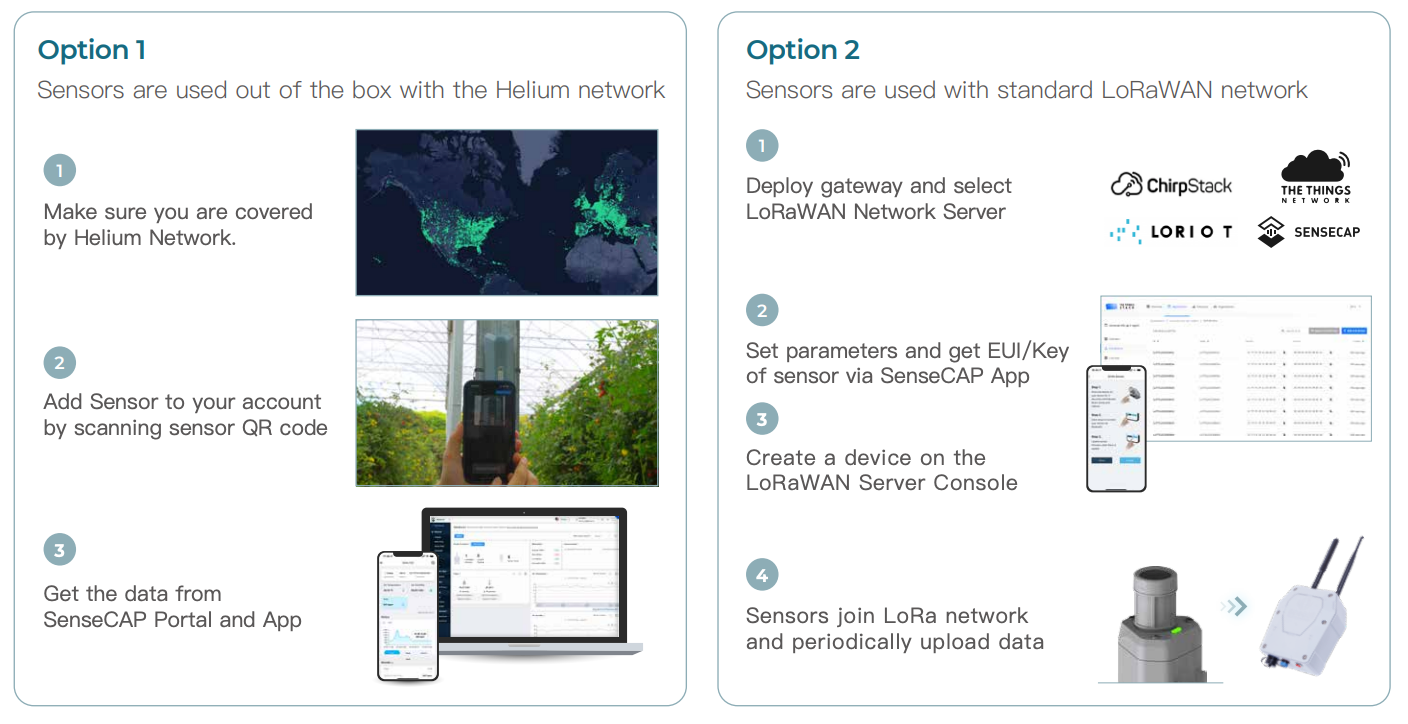 Seeed provides:
* [SenseCAP M2](https://www.seeedstudio.com/SenseCAP-M2-Light-Hotspot-and-Software-License.html) for Helium network
* [SenseCAP M2 Multi-Platform](https://www.seeedstudio.com/SenseCAP-M2-Light-Hotspot-and-Software-License.html) for standard LoraWAN® network
### Configure your model on the SenseCraft App
1. Download [SenseCraft App](https://wiki.seeedstudio.com/sensecraft-app/overview/) (formerly SenseCAP Mate App)
* [Android](https://play.google.com/store/apps/details?id=cc.seeed.sensecapmate)
* [iOS](https://apps.apple.com/us/app/sensecraft/id1619944834)
2. Open SenseCraft and login
Seeed provides:
* [SenseCAP M2](https://www.seeedstudio.com/SenseCAP-M2-Light-Hotspot-and-Software-License.html) for Helium network
* [SenseCAP M2 Multi-Platform](https://www.seeedstudio.com/SenseCAP-M2-Light-Hotspot-and-Software-License.html) for standard LoraWAN® network
### Configure your model on the SenseCraft App
1. Download [SenseCraft App](https://wiki.seeedstudio.com/sensecraft-app/overview/) (formerly SenseCAP Mate App)
* [Android](https://play.google.com/store/apps/details?id=cc.seeed.sensecapmate)
* [iOS](https://apps.apple.com/us/app/sensecraft/id1619944834)
2. Open SenseCraft and login
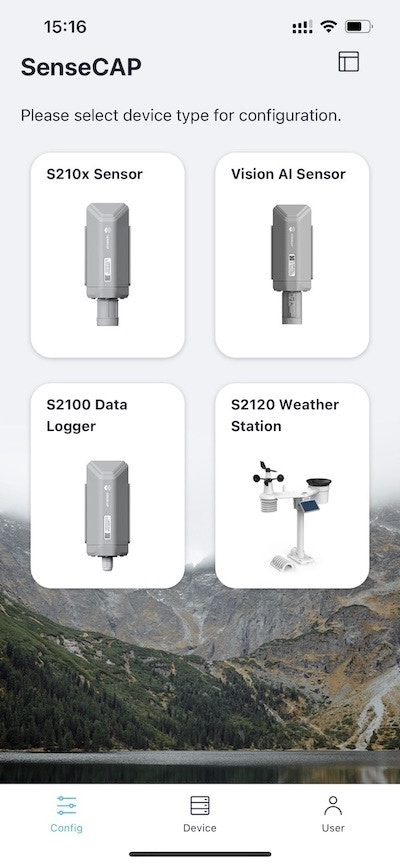
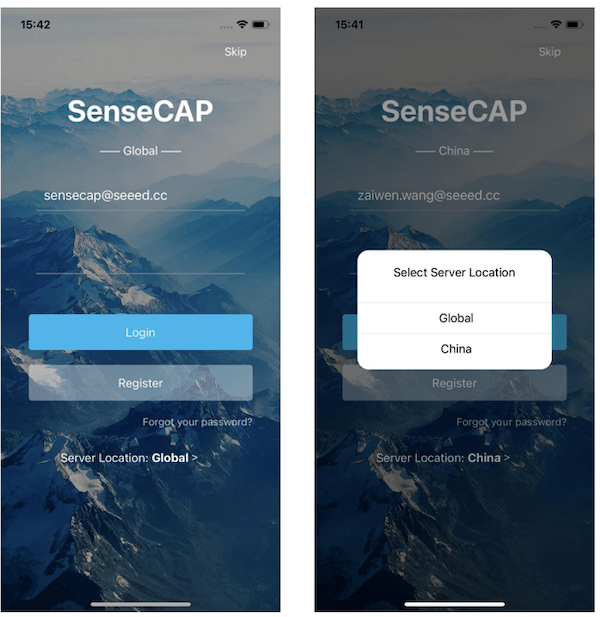 3. Under **Config** screen, select **Vision AI Sensor**
 4. Press and hold the configuration button on the SenseCap A1101 for 3 seconds to enter bluetooth pairing mode
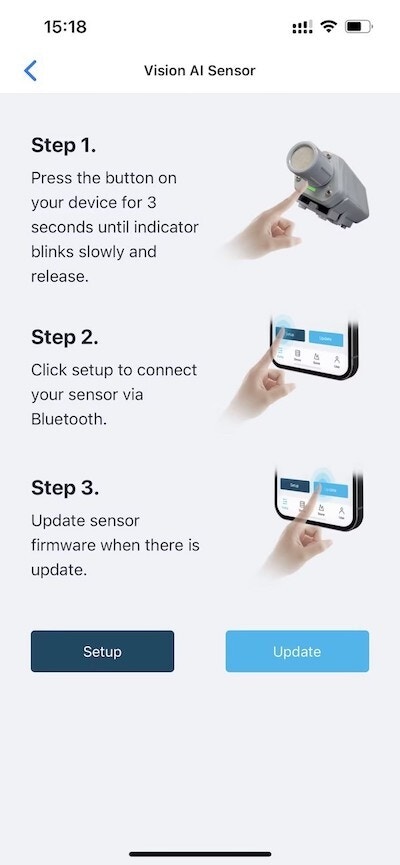
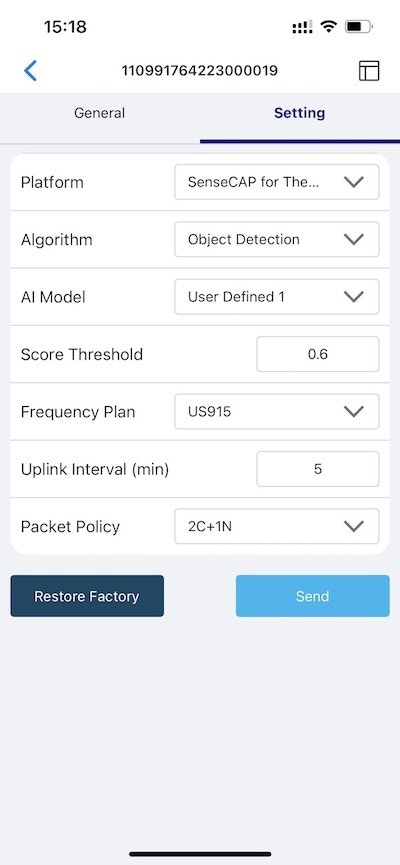
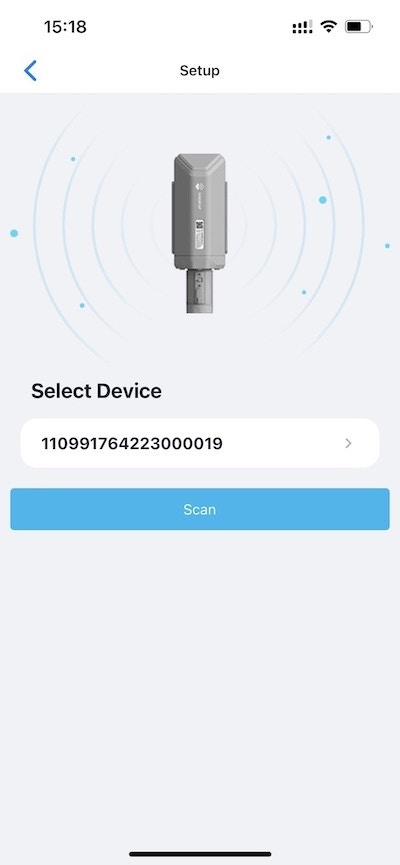 5. Click **Setup** and it will start scanning for nearby SenseCAP A1101 devices- Go to **Settings** and make sure **Object Detection** and **User Defined 1** is selected. If not, select it and click **Send**
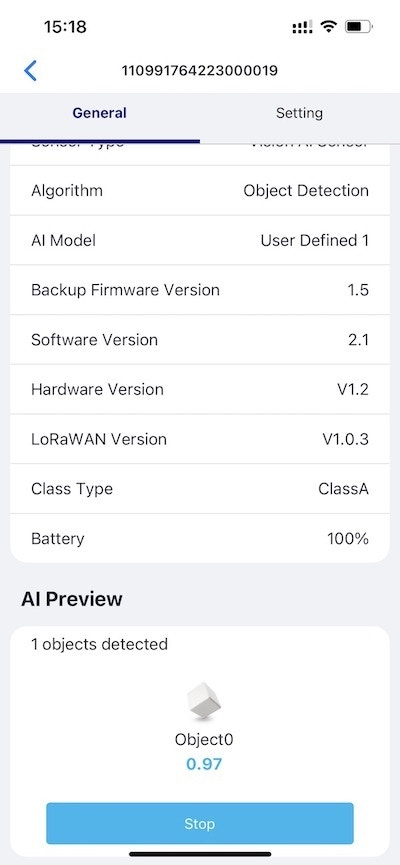
 6. Go to **General** and click **Detect**, you'll see the actual data here.
 7. [Click here](https://files.seeedstudio.com/grove_ai_vision/index.html) to open a preview window of the camera stream
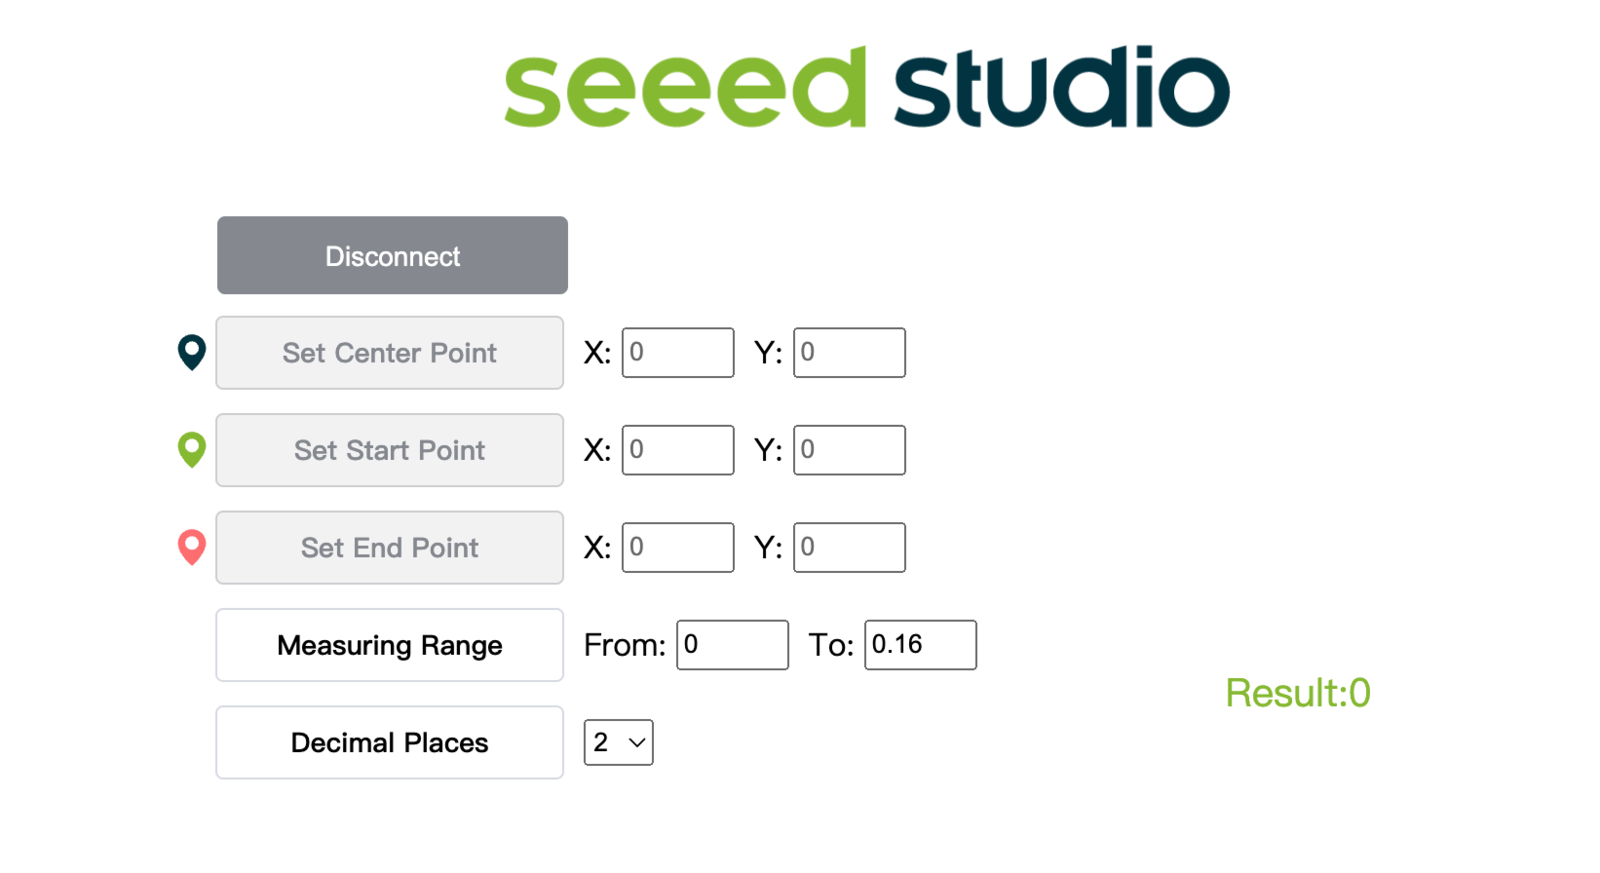 8. Click **Connect** button. Then you will see a pop up on the browser. Select **SenseCAP Vision AI - Paired** and click **Connect**
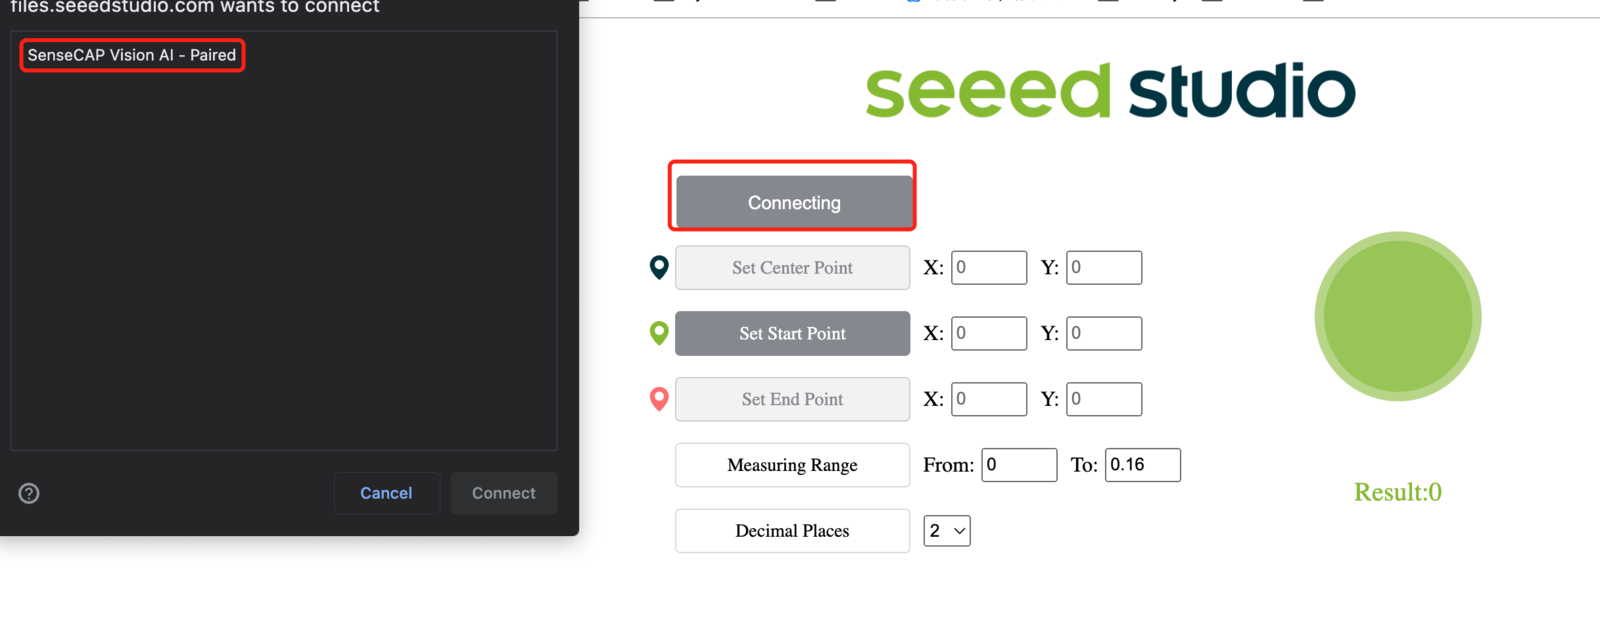 9. View real-time inference results using the preview window!
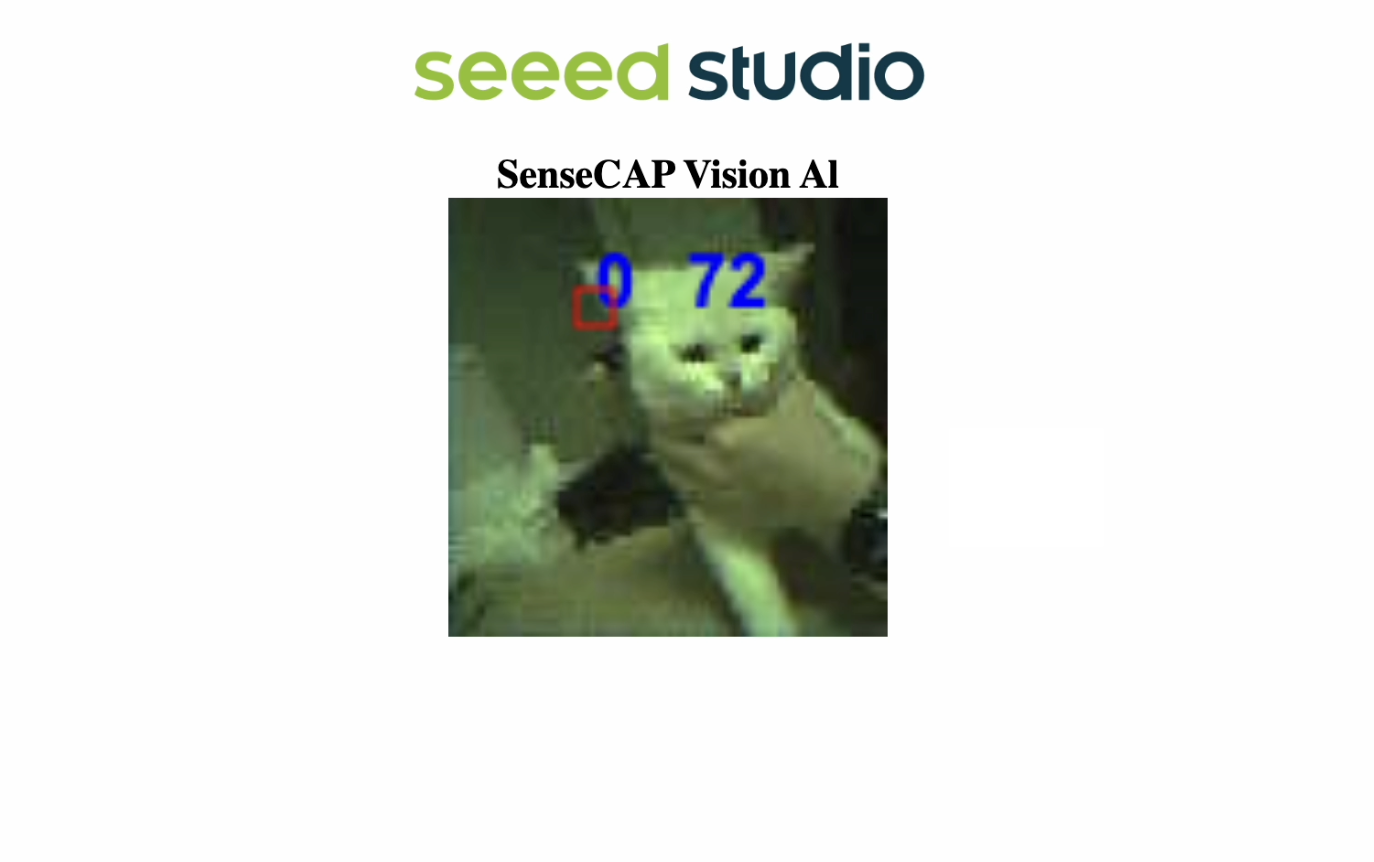 The cats are detected with bounding boxes around them. Here "0" corresponds to each detection of the same class. If you have multiple classes, they will be named as `0, 1, 2, 3, 4` and so on. Also the confidence score for each detected object (0.72 in above demo) is displayed!